Easy Stitches Pillow Pattern
/This post may contain affiliate links, meaning that if you click through and make a purchase, I earn a small commission at no extra cost to you. This helps support my business and makes it possible for me to bring you free content.
Breathe in… breathe out… Hello friends! I don’t know who else needs a few moments to just breathe, but I sure have been feeling the need to ground myself lately. This is a particularly stressful time in my life, and while crocheting brings me so much joy, the pressures (often self-inflicted) of designing patterns or keeping up with pattern testing and social media engagement can sap my cro-jo.
Recently I just picked up my hook and some pretty yarn and I started stitching. Before long, the stitches told me what they should be, and the Easy Stitches Pillow pattern was born.

This pattern is so simple, and it allows you to get into a nice, meditative rhythm while you stitch. It’s a good one for taking on the go, since it’s not too big to stash in a cute project bag. It’s also great for getting in a just few rows here and there, if you don’t have a big chunk of free time to devote to crocheting.
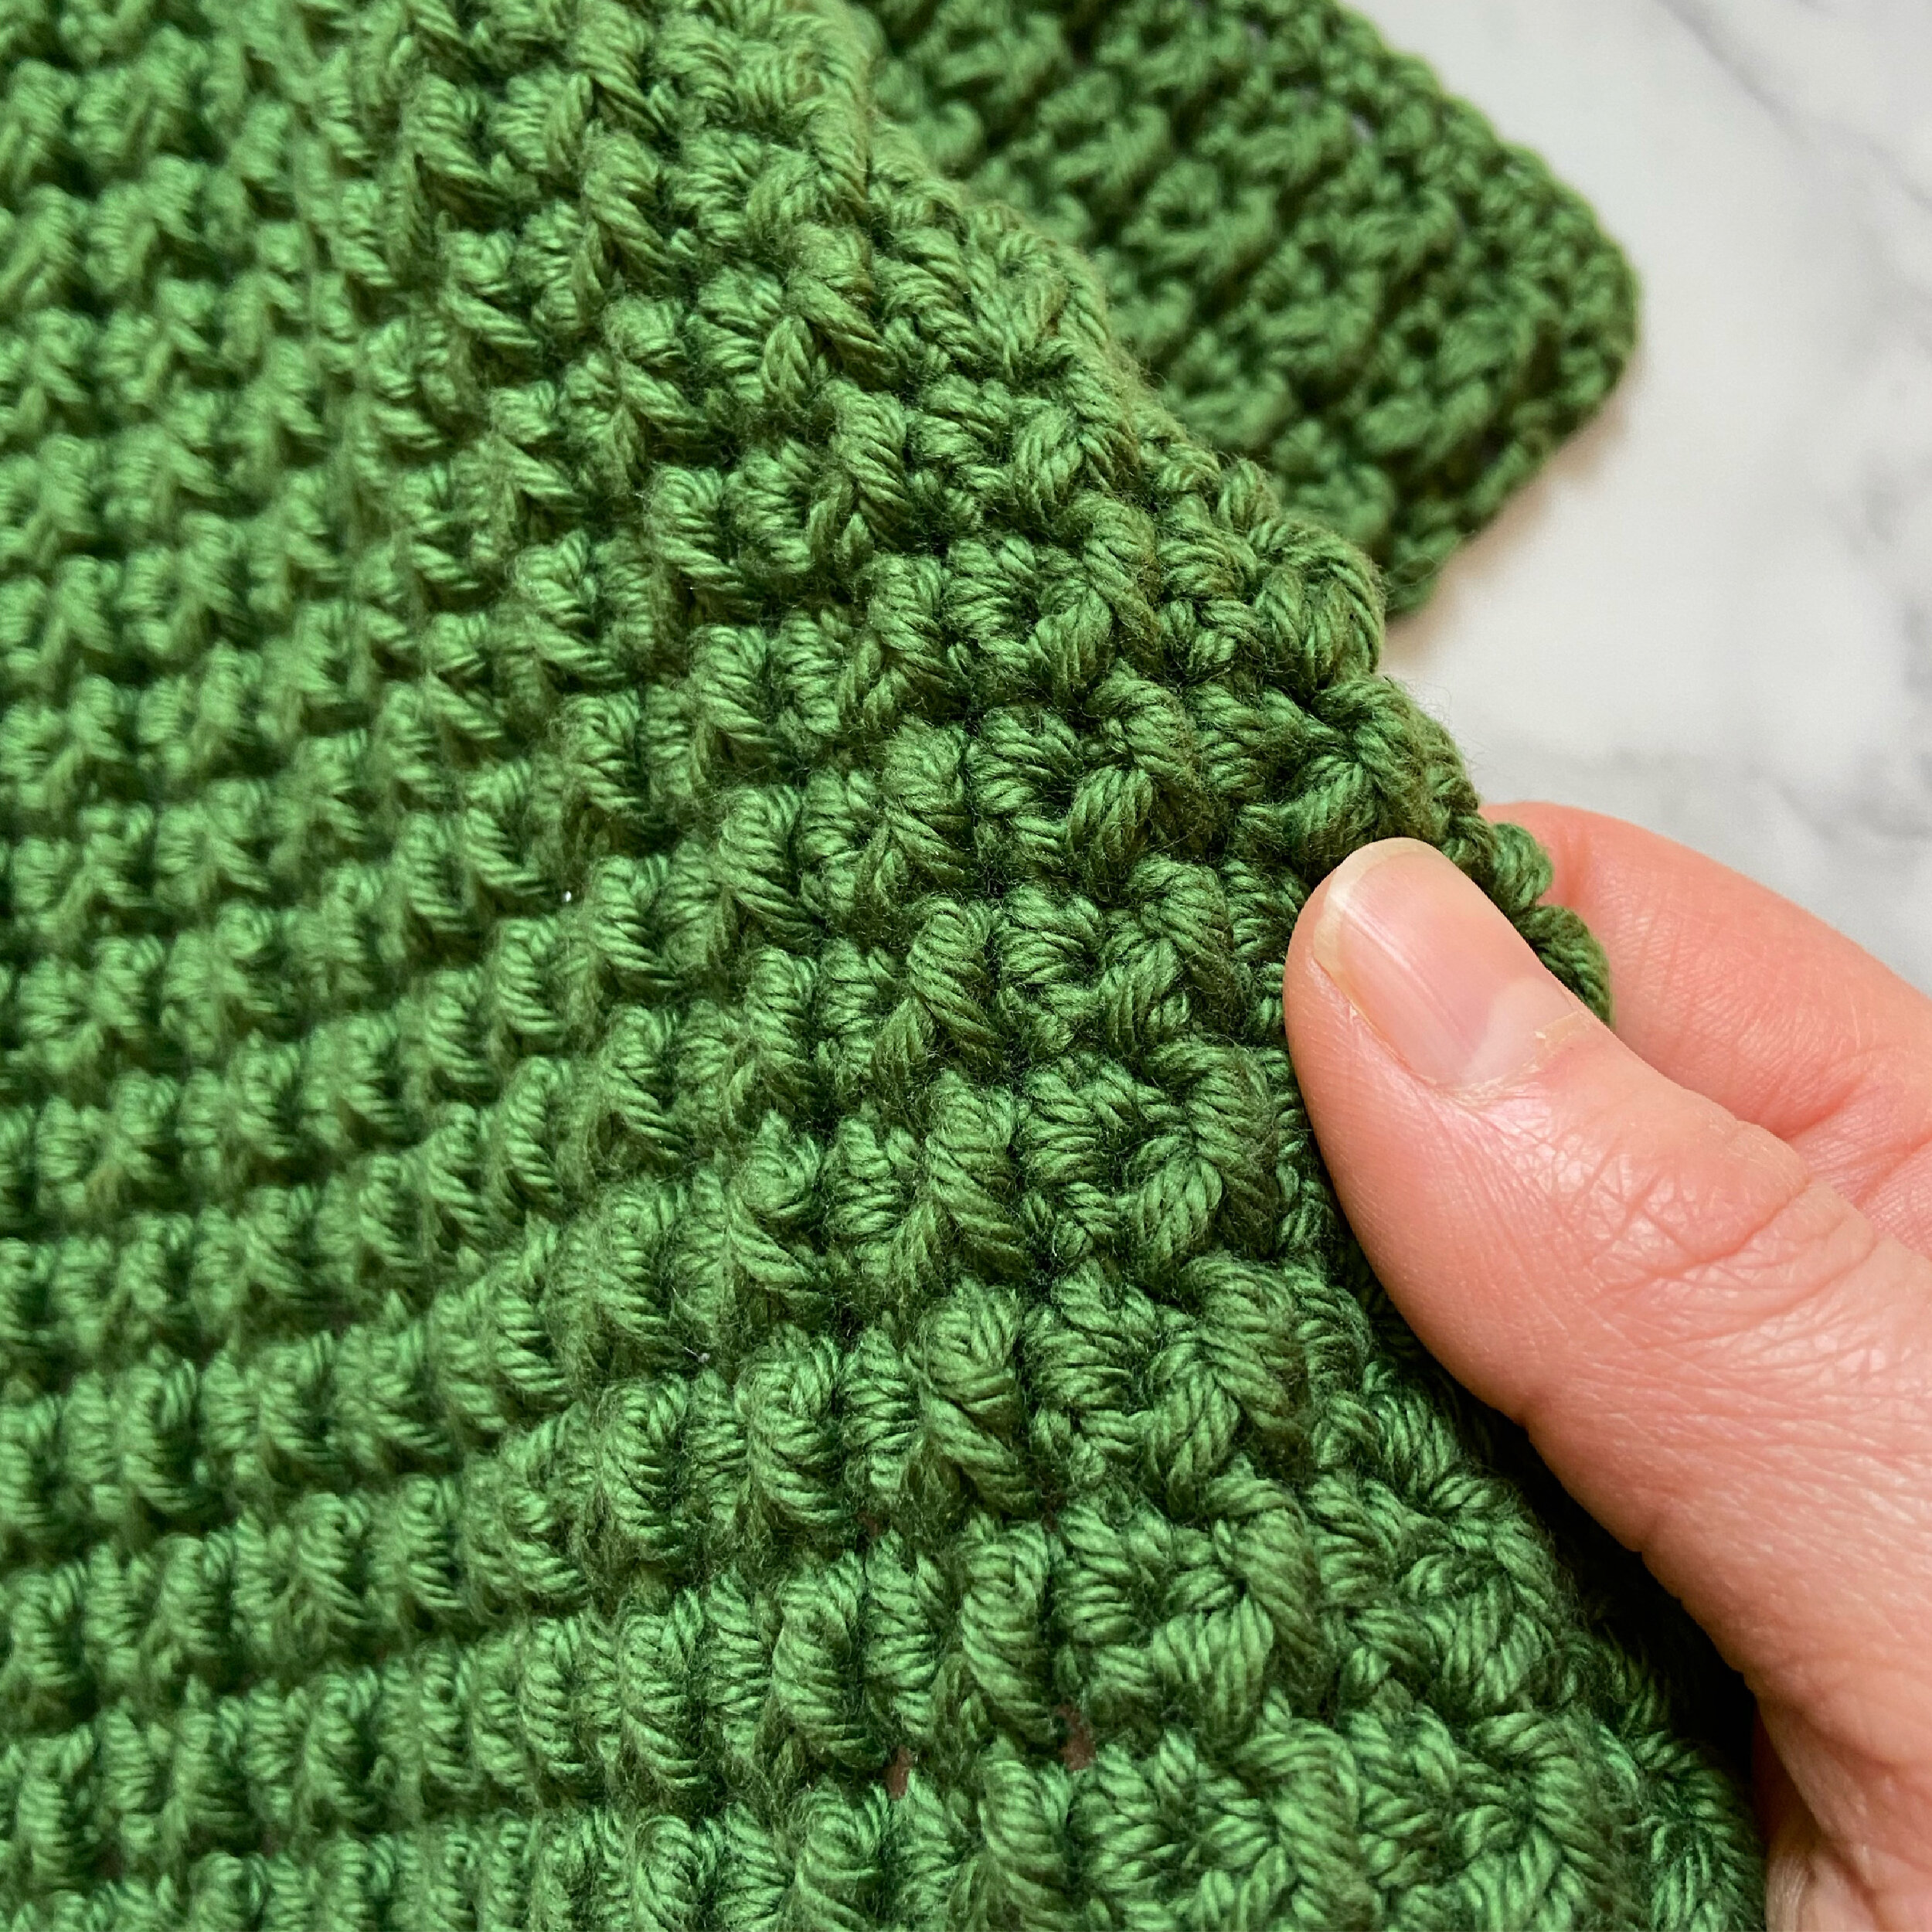
For this pattern, I’ve used a really cool yarn from one of my favourite companies, Lion Brand Yarn. It’s called Twisted Cotton Blend, and it’s a Bulky (5) weight blend of 69% cotton/31% acrylic. At first I thought it was going to be splitty, but I was pleasantly surprised - it is sturdy and really easy to work with. The unique texture makes it great for patterns like this that use simple stitches. The two-tone look really gives this pillow design depth, making it a perfect addition to both cozy reading corners and upscale sitting room decor.

Materials
Hook - US L/8mm Tunisian Crochet hook with 16”/40.5cm cord attached (or size needed to meet gauge). I use these ones from WeCrochet!
Yarn - approx. 600 yds/ 549m of Lion Brand Twisted Cotton Blend (I used the colour Ecru/Tan) or another Bulky (5) weight yarn of your choice.
Notions - 16”/40.5cm square pillow form, 4 buttons of any size (1”/2.5cm is recommended), locking stitch markers (2-4), scissors, tape measure, yarn needle.
Notes
The first loop on your hook to start each row counts as a stitch.
If you wish to block your work to settle the stitches, I recommend a gentle steam blocking prior to assembly.
Sizing
Gauge: 12 sts x 15 rows = 4”/10cm in tks.
Measurement before assembly: approx. 40”/ 101.5cm long x 17.5”/44.5cm wide.
The finished pillow cover will fit snugly on a 16”/40.5cm square pillow form.
Terminology/Abbreviations
This pattern uses standard US terms as detailed by the Craft Yarn Council:
ch: chain
lts: last Tunisian stitch – the very last stitch of the row; insert your hook under both loops of the edge stitch
RetP: return pass – Ch 1, *yarn over and pull through 2 loops. Repeat from * until 1 loop remains on your hook
sc: single crochet
sl st: slip stitch
st(s): stitch(es)
tks: Tunisian Knit stitch – insert your hook into the middle of the stitch. Check out this excellent tutorial video!
Pattern Instructions
Row 1. Ch 53. Starting in the second ch from hook, pull up a loop in the back bumps of each ch st (53 loops on hook). Work a RetP.
Row 2. Tks in each st across until the last st, lts and work a RetP.
Repeat Row 2 until your work measures approximately 40”/101.5cm long.
You will now work a bind off row, which includes small loops that will secure the buttons. You may wish to switch to a slightly smaller hook for this last row.
Bind off row: Ch 1, insert hook into next st as for tks and work a sc. Sc in next 8 sts, then work a buttonhole as follows: ch 4, join with a sl st to the last sc worked. *Sc next 11, work a buttonhole. Repeat from * twice more, then sc in last 10 sts (including the edge st, remember to insert your hook under both loops). Fasten off and proceed to Assembly instructions.
Note: make sure your buttonhole size matches the button you are using. I used a 1”/2.5cm button and cotton yarn (which does not stretch much). If you’re using yarn that has more stretch, you might want to only ch 3, or if you’re using a bigger button, work more chs as needed.
Assembly: Refer to the photos below when following along with the assembly instructions.
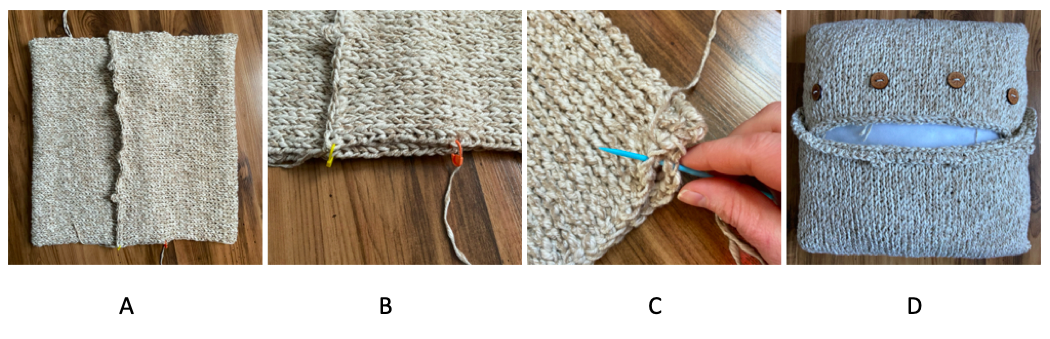
Lay your work flat out, right side facing down. Fold the starting edge in, then fold the buttonhole edge over the starting edge to form a square that is approximately 17”/43cm in length, with about 3”/7.5cm of overlap of the two ends (picture A). Secure the sides where these edges overlap (picture B). Turn the pillow inside out, and *starting at one corner, seam one side closed using the whip stitch, or your favourite seaming method. Make sure to go through both edges (picture C), and all three thicknesses where they overlap. Fasten off at the opposite corner. Repeat from * on the other side of the pillow.
Turn the pillow right side out. Insert the pillow form, and gently pull the buttonhole edge up over the other edge to see where the buttons should be placed. When buttoned closed, the edges should not gape or look too stretched. Place your buttons evenly so they match up with the buttonholes, and secure them in place (picture D).

Save this pattern to your Ravelry queue, or add a project to the pattern page!
Check out my testers’ versions!

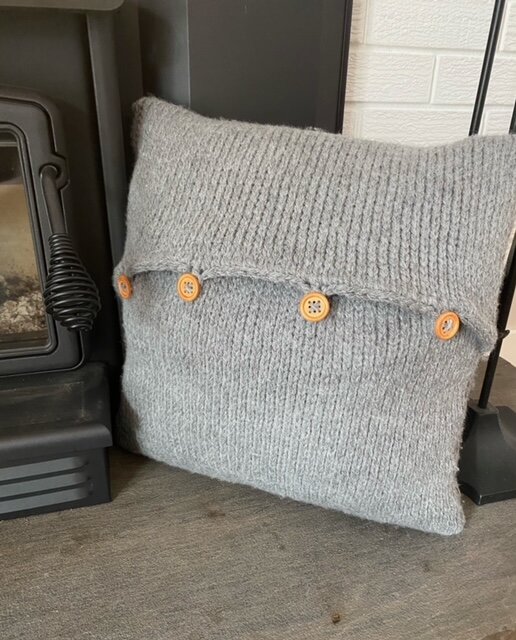


Congratulations on finishing your Easy Stitches Pillow! Share your photos on Instagram using the hashtags #EasyStitchesPillow and tag me, @capital.crochet!
My patterns and thoroughly tested and edited, and come with my full support - if you find an error or have a question, please don’t hesitate to get in touch! You may sell finished items made from this pattern, but please credit me as the designer by linking back to this blog post.
Thank you so much for your support! If you’d like to be the first to know about new patterns, blog posts, and freebies (yay!), please join the email list below.
If you enjoy working with cotton yarn, check out my Stitch Exploration Series! Each month, I try out a new-to-me stitch pattern or technique, and create FREE cotton dishcloth patterns so that you can try out new skills, too! Below are the two most recent patterns in the series, March’s Pollyanna Dishcloth and February’s Mulberry Dishcloth, both using WeCrochet Dishie yarn.