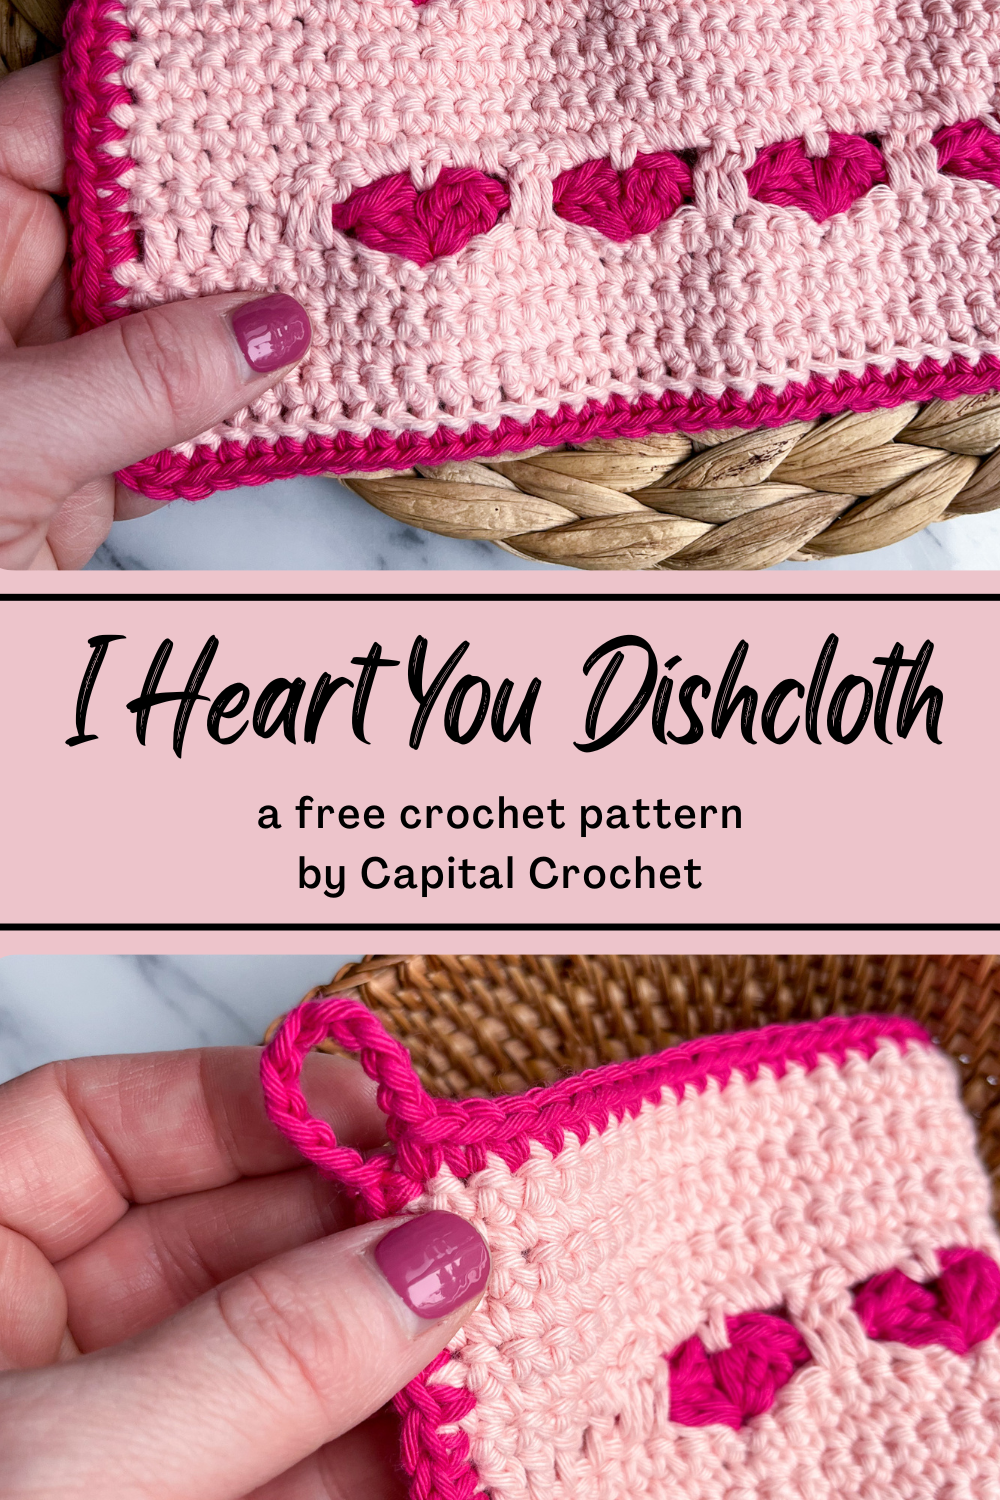
I Heart You Dishcloth
/This post may contain affiliate links, meaning that if you click through and make a purchase, I earn a small commission at no extra cost to you. This helps support my business and makes it possible for me to bring you free content.
Welcome February! The shortest month of the year but also it seems like the longest thanks to the cold, snowy days (where I live, at least). Mid-February is about when I start to feel REALLY over winter, like, please leave now - you too?
The last few years, I’ve started to look for little moments of joy to get me through the last long weeks of the winter season. As we approach Valentine’s Day, it seems like the stores, social media and pretty much everywhere we look is exploding with PINK and HEARTS. For this month’s Stitch Exploration Series, I decided to jump on that trend, because pink hearts make me happy. 💖

This instalment of the Stitch Exploration Series features some simple colour work that creates the look of little hearts. This technique would be great for adding a special touch to a blanket or a baby lovey, or even along the bottom of a child’s sweater or cardigan.
And if I may say so, it makes an adorable little dishcloth! What a great way to add some colour to your kitchen.
If you’re not familiar with my Stitch Exploration Series, here are the details: Each month (or month-ish), I post a new FREE dishcloth pattern that uses an interesting technique, skill or stitch. This is my way of challenging myself to try out new techniques and discover new textures and stitch patterns. Check out the other patterns in the series (both Tunisian and traditional crochet).
This series is all about testing out new skills without the pressure of having to create a large project like a garment. When I’m designing, I find that I tend to choose familiar stitches, which can limit my creativity. I’ve chosen dishcloths because they’re small enough to finish up quickly, but large enough to get a general idea of the fabric the stitch pattern will create!
I’m so excited to partner with Hobbii Yarn for this design! The I Heart You Dishcloth was designed for the their #IHeartYou campaign, which showcases knit and crochet patterns that you can make to express love and appreciation for the people in your life. The PDF pattern is available as a FREE download for Hobbii Plus members, and can also be purchased on the Hobbii website.
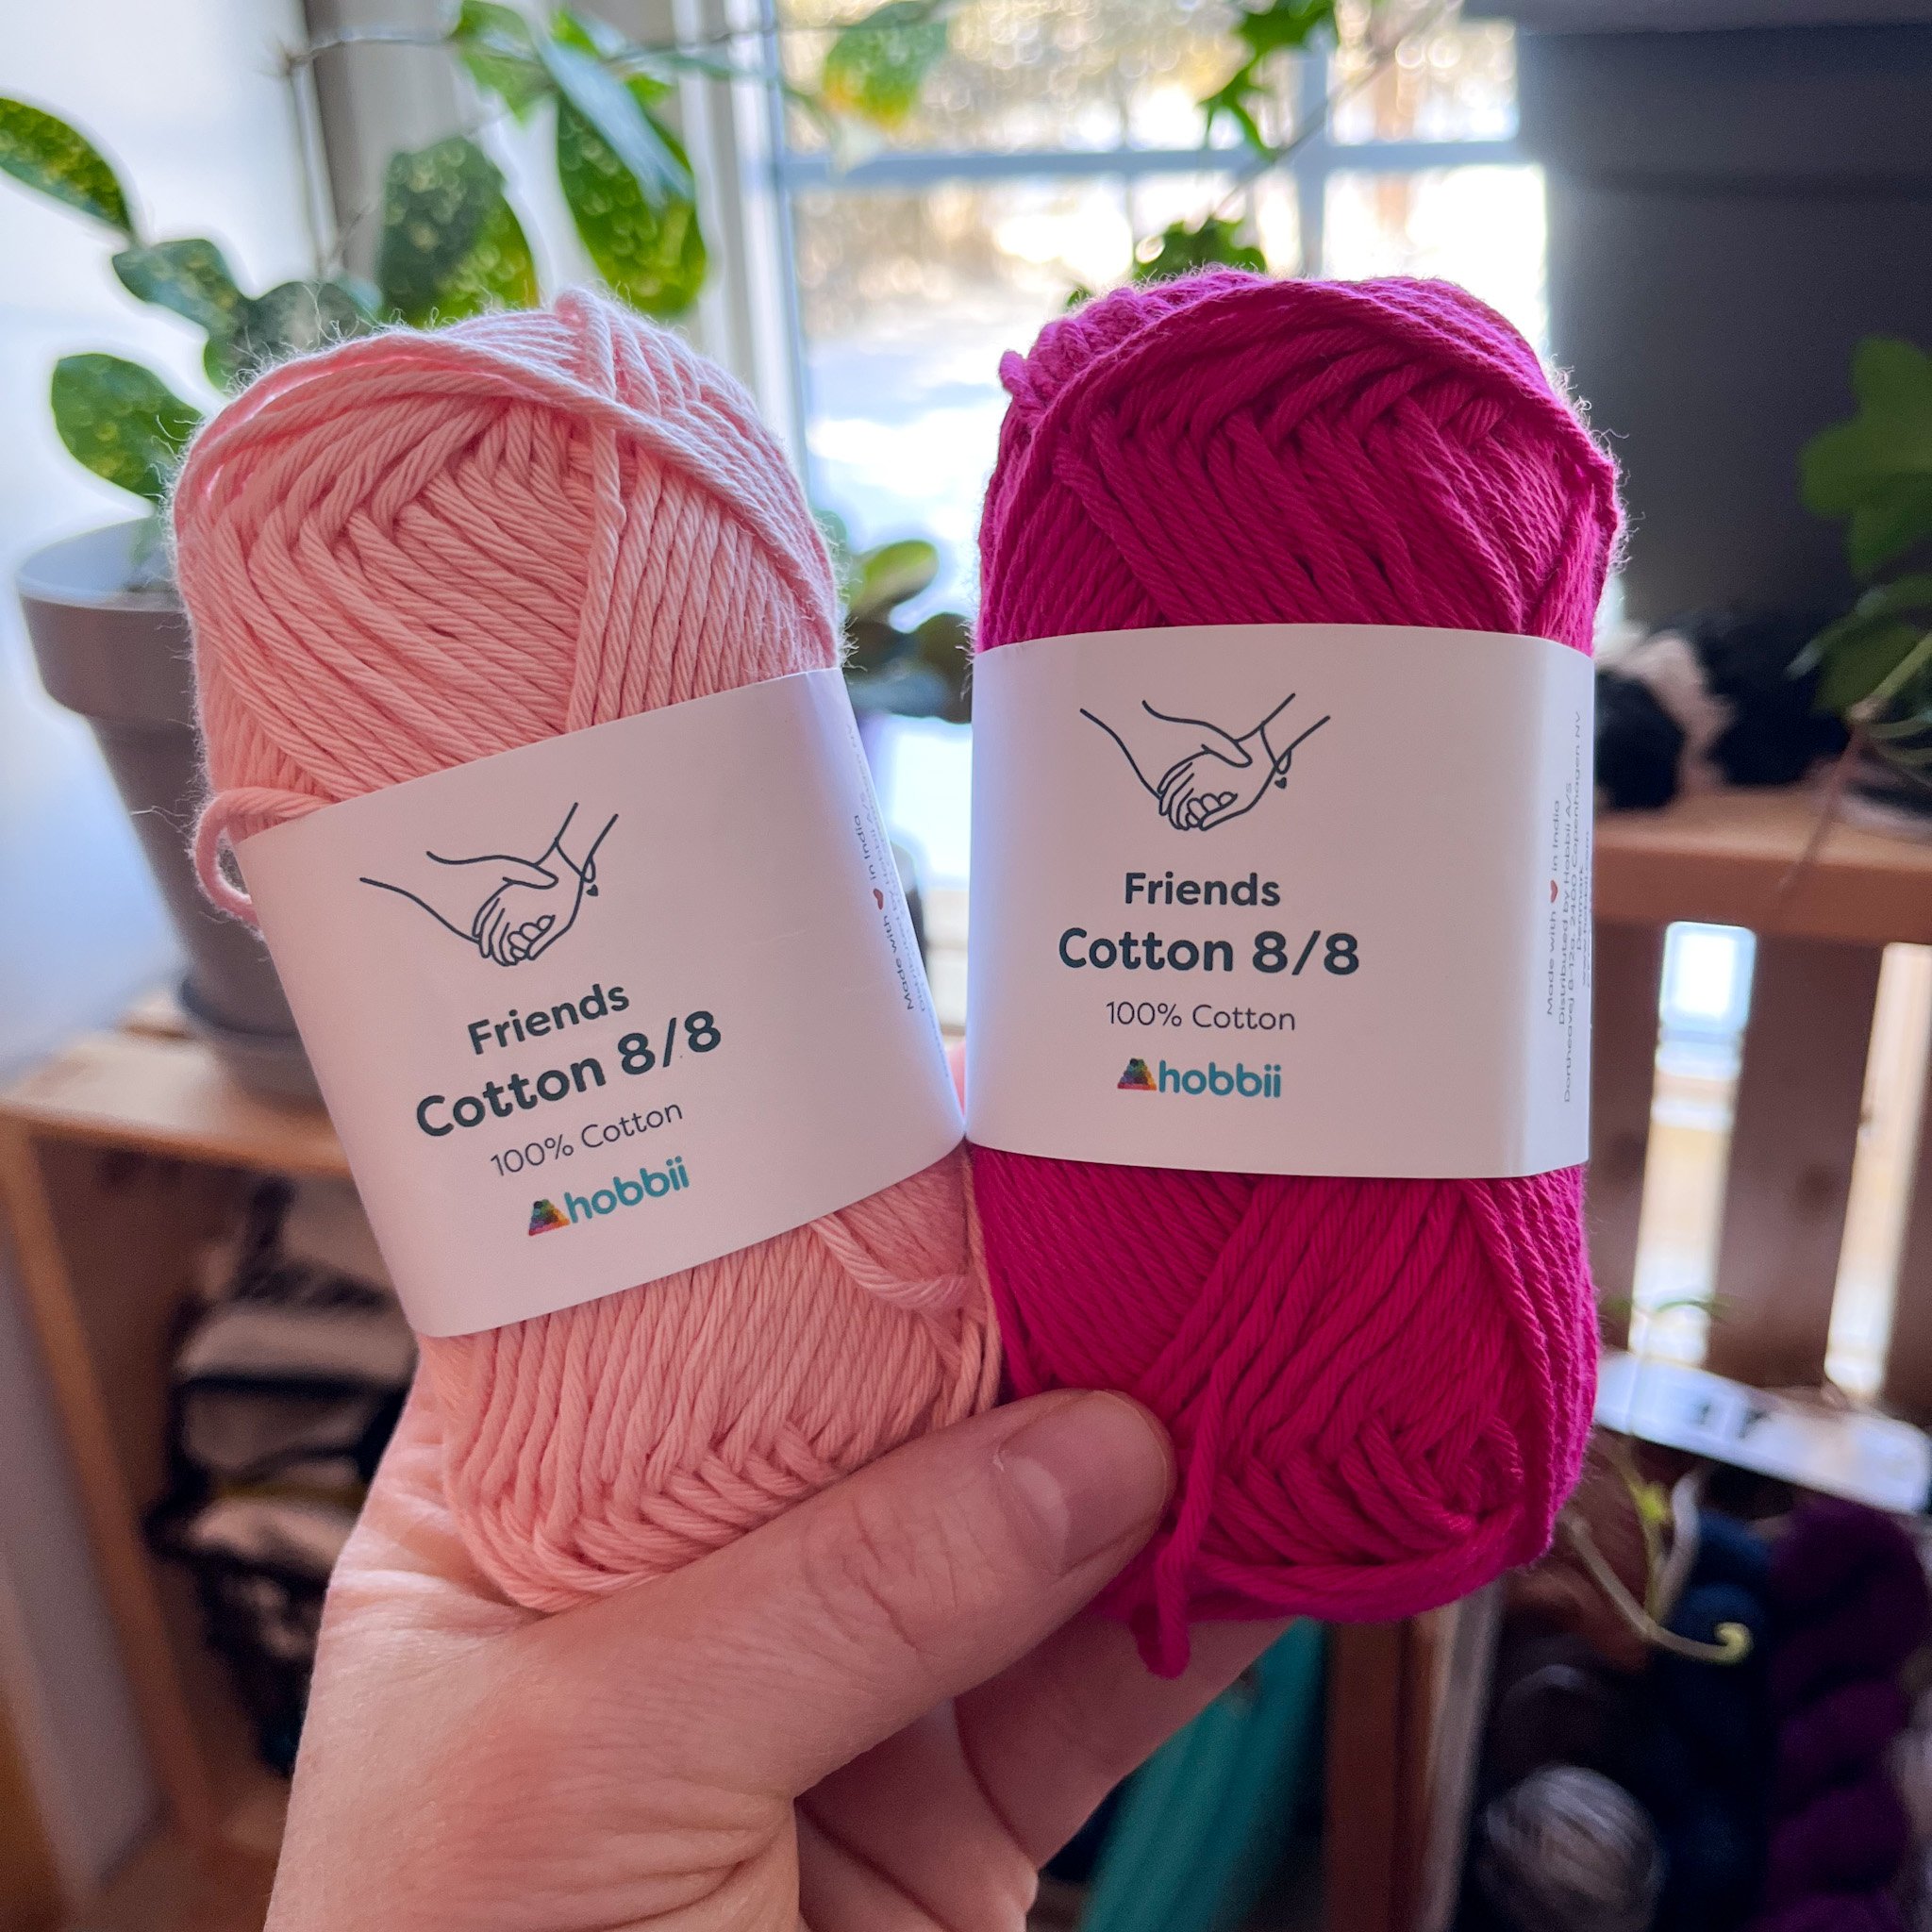
I have to send out a big thank you to my friends at Hobbii Yarn for sponsoring this pattern. They sent me this amazing yarn - Hobbii Friends Cotton 8/8, a 100% cotton yarn that is also OEKO-TEX® certified. It is a nice, smooth cotton, which makes it a breeze to crochet with (almost no splitting, yay!). It’s available in 60 colours, so it’s really easy to coordinate colours for a project. Which ones would you choose for this pattern?
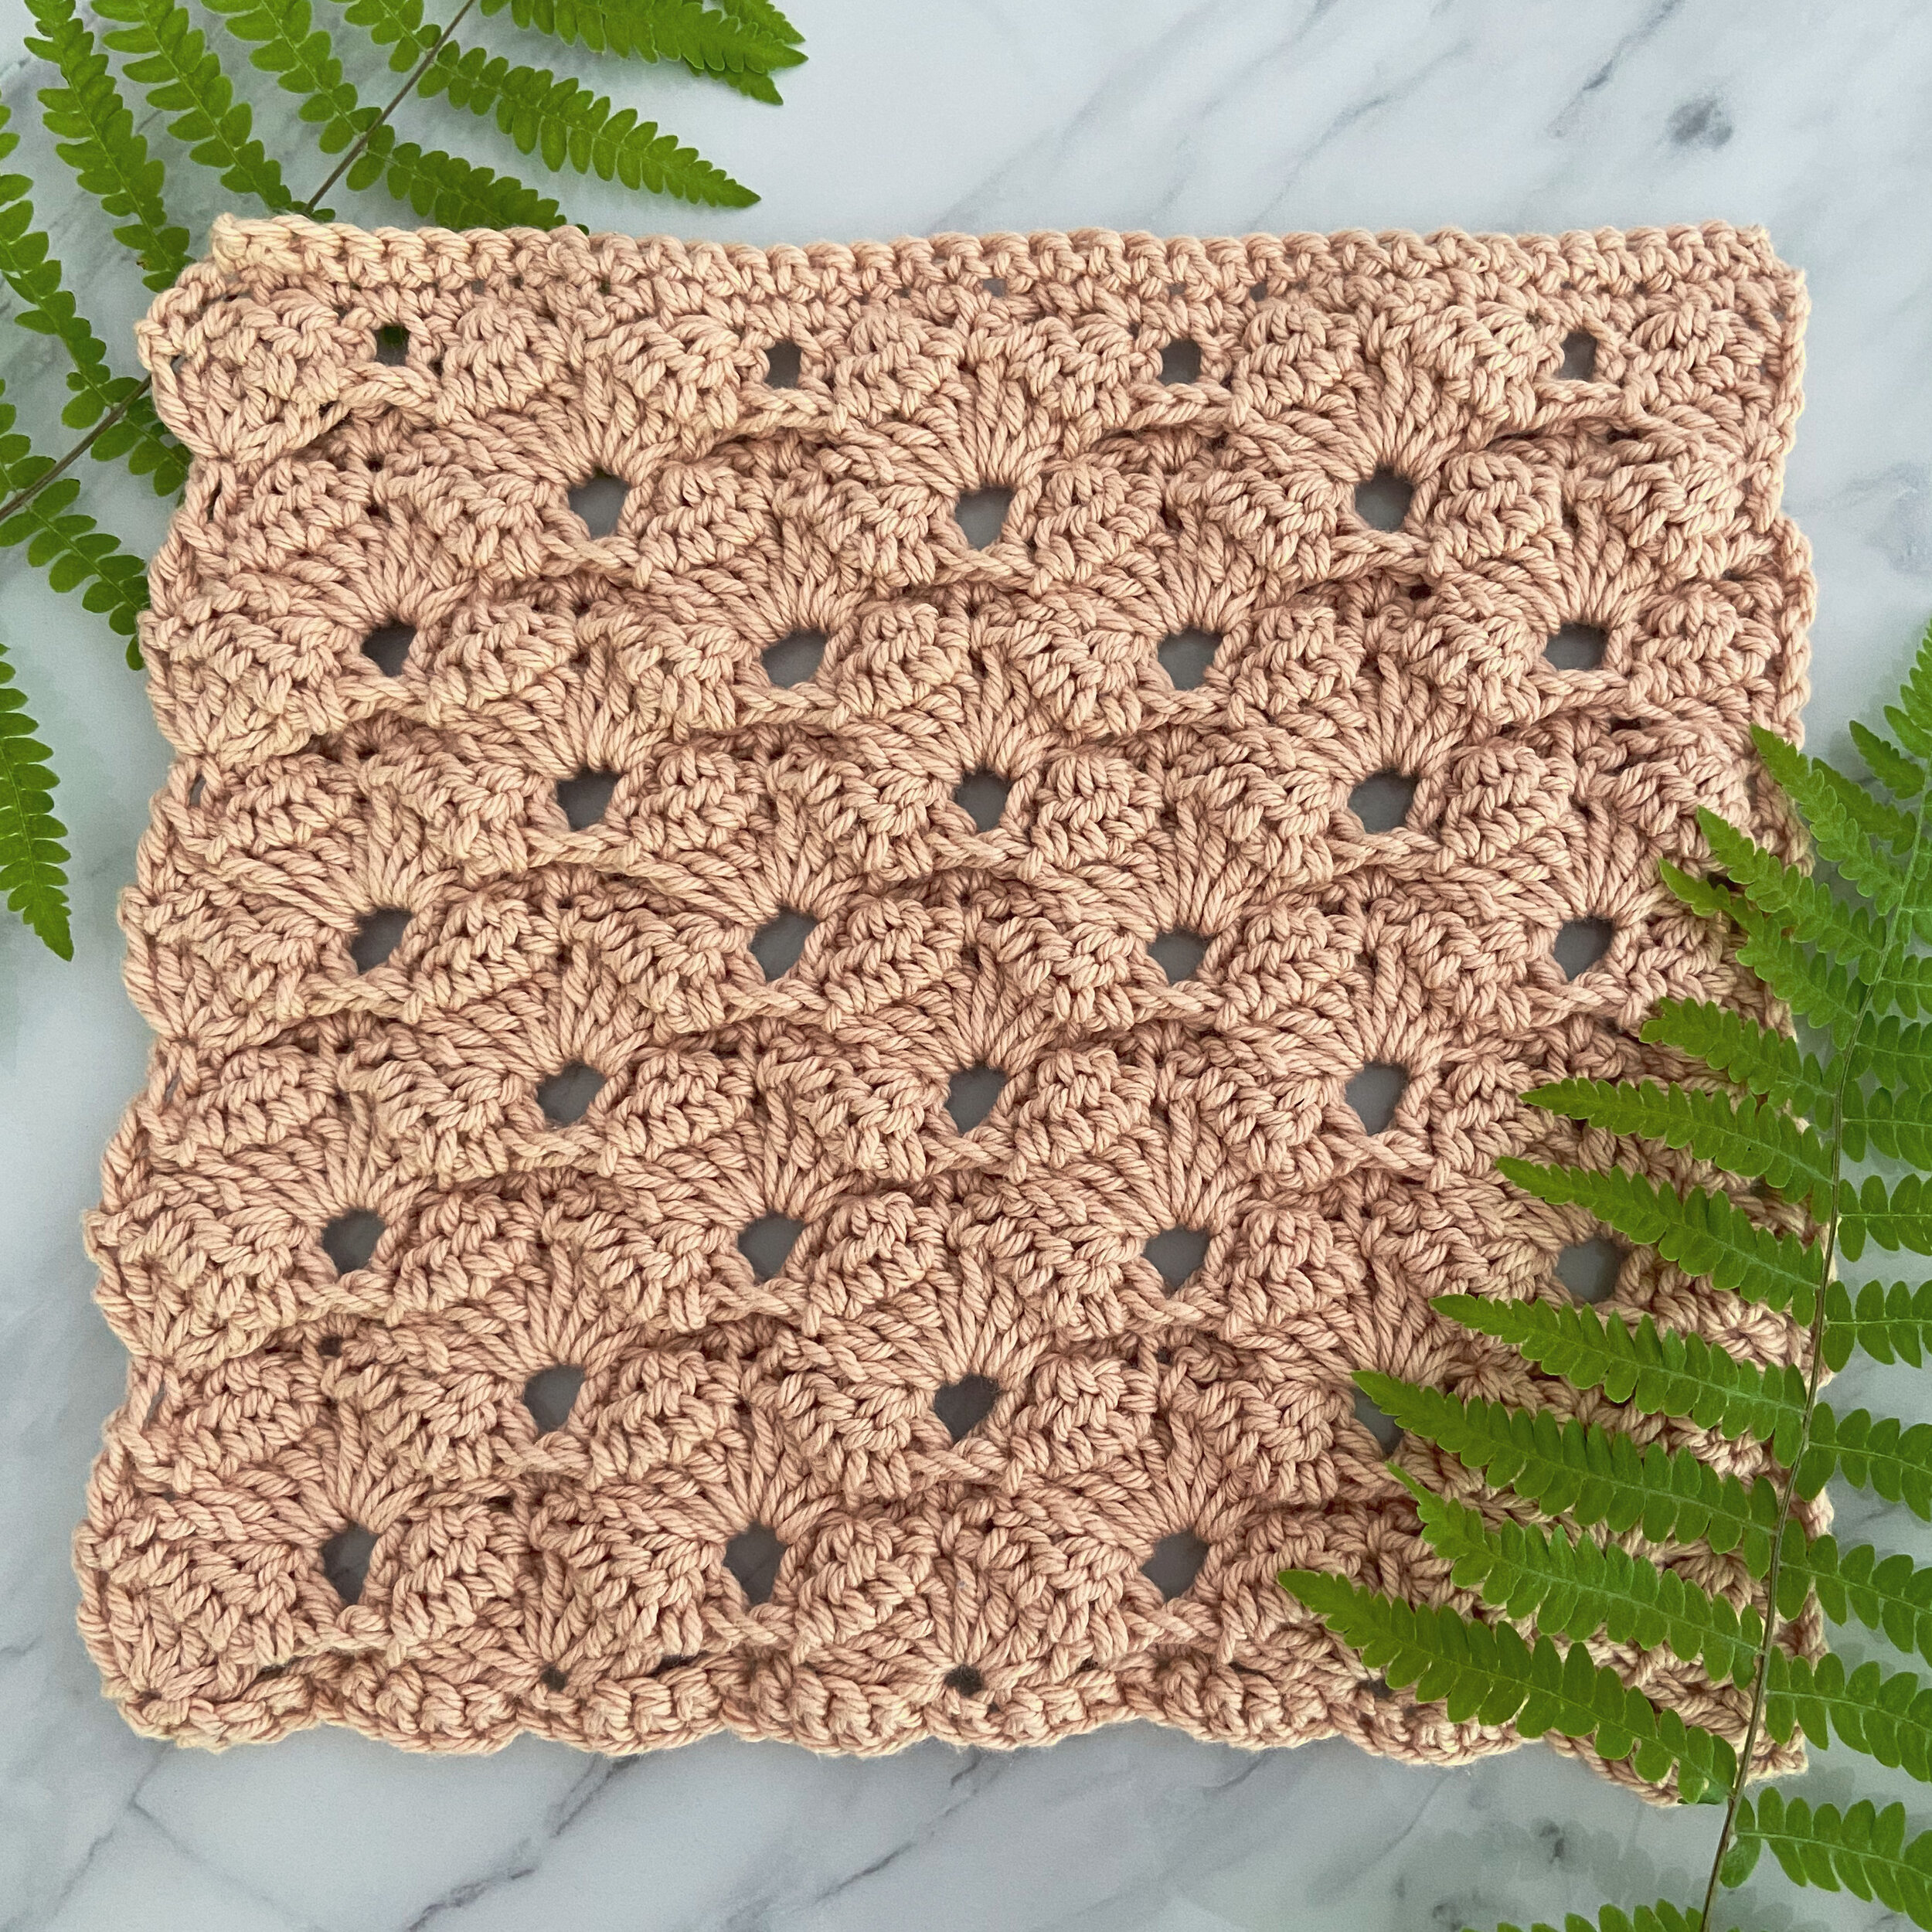
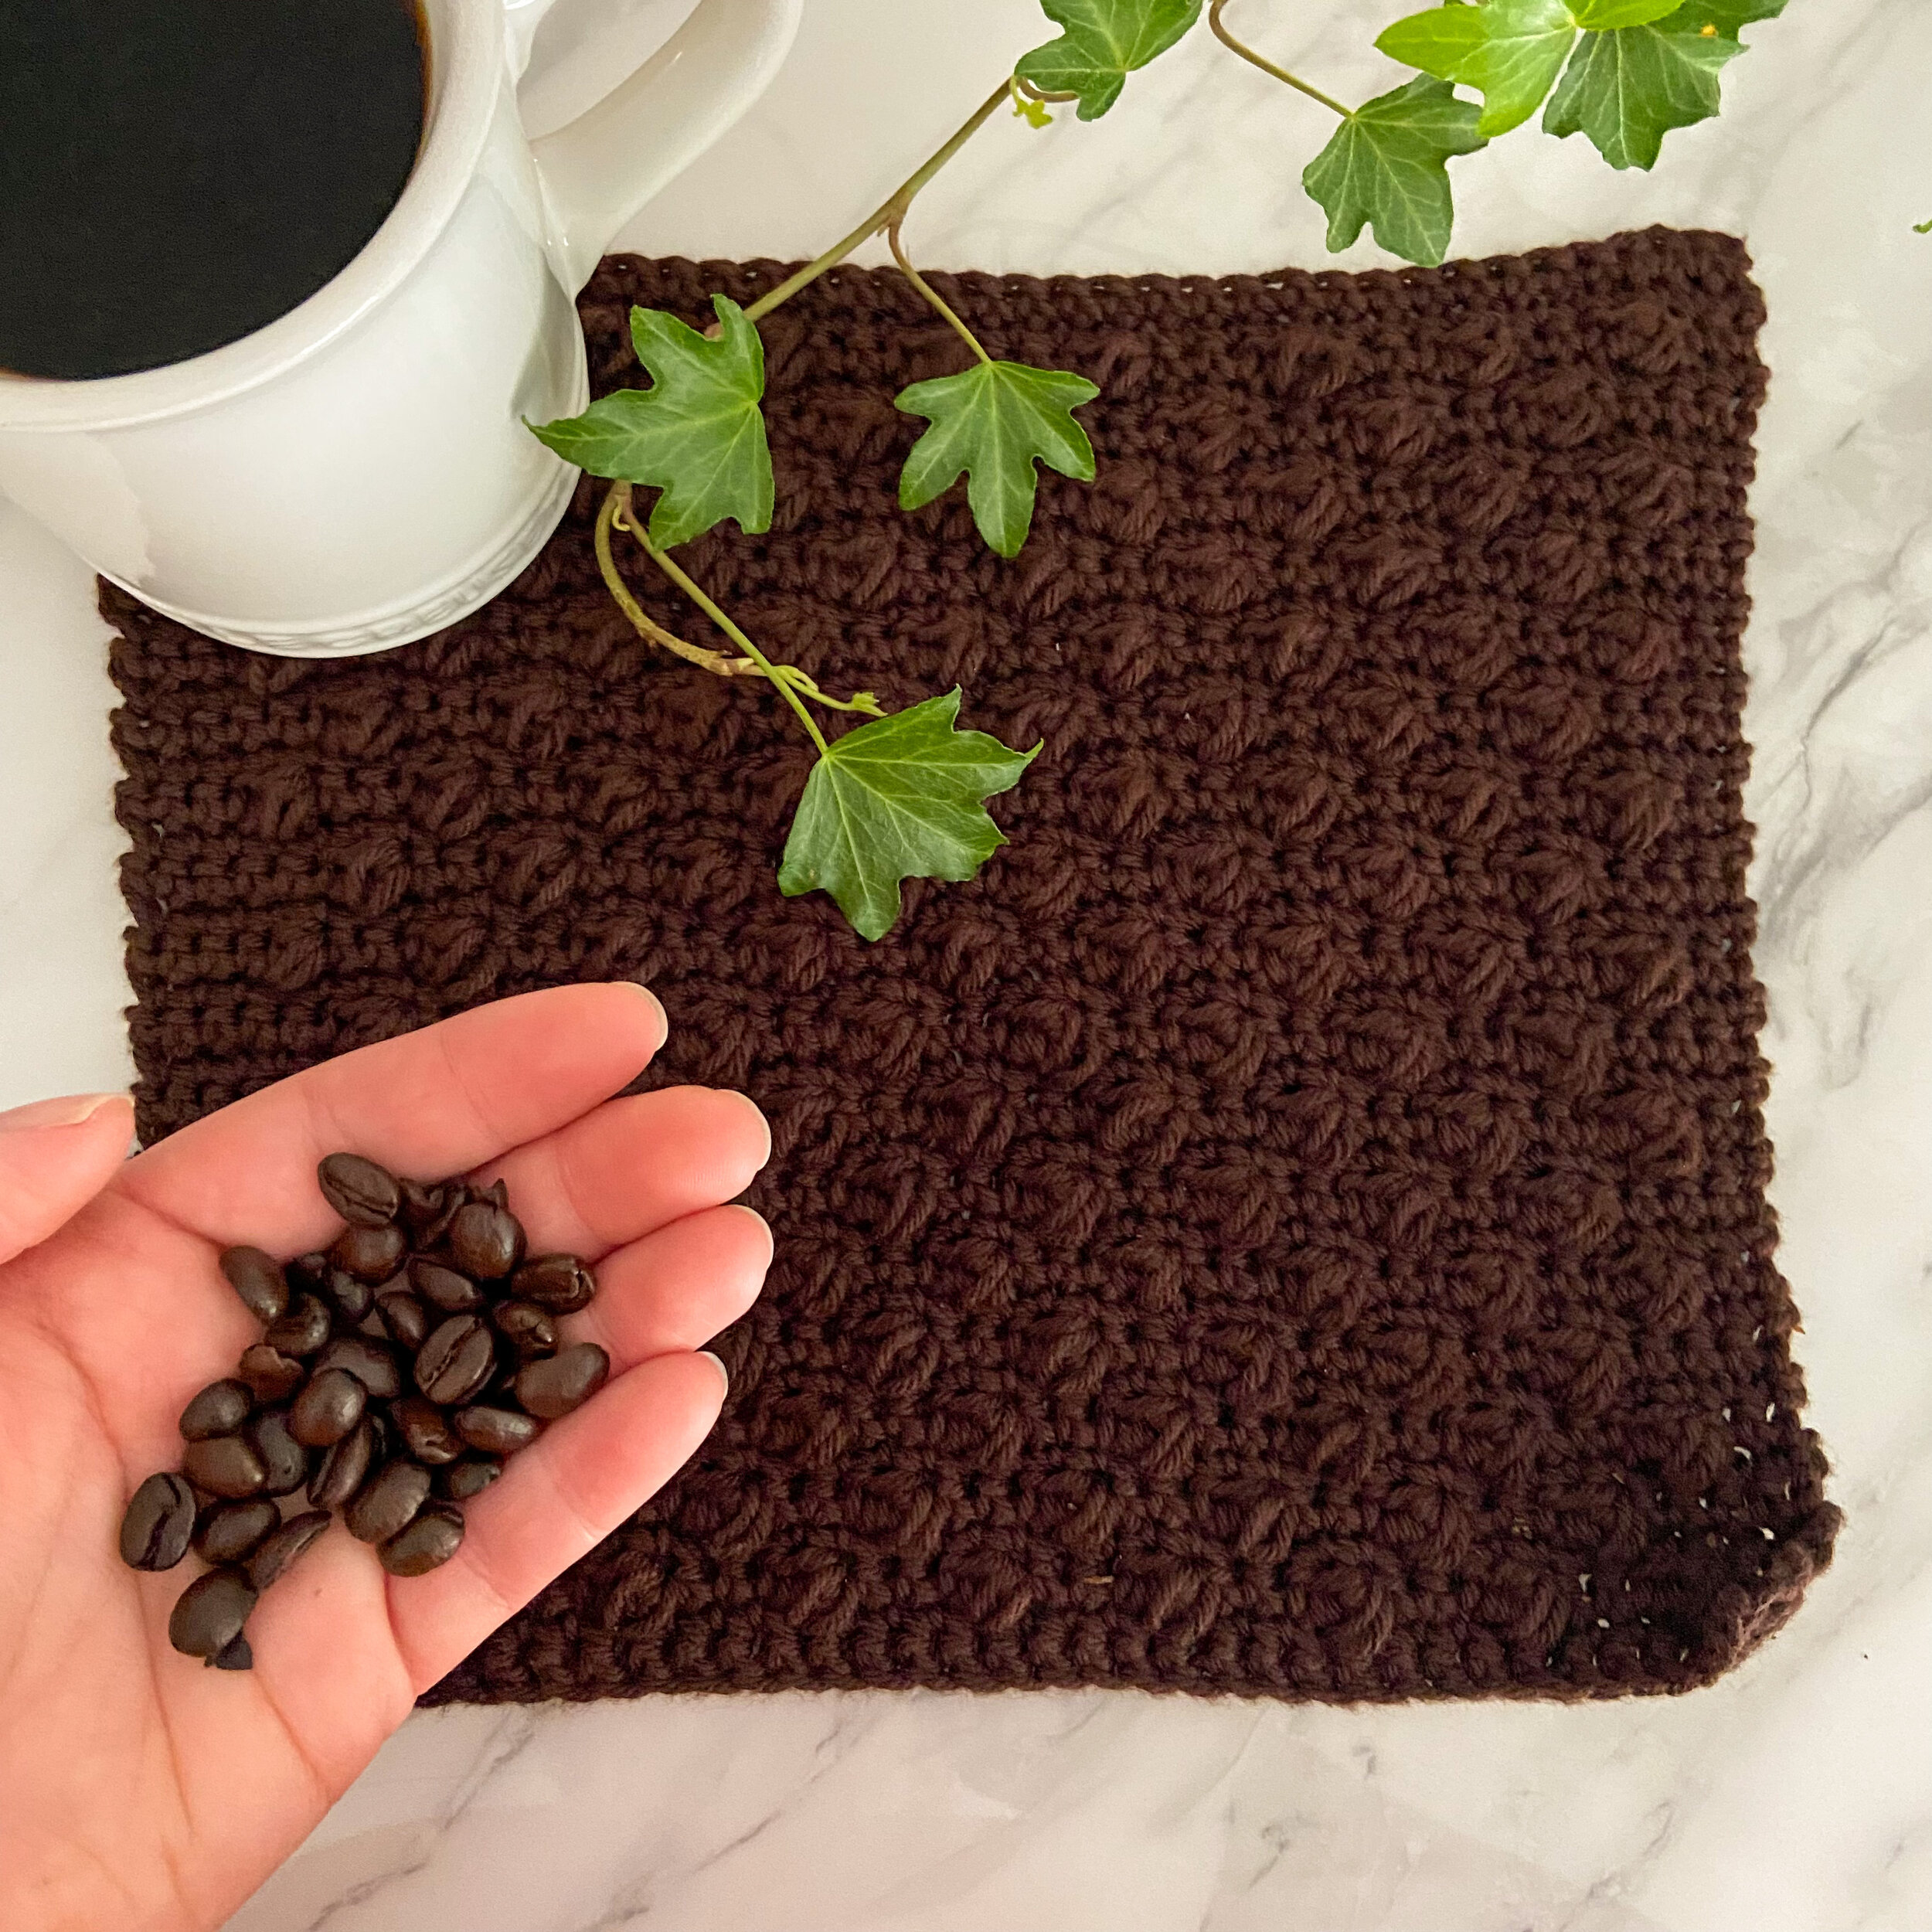
Check out some of the previous patterns in the series - the Keyhole Dishcloth (cream) is probably my favourite so far, and the Coffee Bean Dishcloth is a fan favourite, with over 300 likes and lots of projects on Ravelry!
Materials
Yarn: Light worsted/DK (3) weight cotton yarn in two colours. Sample uses Hobbii Friends Cotton 8/8 (100% cotton, 82 yds/75 m per 50g skein):
Colour 1: 51, Baby Pink
Colour 2: 47, Pink
Hook: US G/4mm hook (or size needed to meet gauge).
Notions: measuring tape, scissors, yarn needle, locking stitch markers (4, optional), blocking materials (optional)
Sizing
Gauge: 9 sts x 10 rows = 2”/5cm in sc, unblocked
Finished Measurements: approx. 9”/23cm square
See the Variations section below for instructions on how to easily modify the size.
Terminology/Abbreviations
This pattern uses standard US terms as detailed by the Craft Yarn Council:
C1, C2: colour 1, colour 2
Cdc: chainless double crochet (see Techniques Videos)
ch: chain
chXsp: chain space; the X denotes how many ch sts there are
CL: cluster (*yarn over, insert hook into indicated st and pull up a loop. Yarn over, pull through the first two loops. Repeat from * twice, then yarn over and pull through all loops on the hook)
dc: double crochet
fsc: foundation single crochet
RS/WS: right side/wrong side
sc: single crochet
st(s): stitch(es)
Notes
Ch 1 to start some rows does not count as a st.
I don’t usually block cotton dishcloths before I use them, I just toss them into the sink when I’m doing the dishes. If you want to neaten things up for gifting, or if your edges are a little wavy, a gentle blocking can help to settle the stitches and even things out.
Pattern Instructions
BODY
Row 1 (RS): Fsc 38 and turn. <38 sc>
Row 2 (WS): Ch 1, sc in each st across and turn.
Rows 3-6: Repeat Row 2.
NOTE: In Row 7, you will use both C1 and C2. You can choose to cut C1 if you like, or you can just drop it after the first few sts of the Row and pick it back up at the end. If you choose to do the latter, make sure that when you pick it up to work the final few sts of the row, you keep the dropped portion taught but not so tight that it is pulling at the rest of your work. The unworked strand should lay flat, even a slight bit loose. You will crochet over it in Row 8 to cover it up. This strategy will reduce the number of ends to be woven in when you are finishing your dishcloth.
Row 7: Cdc, dc in next 3 sts. Ch 1, then ch 1 with C2 (this creates a ch2sp, and now C2 is the working yarn). Skip 4 sts (CL, ch 2, CL) in the next st. *Ch 3, skip 6 sts, (CL, ch 2, CL) in the next st. Repeat from * twice more. Ch 1, then ch 1 with C1 (another ch2sp is created, and C1 is now the working yarn). Skip the next 4 sts, dc in the last 4 sts and turn. You may cut C2, leaving a 4”/10 cm tail to weave in. <8 dc, 8 CLs>
Row 8: If you’ve kept C1 attached, make sure to crochet over the exposed strand to hide it. Ch 1, sc next 4. Dc in each of the first 2 skipped sts of the row below. *Ch 2, sc into ch2sp between the CLs. Ch 2, dc into each of the middle 2 skipped stitches of the row below. Repeat from * twice. Ch 2, sc into the ch2sp between the CLs. Ch 2, dc into each of the last 2 skipped sts of the row below. Sc in the last 4 sts and turn. <12 sc, 10 dc>
Row 9: Ch 1, sc across the row, placing 1 sc into each sc and dc from the row below, and placing 2 sc into each ch2sp. <38 sc>
Repeat Rows 2-9 three times, then repeat Rows 2-6 once more. You may wish to mark the first row of each repeat with a stitch marker so you can easily keep track. Proceed to Border section.


BORDER
RS should be facing after working the final row of the Body and turning your work.
Side 1: Attach C2 and ch 1. Sc into each st until you get to the final st of the row. (Sc, ch 9, sc) into the last st of the row to create the hanging loop (if you do not want a loop, simply work 3 sc into this st). Rotate your work so that you can work down the side, crocheting into the row ends.
Side 2: Sc evenly along this edge, placing 1 st into each sc row end, and 2 sts into each dc row end. After the last row end, rotate your work so that you can work along the bottom edge.
Side 3: 3 sc into the first st along the bottom edge. Sc into each st across, 3 sc into the last st. Rotate your work so that you can work up the other side, into the row ends again.
Side 4: Sc evenly along this edge, placing 1 st into each sc row end, and 2 sts into each dc row end. After the last row end, you will be back to the beginning of the border round. Place 2 sc into the same st as the first st of the border, then join to the first st with a slip stitch.
VARIATIONS
This pattern can be easily adjusted to create a larger or smaller dishcloth.
To adjust the length of the pattern, simply work fewer or more repeats of Rows 2-9.
To adjust the width, work fewer or more ch sts to start the pattern. When adjusting the width, make sure to add or remove sts in multiples of 2, then adjust the number of dc you work in Row 7 by the same amount on each side. For example, if you add 8 sts to Row 1, you will add 4 dc on each end of Row 7.
Remember that any alterations to the stitch or row counts will adjust the yardage required.

Save this pattern to your Ravelry queue, or add a project to the pattern page!
Congratulations on finishing your I Heart You Dishcloth! I haven’t done a lot of colour work in my previous designing, but this one just might be changing my mind because the final result really is beautiful.
I’m having a lot of fun exploring these new-to-me techniques, and I hope you are too! I’d love to see your dishcloths (in finished or WIP form!), or how you’re using the things you’re learning here in your own designs. Share your dishcloth on Instagram using the hashtags #IHeartYouDishcloth and #StitchExplorationSeries, and tag me, @capital.crochet!
You may sell finished items made from this pattern, and I would really appreciate credit to me as the designer by linking back to this blog post.
Thank you so much for your support! If you’d like to be the first to know about new patterns in this series and other blog posts, make sure to subscribe to my newsletter below.
Pssst… Tunisian crochet lovers, I’ve got you covered for fun Tunisian patterns!
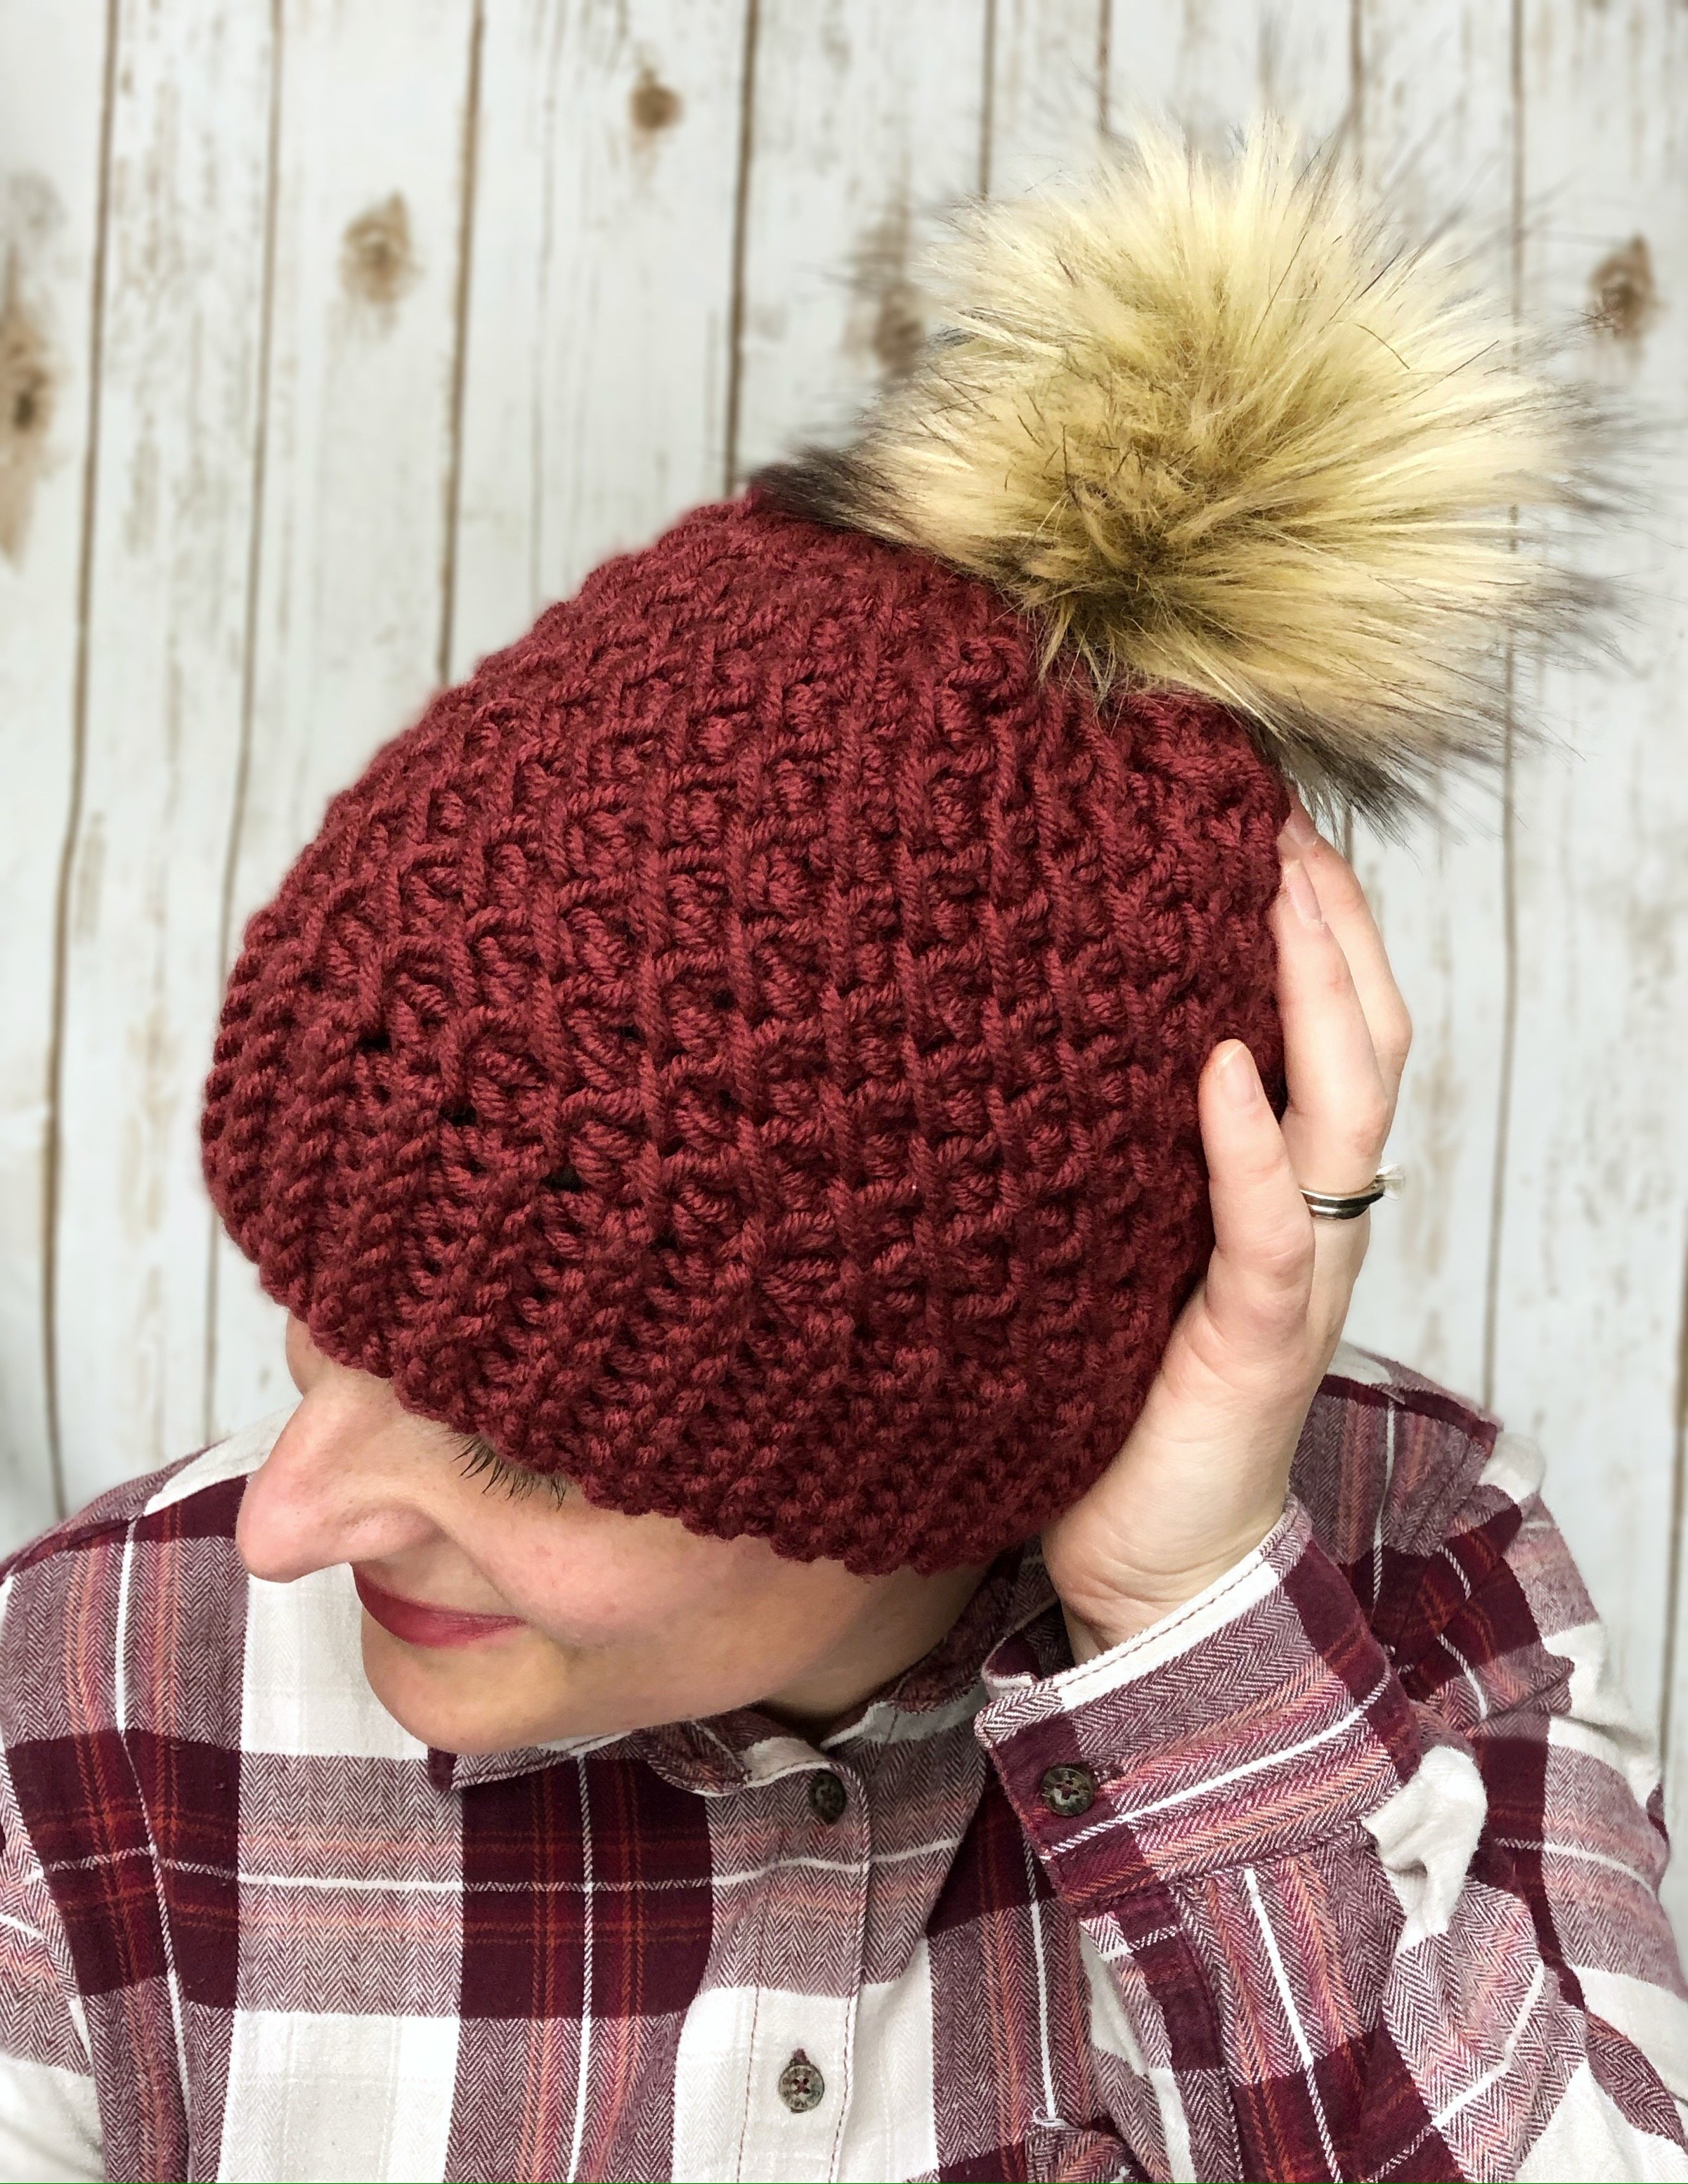
The Thimble Beanie is a quick and easy pattern that uses bulky yarn - perfect for market makes!
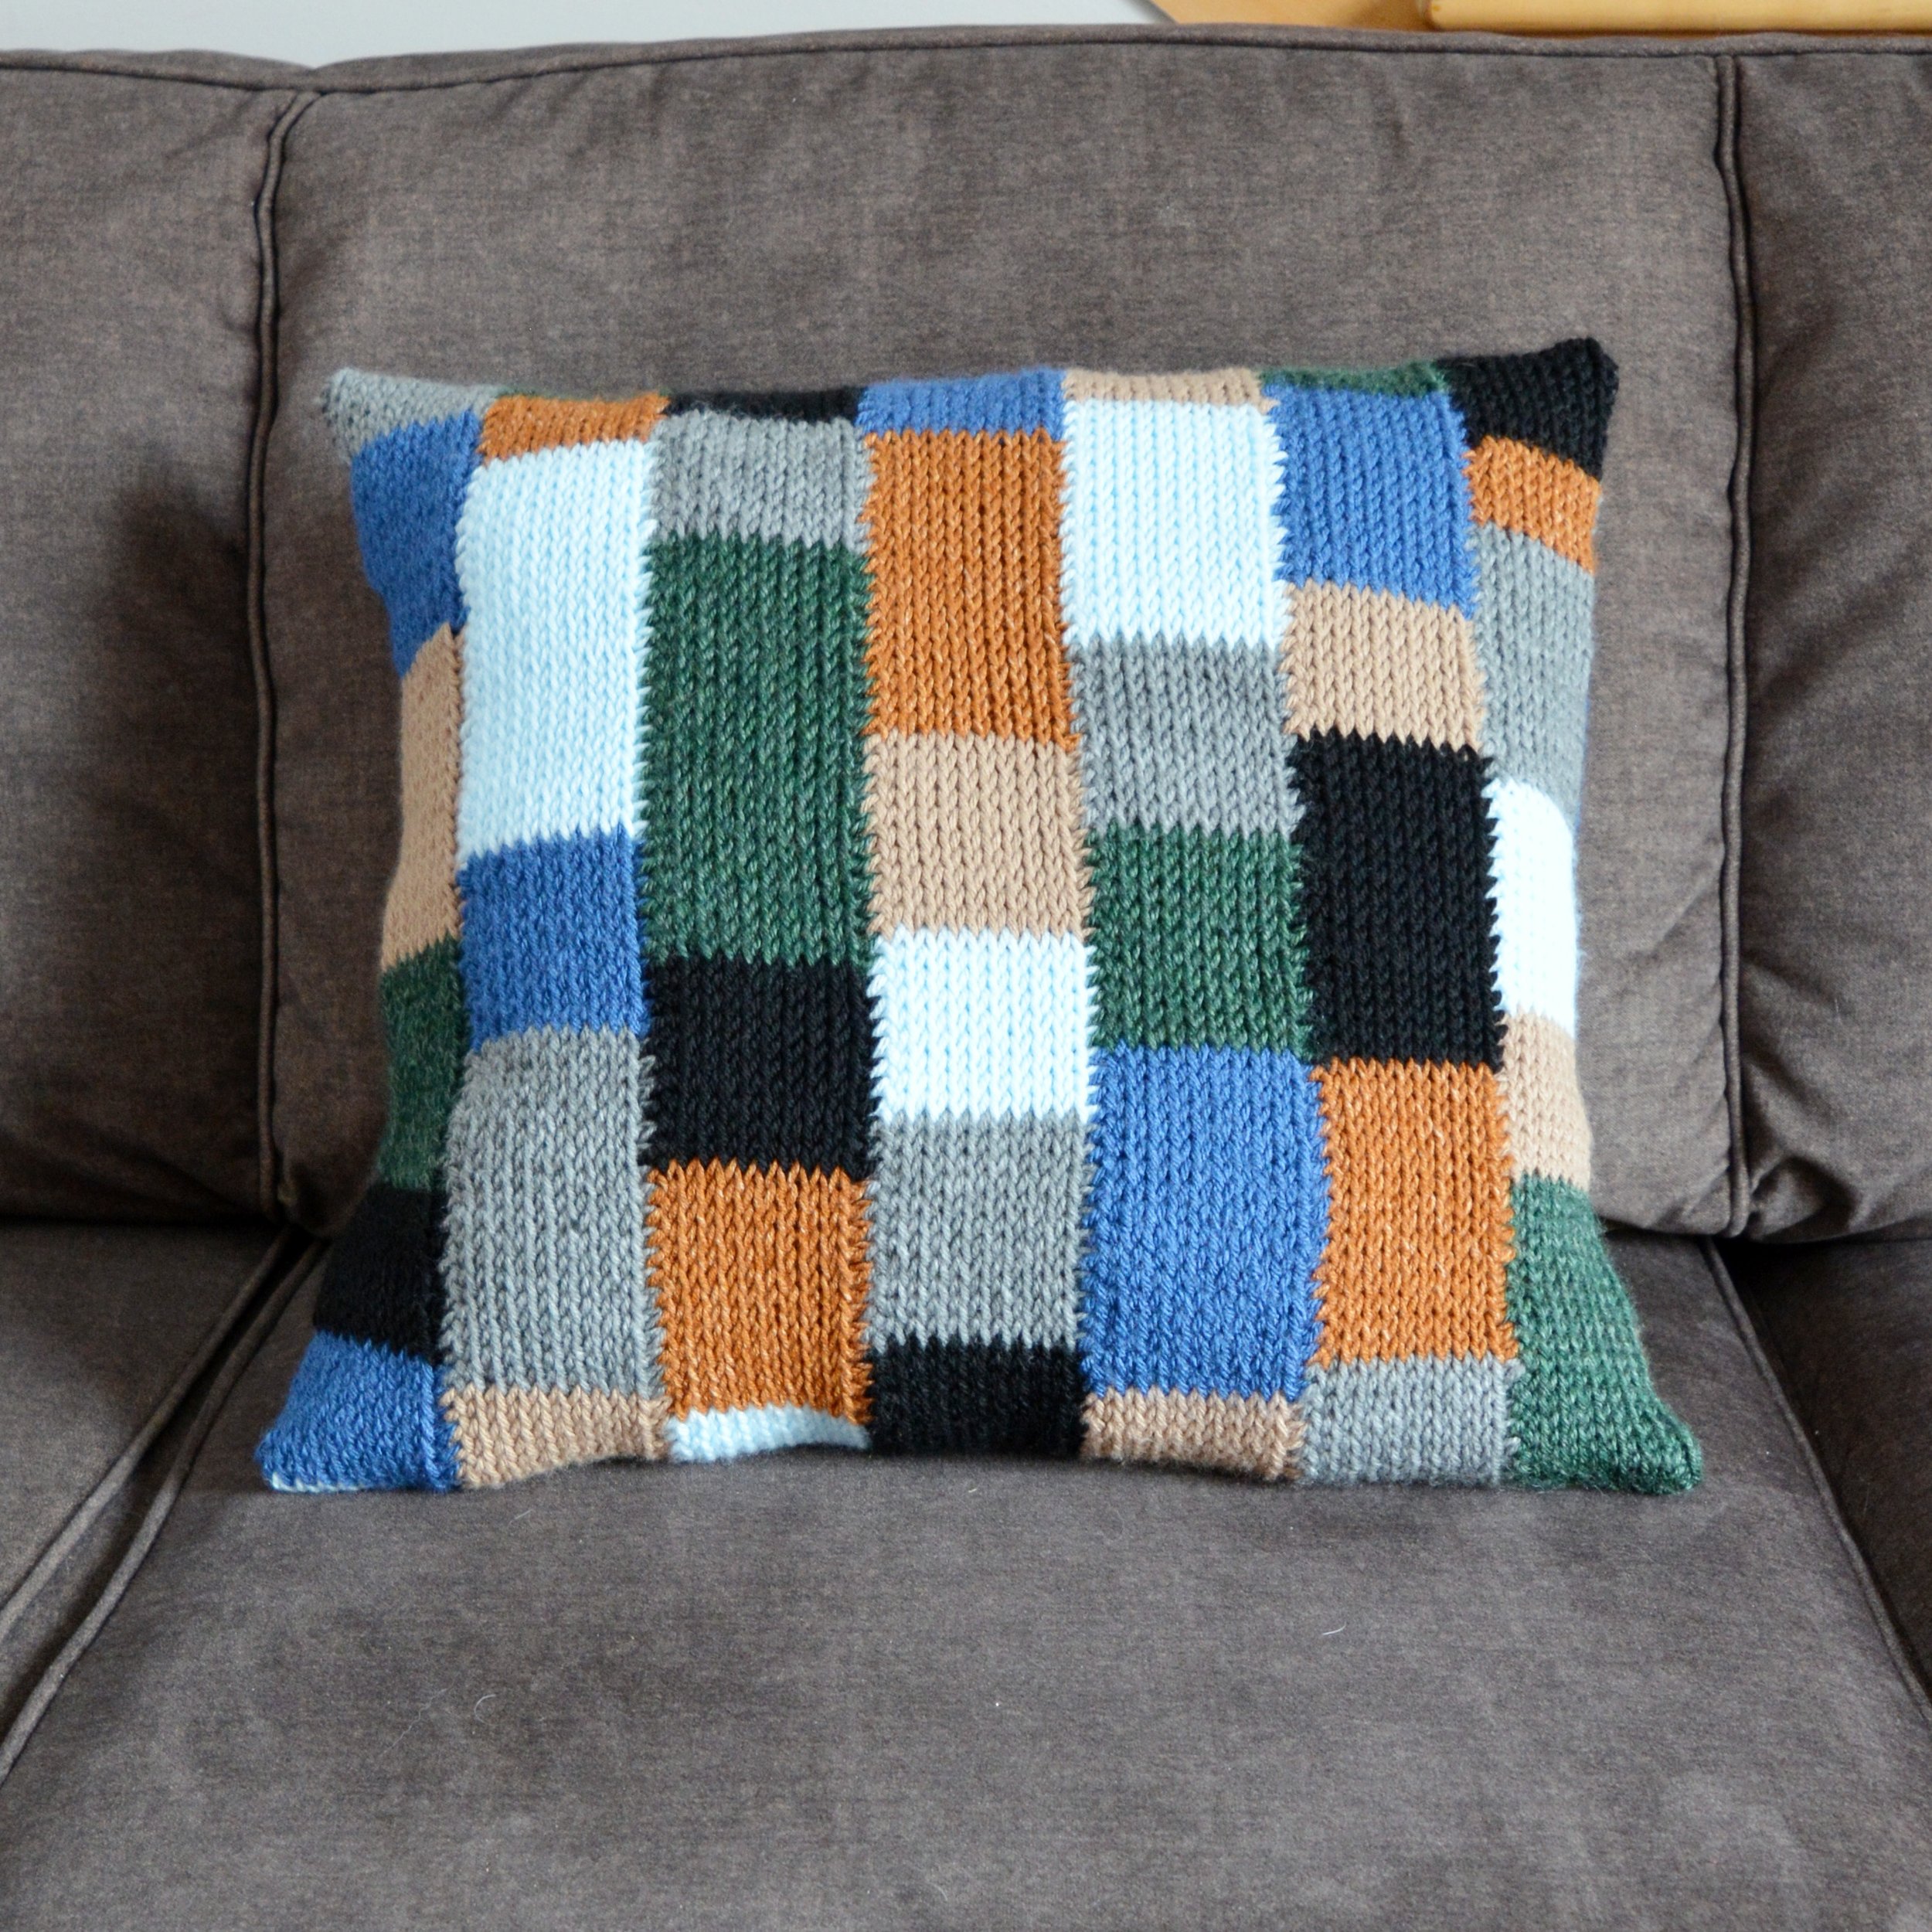
The Stashdown Pillow is an excellent way to use up your scraps and adds a pop of colour to a couch or bedroom.
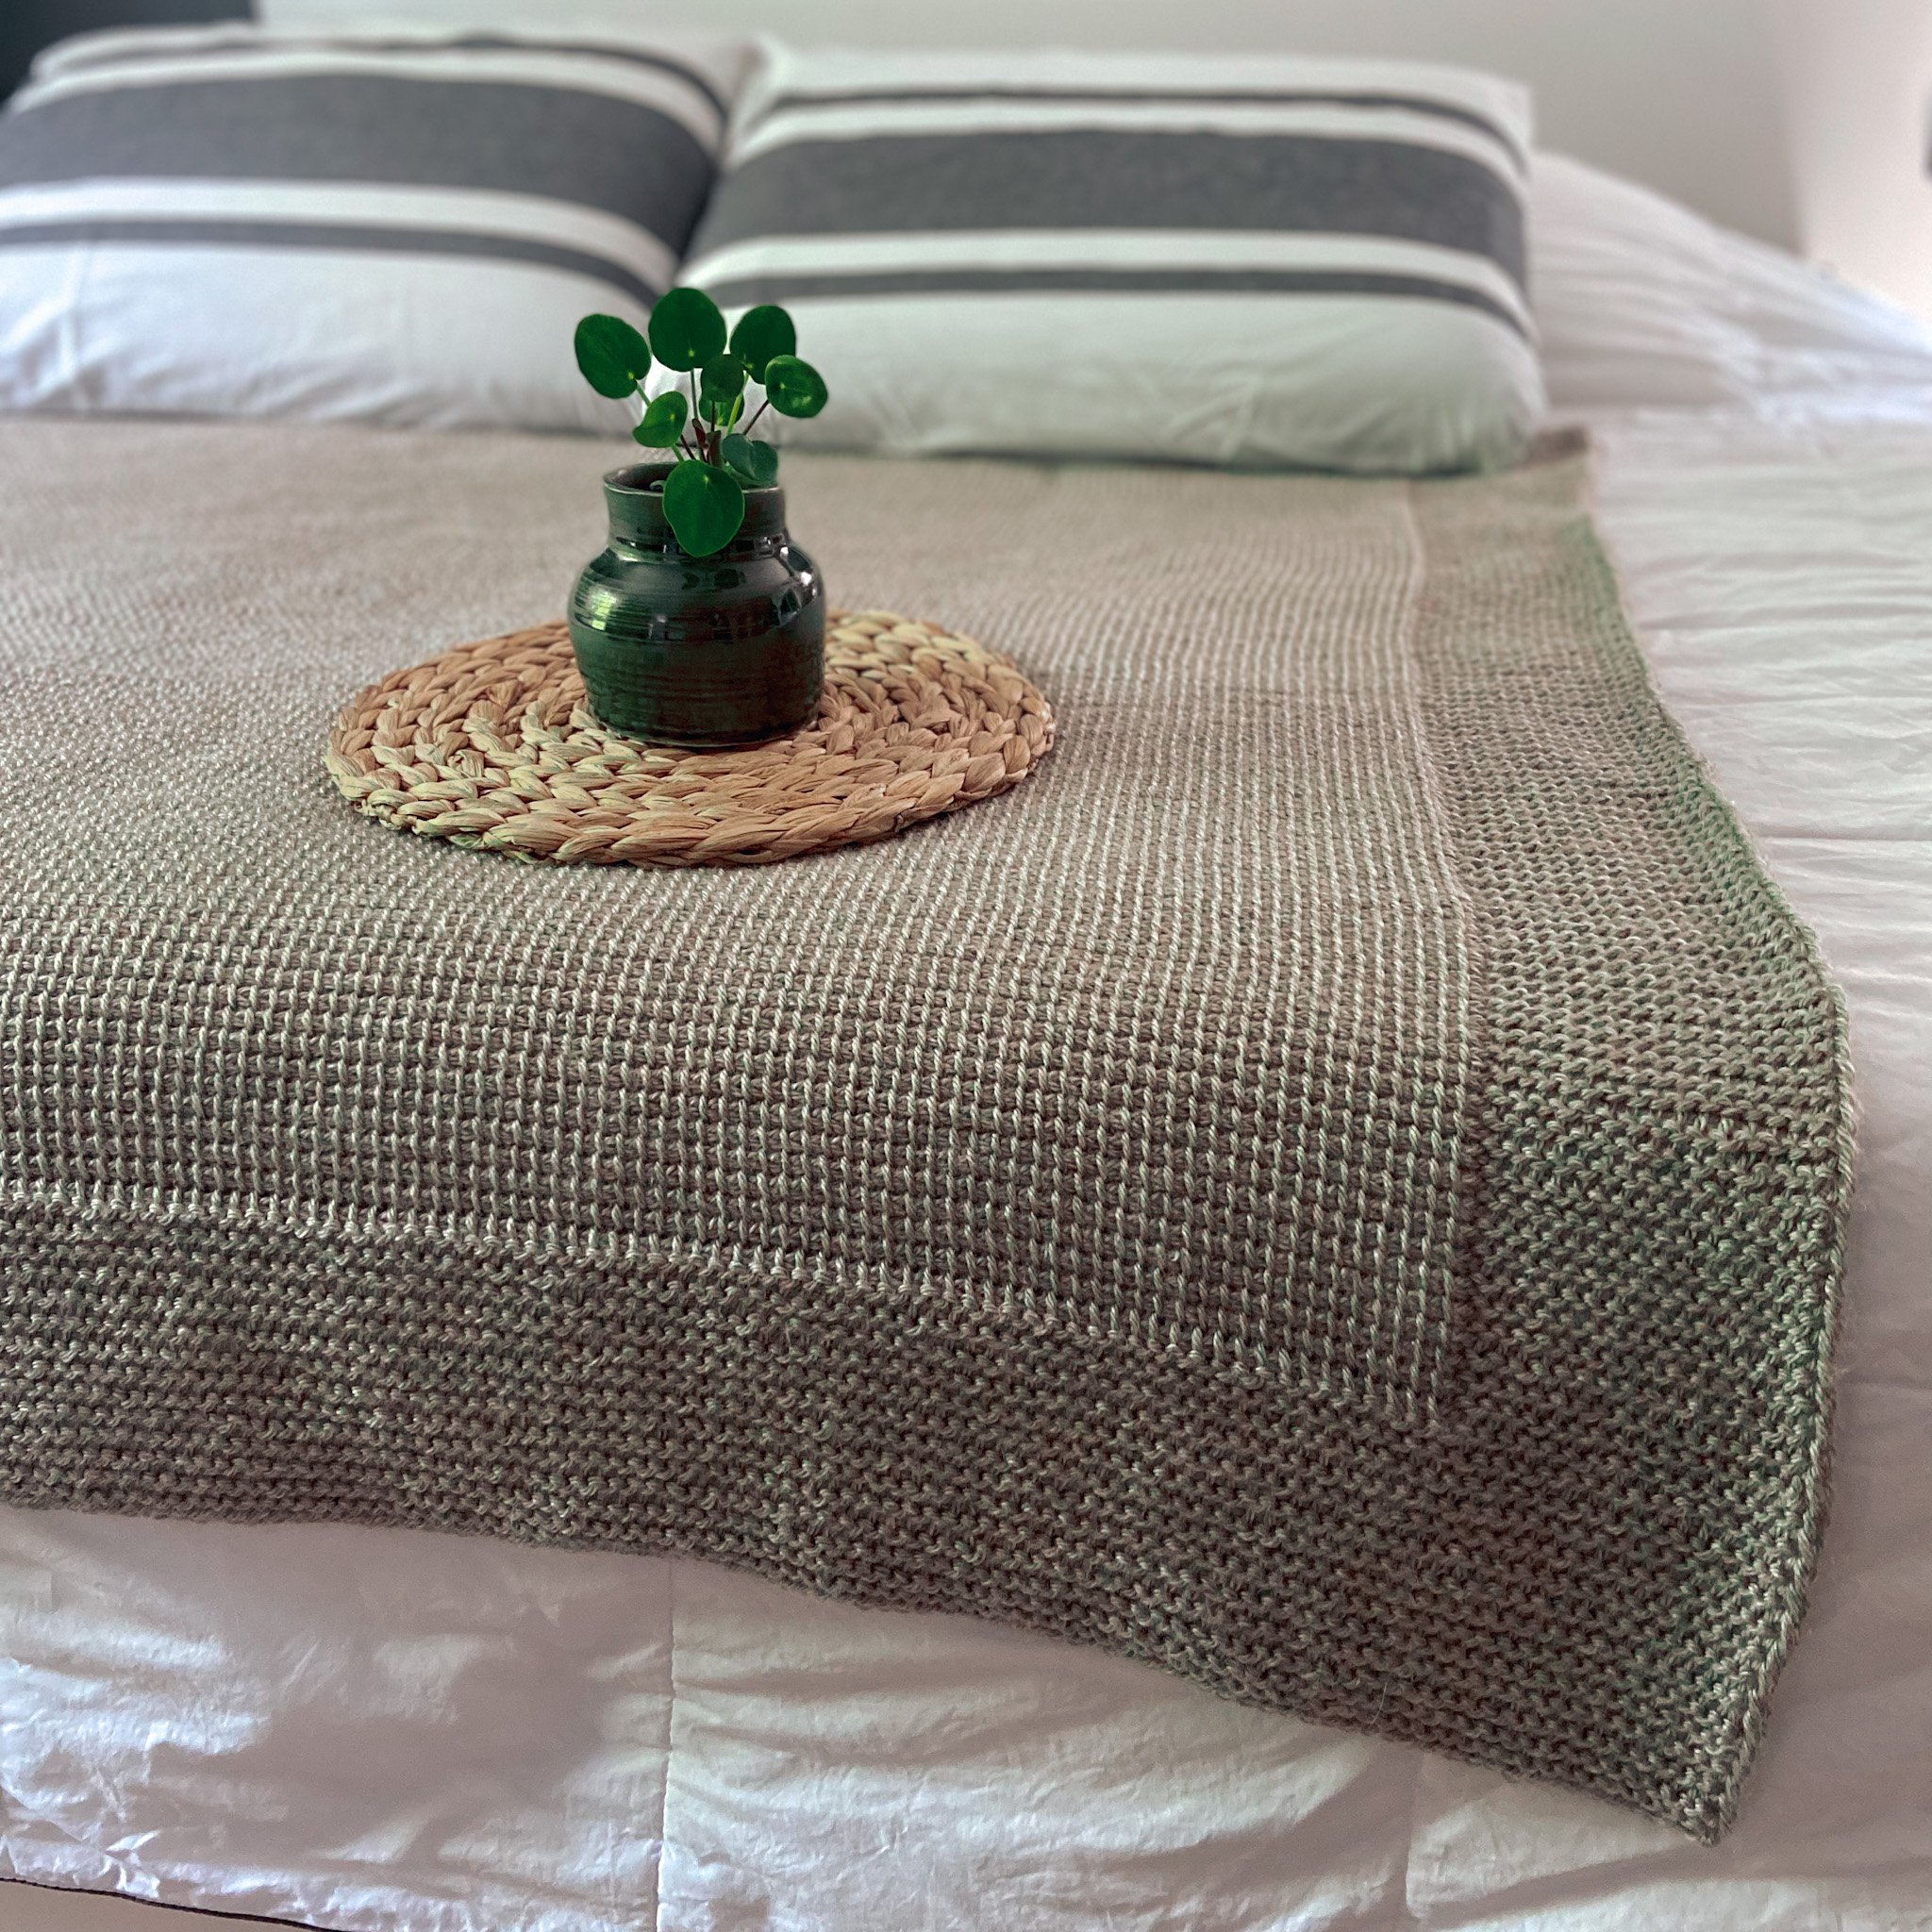
The Lisse Throw Blanket is a meditative make that brings warmth and comfort to your decor (also available as a kit via Lion Brand Yarn!).
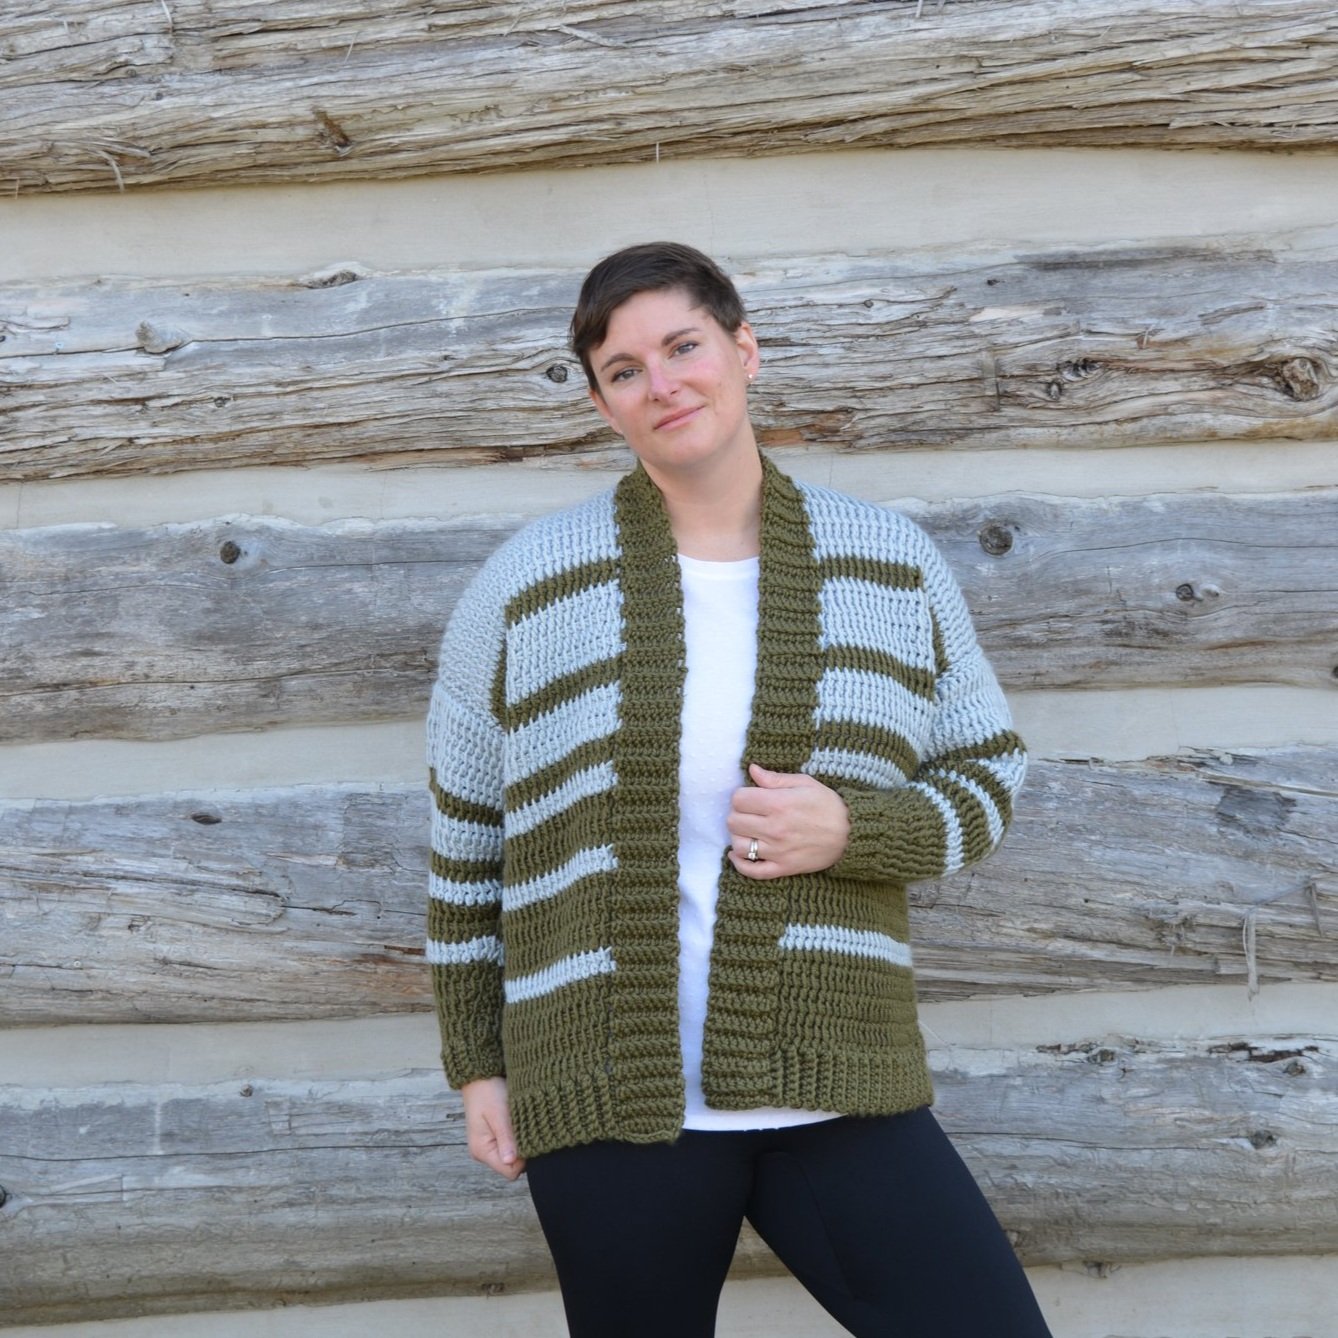
If you’re ready to take on a garment pattern, check out the Flipside Cardigan!