Winter Sparkle Series - Scarf
/This post may contain affiliate links, meaning that if you click through and make a purchase, I earn a small commission at no extra cost to you. This helps support my business and makes it possible for me to bring you free content.
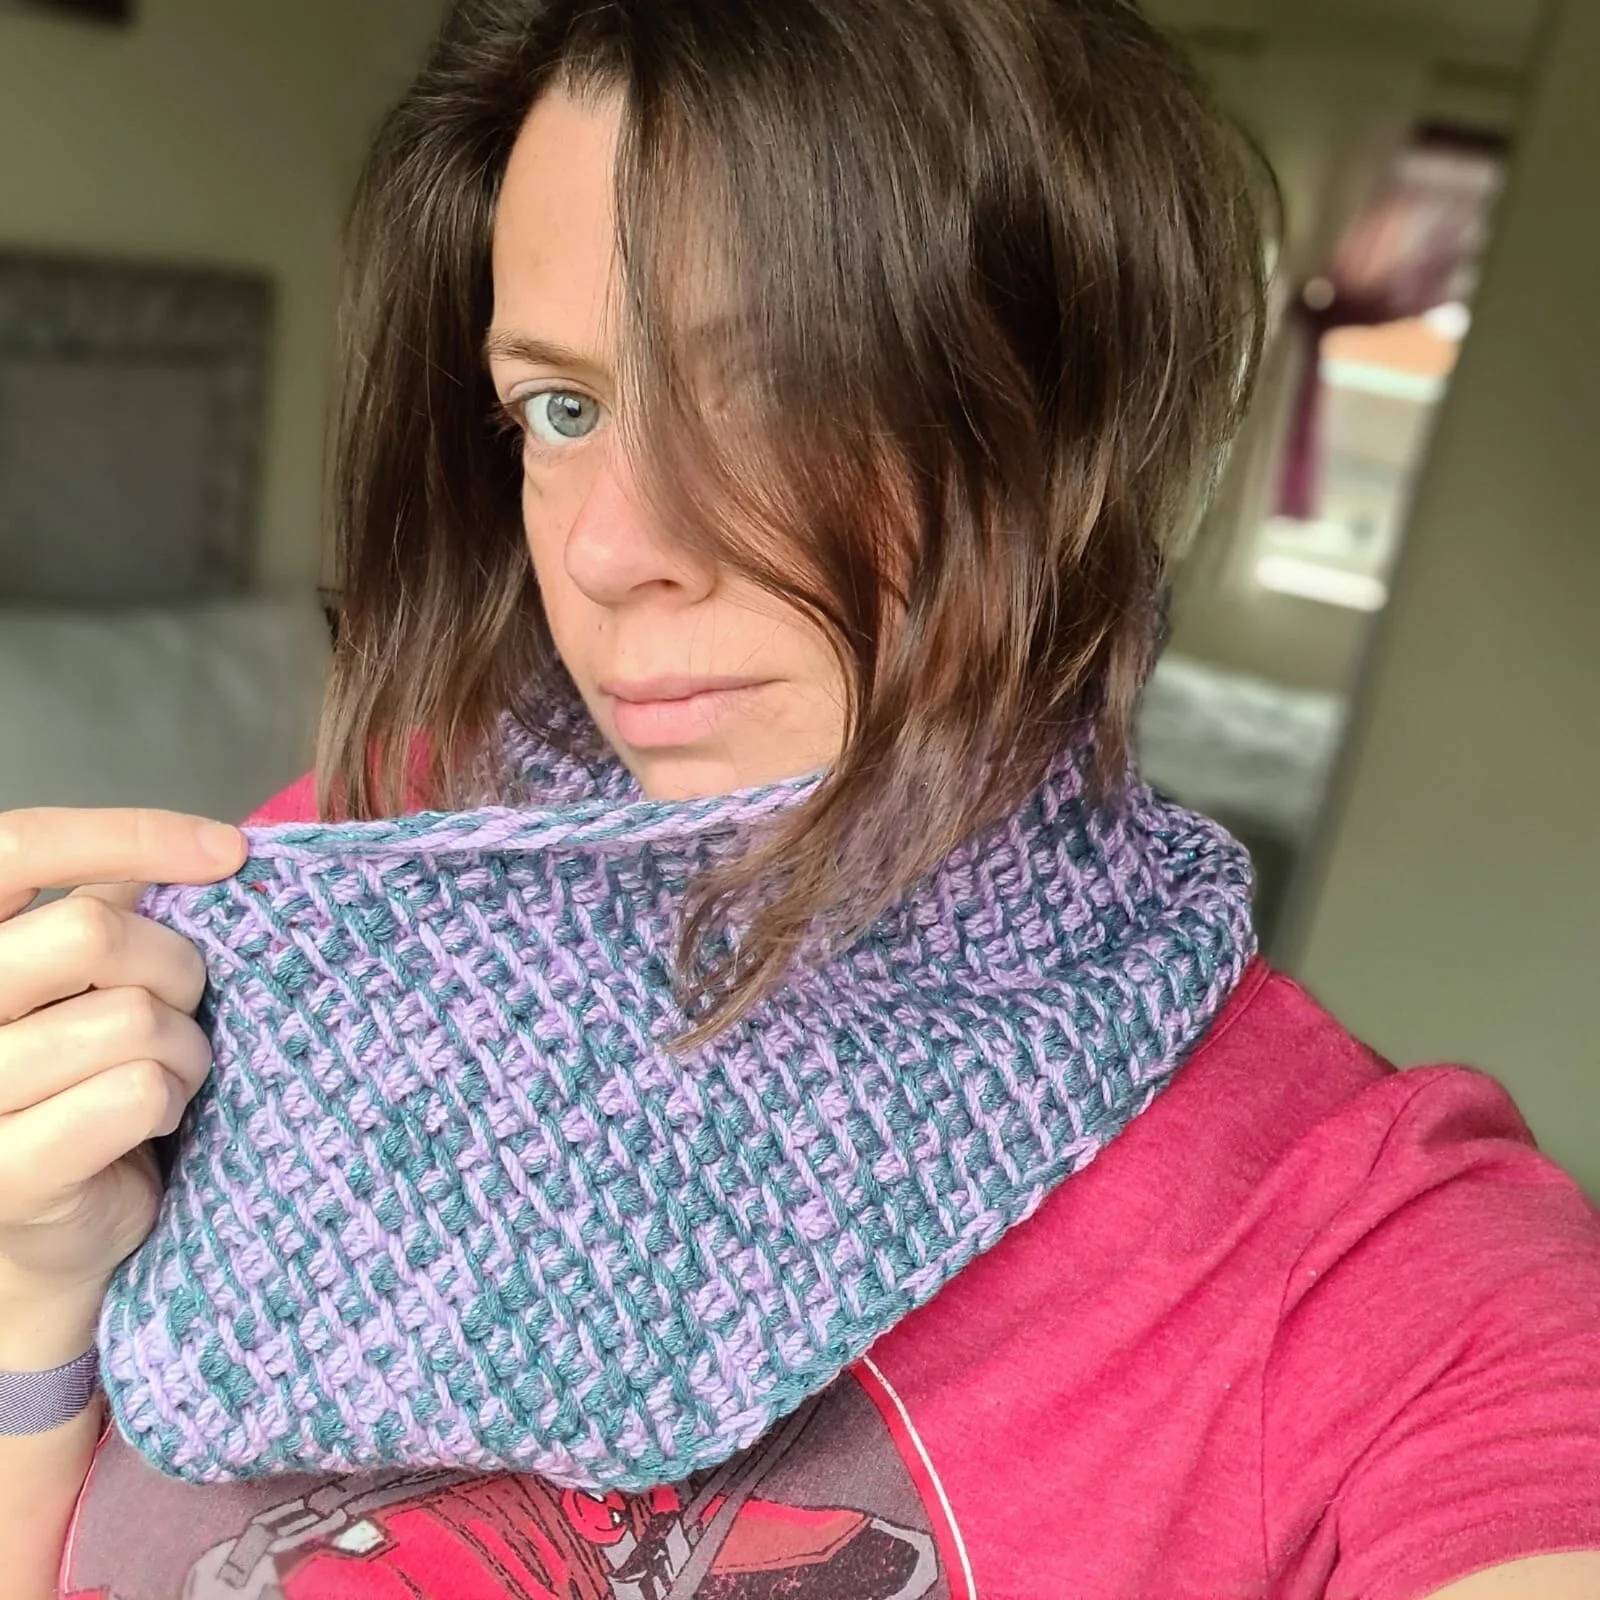
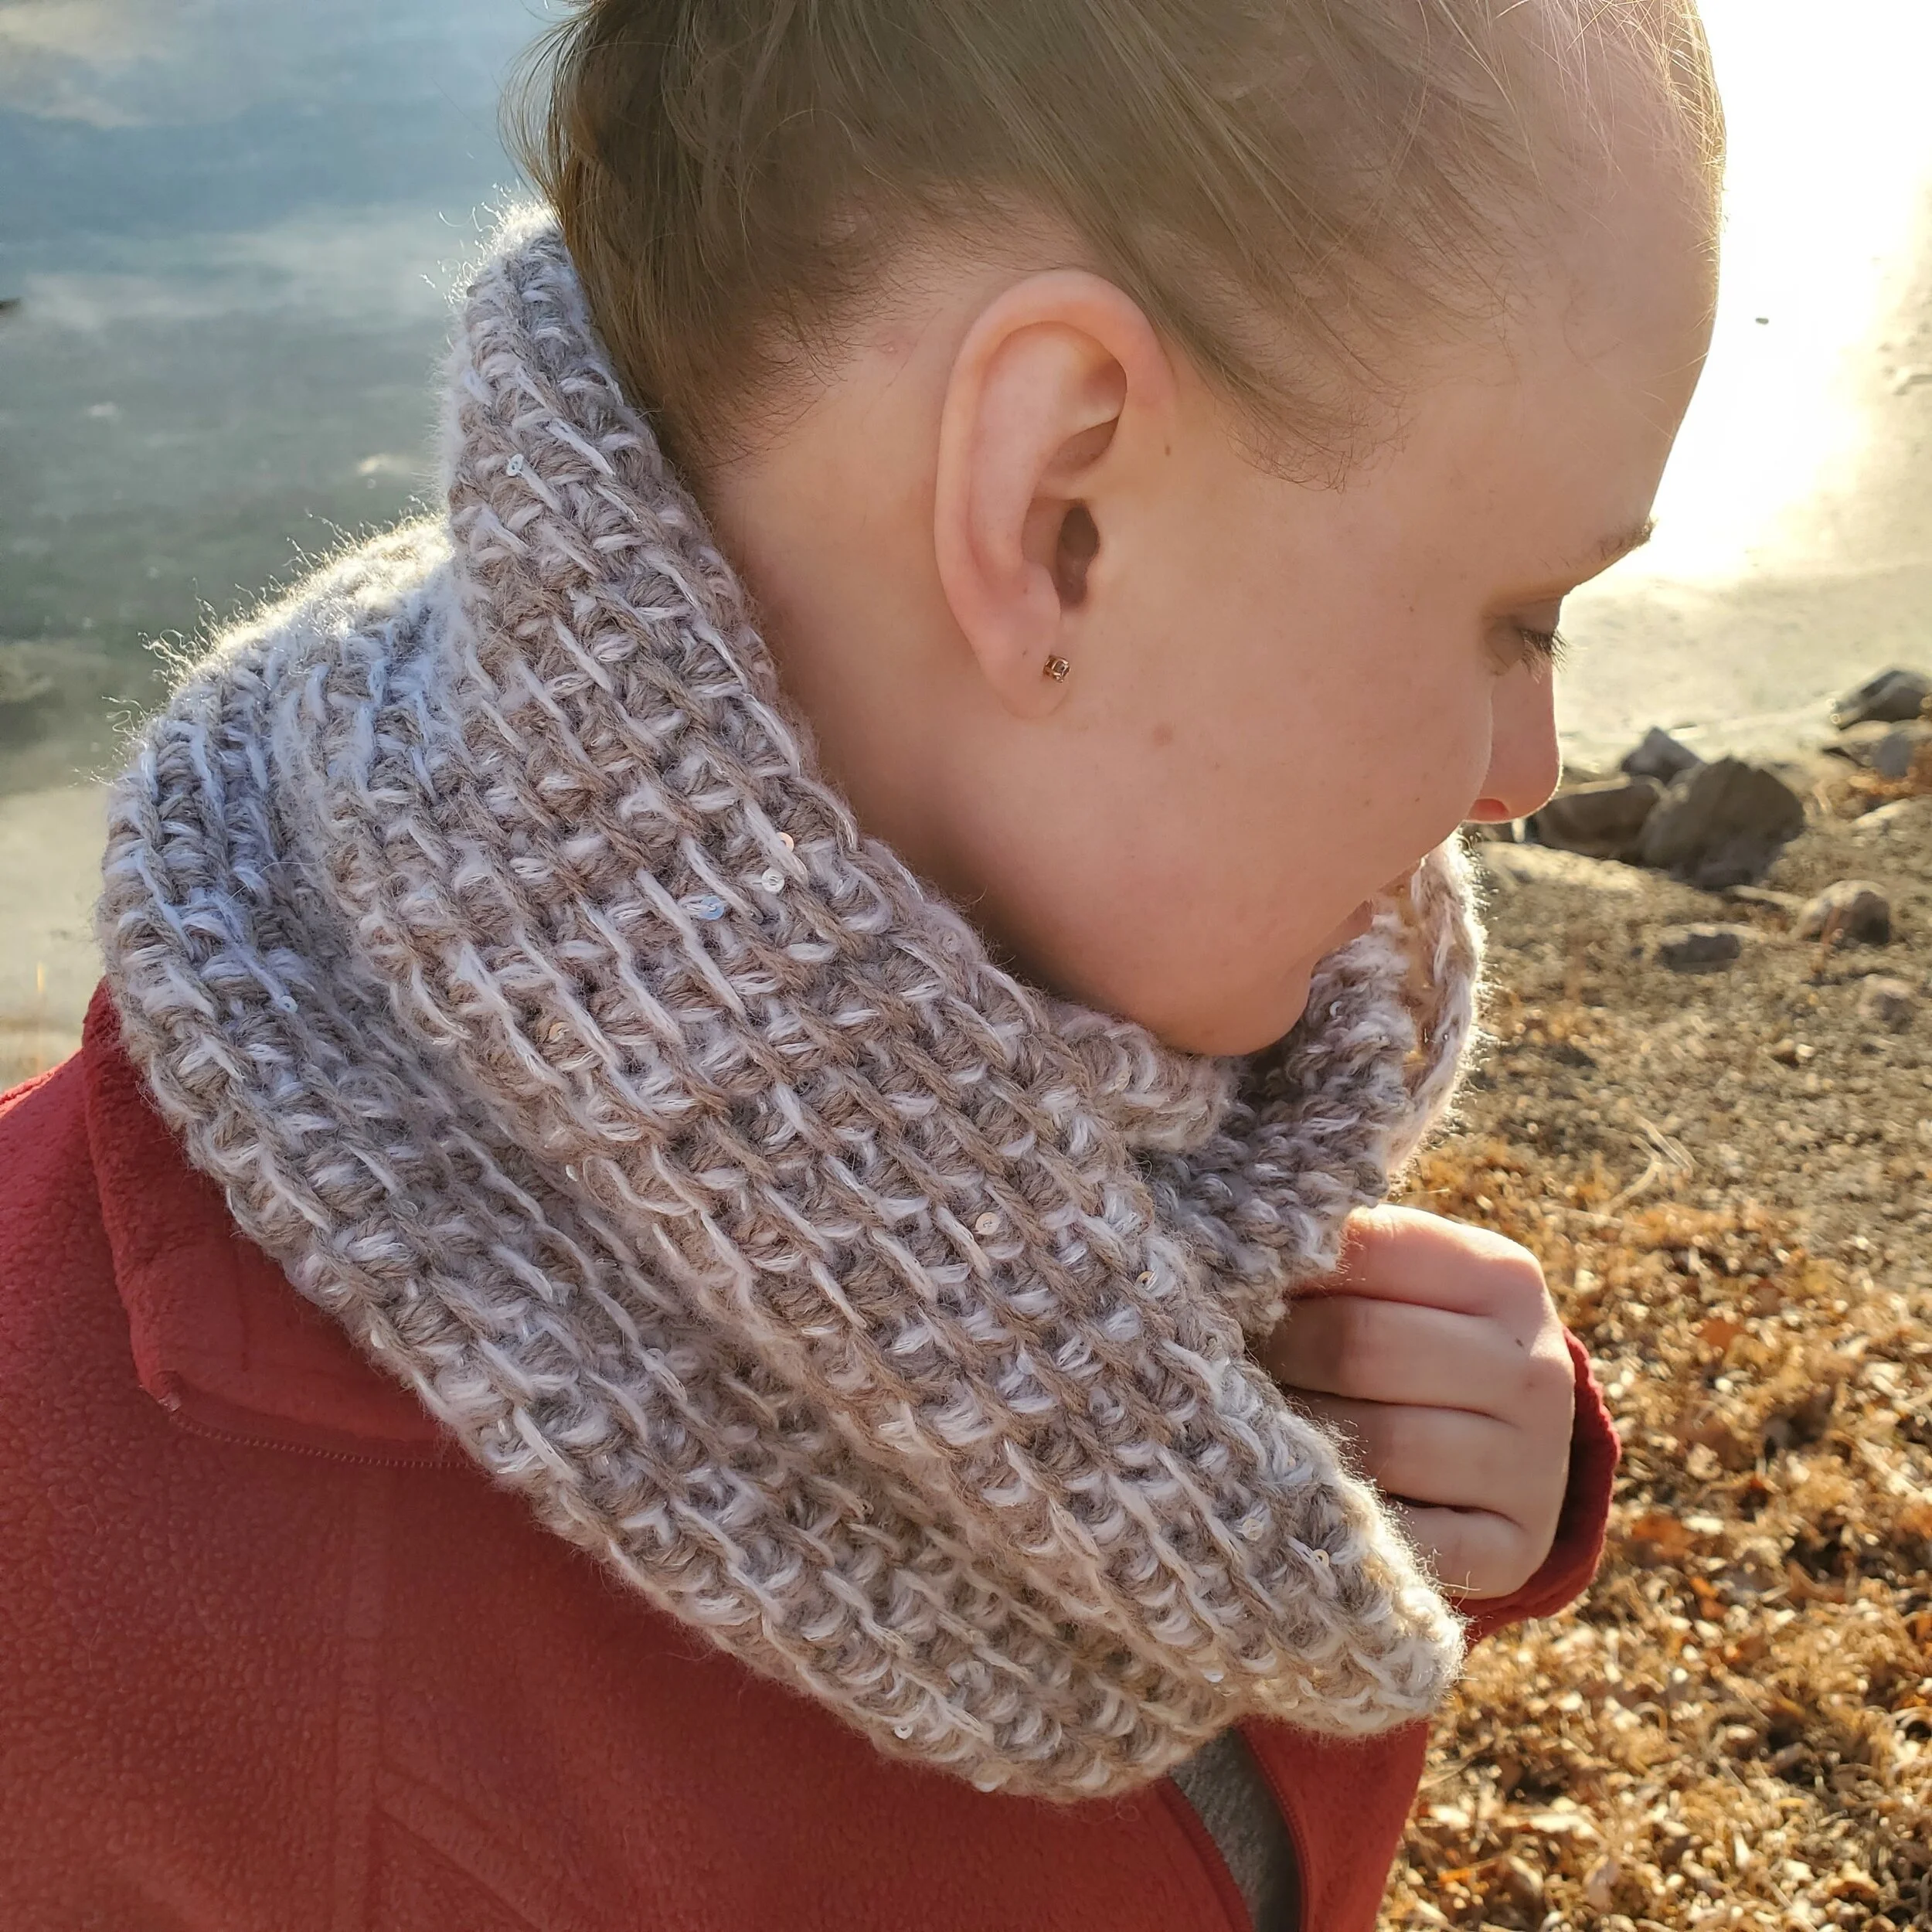
Hello friends! We’ve made it to the final pattern in the Winter Sparkle series - the Winter Sparkle Scarf!
Towards the end of November, when the days started to get real short and dark, I was sitting in my craft room one gloomy afternoon. I felt bleh, you know, lots I should be doing, no motivation to do anything. Yeah, that was me. Up on my shelf, I caught a glimpse of some Winter Nights yarn and thought, heck yes, gimme some sparkle!

The Winter Sparkle patterns are really fun, because they use two yarns held double to create a unique texture and colour look. The Winter Sparkle Scarf is a relaxing, meditative make that you can easily finish in a Netflix bing sesh or two. Match it up with the other patterns from the Winter Sparkle series, and you’ve got yourself a beautifully coordinated set!
I used Lion Brand Winter Nights for the sparkly yarn, and paired it with Lion Brand Touch of Alpaca. This gives the cowl warmth and comfort.
The pattern uses the Tunisian Simple Stitch, which is the basic Tunisian crochet stitch. It is the perfect stitch to introduce yourself to the fabulous world of Tunisian crochet!
Materials
Hook - US 10mm, or size needed to meet gauge, and a short cord attached. I love these interchangeable hooks and cords from WeCrochet.
Yarn - Lion Brand Touch of Alpaca (I used the colour Oxford Grey) and Lion Brand Winter Nights (I used the colour Chinchilly). You will need approx. 270 yds of each yarn. You may also combine any two worsted (4) weight yarns, or use a bulky (5) yarn on its own, as long as you can meet gauge.
Notions - scissors, tape measure, yarn needle, blocking pins and mat (optional).
Notes
Curling at the edges of Tunisian crochet is common. See the Finishing section below for blocking instructions to help tame the curl.
I’ve made the Infinity scarf version - see the Variations section at the end of the pattern for instructions on how to adjust the size and fit.
Sizing
Gauge - 4” = 8.5 sts x 8 rows in tss unblocked.
Finished measurements - approx. 8” wide x 64” long (prior to seaming, if making the infinity version).
Terminology/Abbreviations
This pattern uses standard US terms as detailed by the Craft Yarn Council:
Ch - chain
St(s) - stitch(es)
Sl st - slip stitch
Tss - Tunisian Simple Stitch (see HERE for an excellent tutorial!)
Lts - Last Tunisian Stitch (insert hook under both bars)
RetP - Return Pass (Ch 1, *yarn over, pull through 2 loops. Repeat from * until 1 loop remains on your hook)

Pattern Instructions
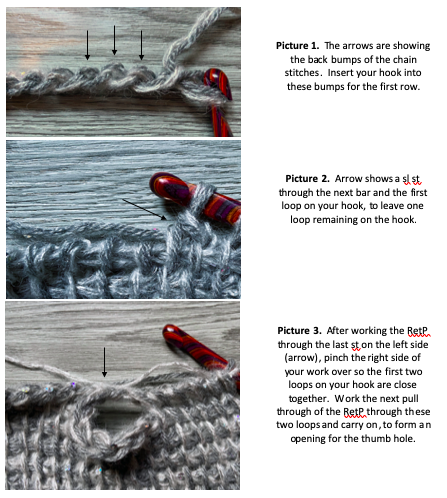
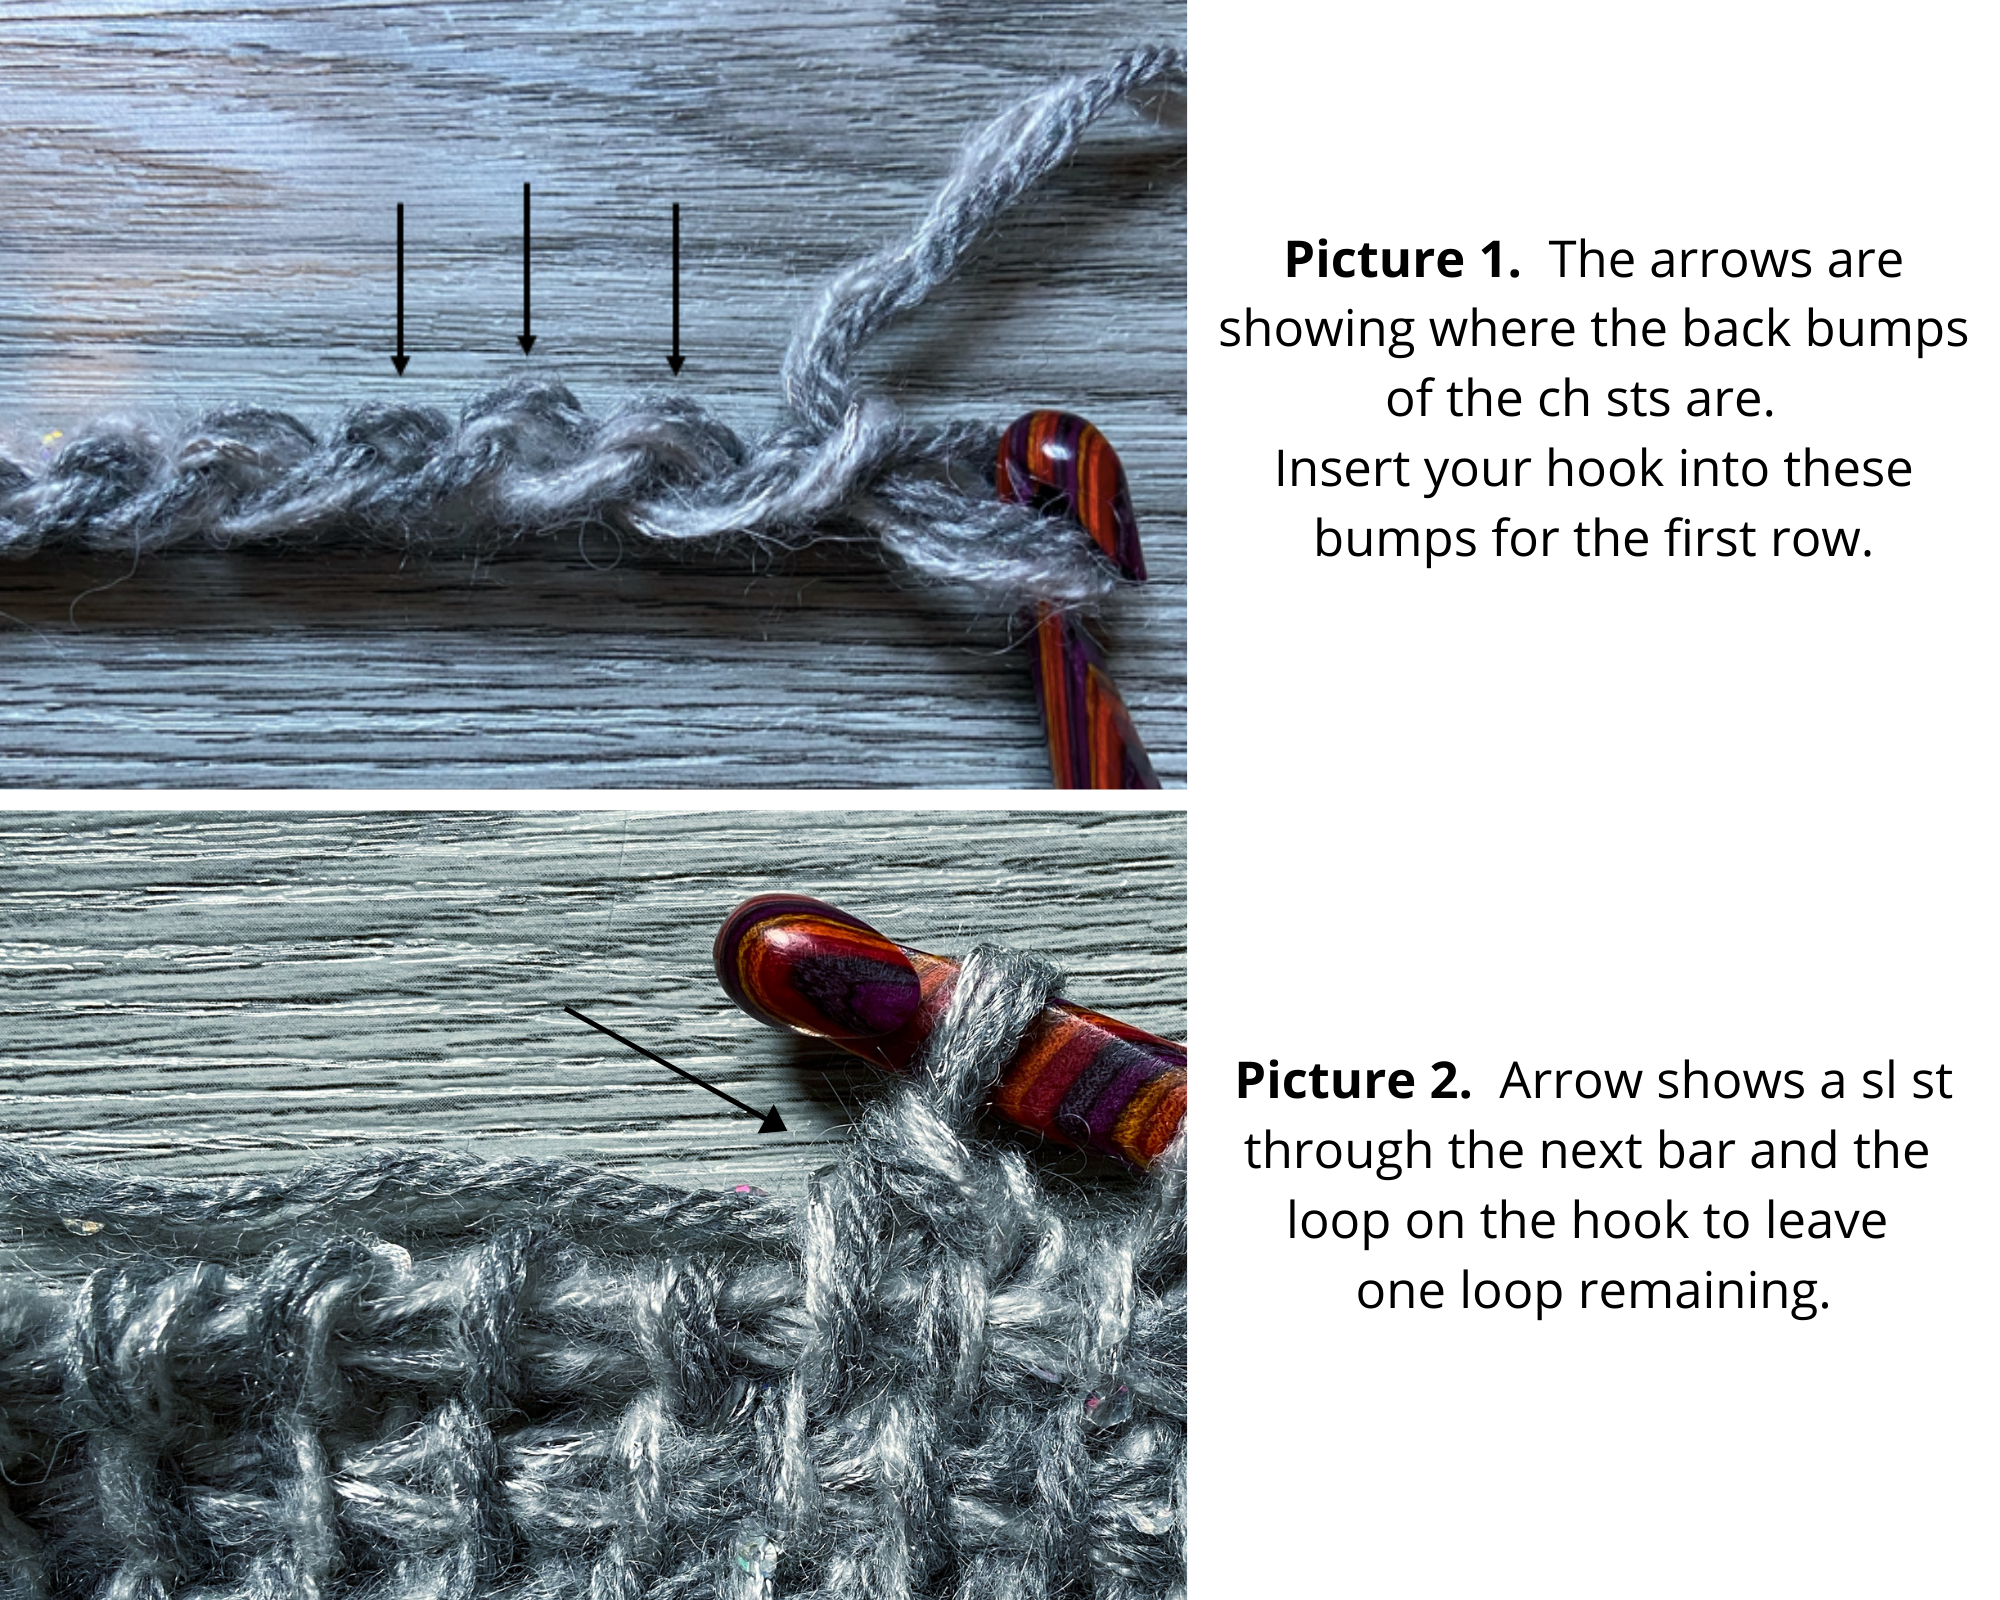
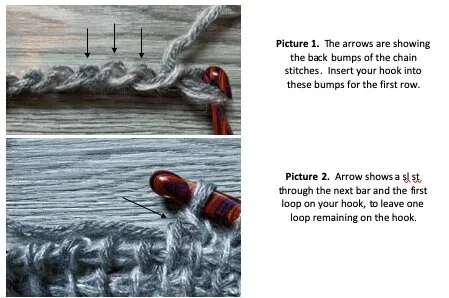
Row 1. Ch 18. Working in the back bumps (see Picture 1, below), pull up a loop in the second ch from hook, and each ch across. Work a RetP.
Row 2. Tss in each st across, Lts, RetP.
Repeat Row 2 until your work measures 64” long, or desired length.
Bind off row: Ch 1, *sl st next st (see Picture 2, below). Repeat from * until last st. Insert your hook as for Lts and pull up a loop. Yarn over and pull through both loops. Fasten off, leaving a 12” tail for seaming.
Finishing
Blocking: You may wish to steam block or wet block your work prior to seaming.
To steam block, pin your work down to mats or another flat surface, taking care not to stretch the fabric. Use an iron or steaming tool, gently pass over the whole piece, applying steam to help relax the fibres. Leave pinned until dry.
To wet block, soak your work in cool water for 15-20 mins. Gently squeeze out excess water (do not wring!) by laying it flat on a towel and rolling it up tight. Lay the wet piece down on mats or a towel, and secure the edges with pins. Take care not to stretch your work; you can use the finished measurements as a guide. Leave pinned until dry.
Seaming: Fold your work so that the two short edges are matched up. Seam the edges together using your preferred seaming method (I like to use the Mattress Stitch technique). Weave in all ends.
Variations
To make your scarf narrower or wider, start with fewer or more chain sts in Row 1.
To make your scarf shorter or longer, work as many rows as you wish to achieve desired length.
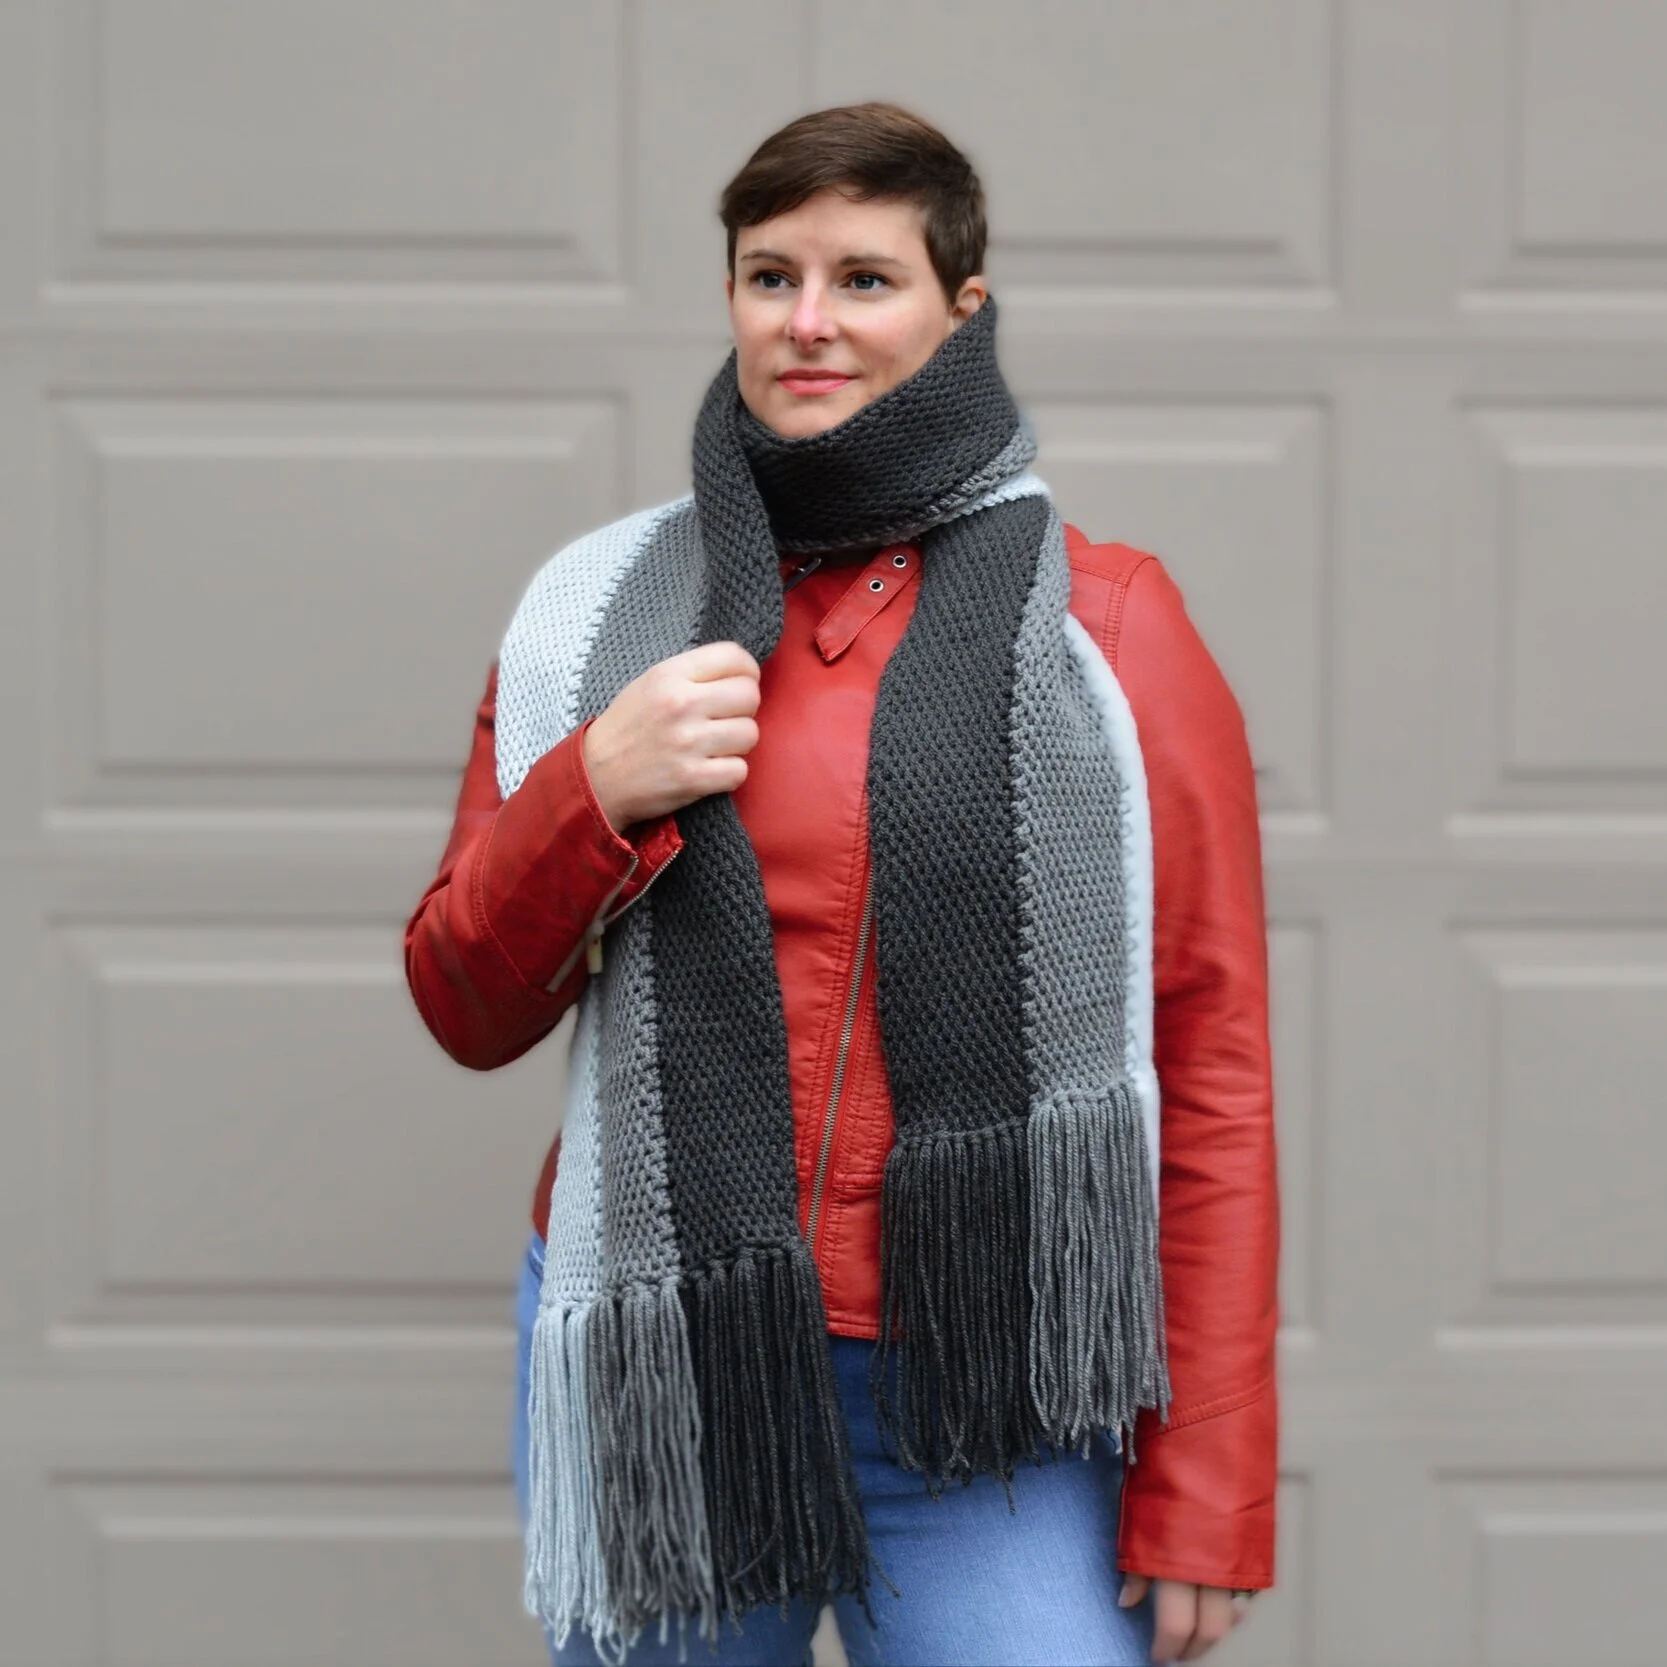
To make a traditional long scarf, simply omit the seaming to leave your scarf open. Add tassels or fringe to take it to the next level!
Congratulations on finishing your Winter Sparkle Scarf! I hope you have enjoyed this quick and easy Tunisian crochet pattern. Share your pics on social media and tag me @capital.crochet and use the hashtag #WinterSparkleScarf.
You may sell finished items made from this pattern, but please credit me as the designer by linking back to this blog post.
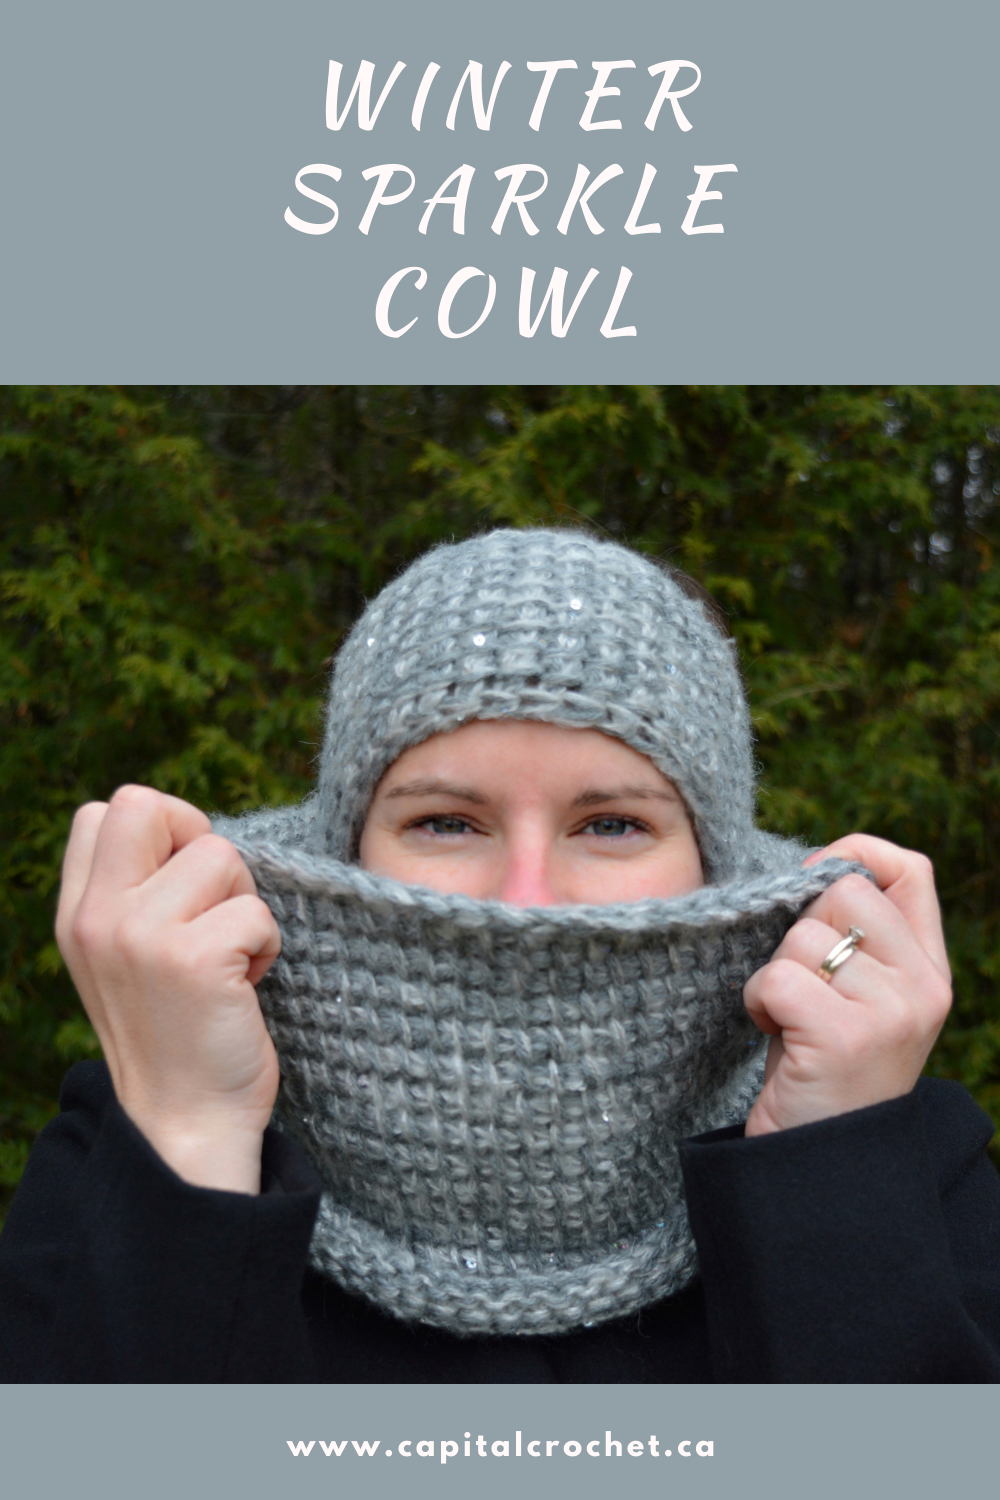
Thank you so much for your support! Make sure to check out the other Winter Sparkle patterns in the series: Ear Warmer, Cowl and Mitts!
If you enjoyed this pattern, I thought you might be interested these similar Tunisian crochet scarf patterns, too! Shown below are the Stashdown Scarf (available FREE on the blog!) and the Juliet Cowl, available in my pattern shop, or on Ravelry and Etsy!