
Stack Ridge Cowl - Scarftober 2021
/This post may contain affiliate links, meaning that if you click through and make a purchase, I may earn a small commission at no extra cost to you. This helps support my business and makes it possible for me to bring you free content.

What is Scarftober, you ask? It’s a celebration of all things scarfy, combined with the month of October. Last year, I shared a couple of free scarf patterns with this fun twist on words and you all loved them. Check out the Cozy Clusters Infinity Scarf, the Diamond Scarf and the Stashdown Scarf!
There are 5 Fridays this month, which means 5 cozy scarf patterns coming your way. I tried to include a good variety of shapes, textures and techniques, and most of them can be easily adjusted for size and fit. I can’t believe we’re already on week 4 with the Stack Ridge Scarf! Check out the other patterns in the series HERE.
This technique used in this pattern is kinda genius - and now I want to incorporate it in EVERYTHING I design! It creates gorgeous little ridges, and by working these ridges in different colour yarn, it really takes the design to the next level without making things too complicated.

We don’t have to stretch the imagination too much to see where the name of this pattern comes from - the ridges are literally stacked up to form a simple repeating pattern of beautiful colour and texture. The main body of this pattern can be easily adjusted to fit narrower or wider, as well as longer or shorter. The ribbing is added at the end, with a little bit of variation to make the never ending slip stitch rows more manageable. I love the look of slip stitch ribbing, but it can take forevvvvver!
If you can’t get started on this one right away, I understand. Makers always have tons on the go! Add this to your Ravelry queue and favourites, or save it to your Pinterest board so that you have quick and easy access once you’re ready to dive in!

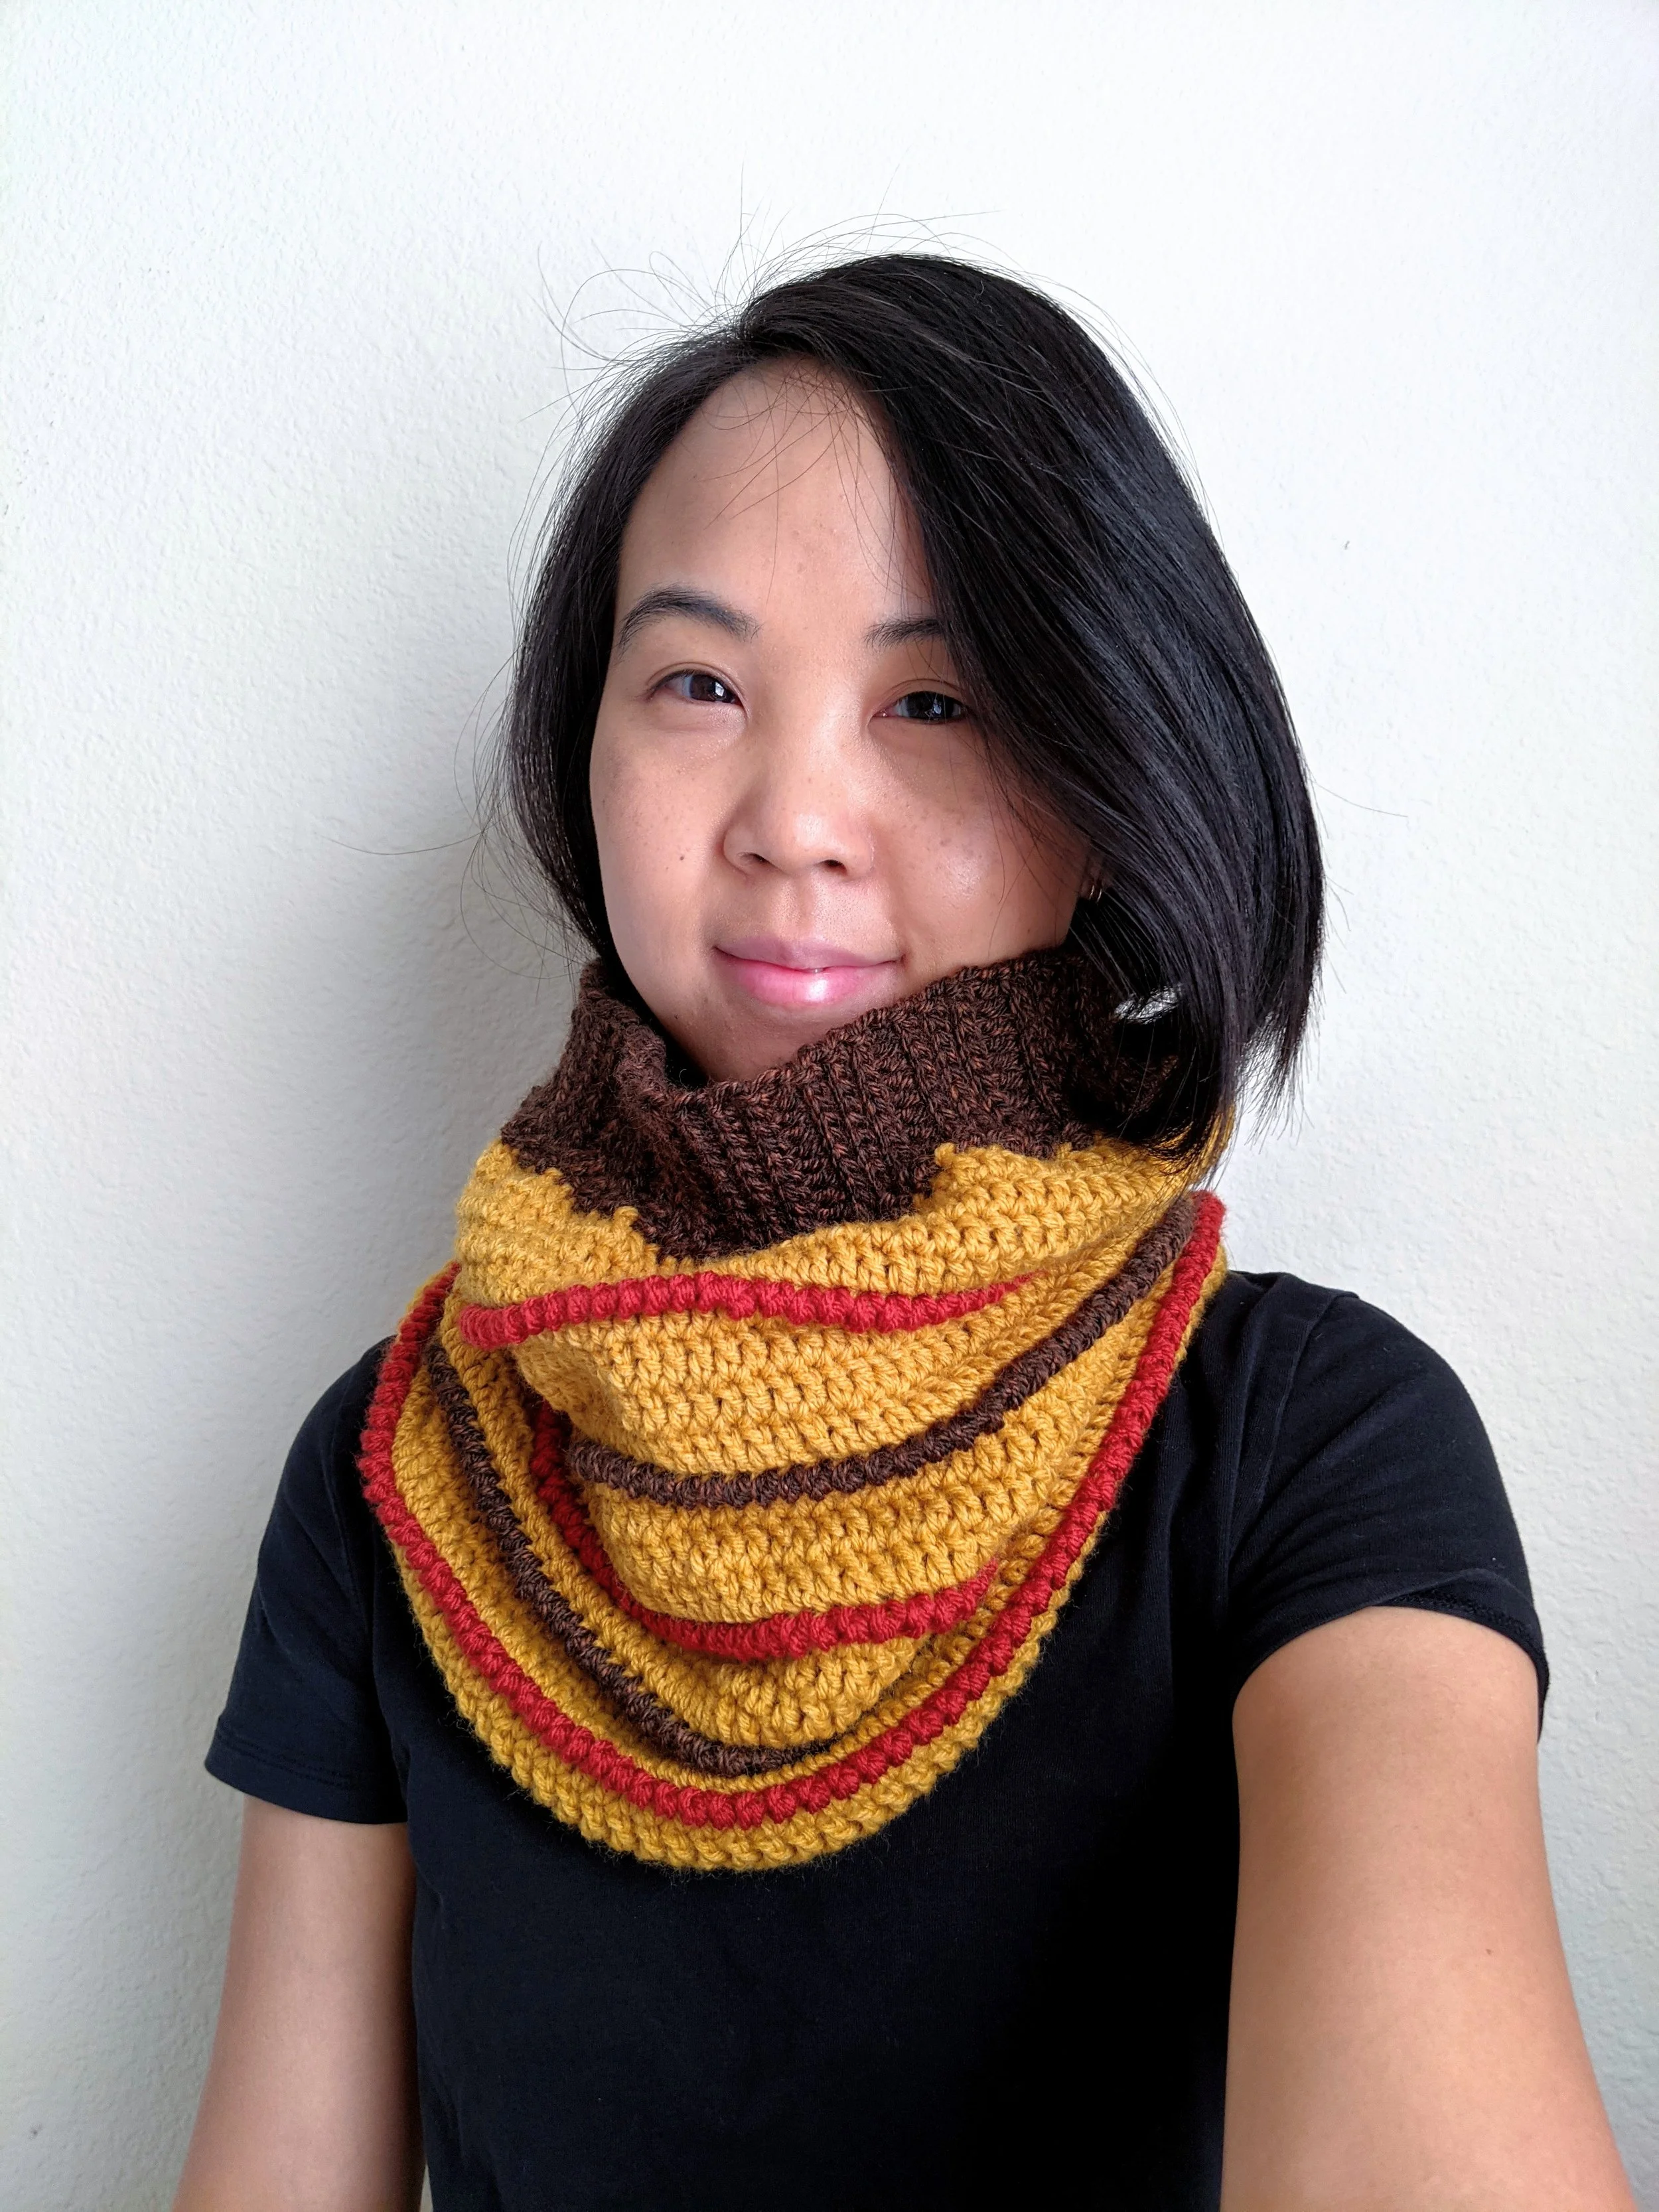
My testers totally rocked this one!! Above, Kat from @azkatban went with high contrast colours to really show off the texture. Below, Alice from @justkeepcrocheting used the most perfect combo of warm Fall colours and I am totally in love. Check out their Ravelry projects for details on yarns that they used!
Materials
Hook - US H/5mm crochet hook, or size needed to obtain gauge
Yarn - 2 colours of worsted (4) weight:
Colour A: 295 yds/270m
Colour B: 90 yds/82m
My sample uses Vidalana Celestial (A, grey, 2 skeins) and Audine Wools Chill (B, blue, 1 skein), both available from KnitCrate (use my affiliate code CAPITAL to save 20%!). Testers used various yarns such as Lion Brand Heartland, Lion Brand Pound of Love and Lion Brand Wool Ease
Notions - scissors, tape measure, yarn needle
Terminology/Abbreviations
This pattern uses standard US terms as detailed by the Craft Yarn Council, and helpful video tutorials are linked where appropriate:
Ch: chain
Dc: double crochet
Fdc: foundation double crochet VIDEO
FLO/BLO: working into the front loop only/back loop only VIDEO
Hdc: half double crochet
Rsc: reverse single crochet VIDEO
RS/WS: right side/wrong side
St(s): stitch(es)
Sl st: slip stitch
Sizing
Gauge (unblocked): 14 sts x 8 rounds = 4”/10cm in joined dc rounds (no turning)
Finished Measurements:
Width (Main Body): 14.5”/37cm
Width (measured along the Ribbing): 10.5”/27cm
Length: 14.5”/37cm
Notes
The Main Body of the cowl is worked with RS facing in joined rounds, no turning.
The Ribbing is added at the end, worked directly onto the last round of the Main Body - no seaming!
To switch colours, work the sl st to join with the new colour.
Ch 3 to start each round counts as a st; ch 1 to start Round 5 does not count as a st.
To adjust the length of your cowl, work fewer or more repeats of Rounds 2-6 until desired length is reached.
To adjust the width of the cowl, work fewer or more fdc sts to start, making sure to use a multiple of 6.
Pattern Instructions
MAIN BODY
Round 1. With A, fdc 102 sts, join with a sl st to first dc. < 102 dc >
Rounds 2-4. Ch 3, dc in each st around and join with a sl st to first dc. Switch to colour B at the end of round 4.
Round 5. With B, ch 1, rsc FLO of round 4. Join to first rsc and switch to colour A by sl st into the BLO of the first st of round 4.
Round 6. With A, Ch 3 and dc BLO in each st of round 4, join to first dc of the round.
Repeat rounds 2-6 four more times, then repeat rounds 2-4 once more (33 rounds total). Switch to B and proceed to Ribbing section below.
RIBBING
The ribbing is meant to tighten the top of the cowl up a little bit so it fits more snugly around the face/neck.
Row 1. With B still attached, ch 11 and turn. Hdc in second ch from hook and each remaining ch. Sl st into the same st as join on the Main Body, sl st into next st on the Main Body, and turn. < 10 hdc >
Row 2. Skip 2 sl sts on the Main Body, sl st BLO into next 10 sts and turn.
Row 3. Ch 1, sl st BLO into next 10 sts, sl st into next 2 sts on the Main Body and turn.
Row 4. Repeat Row 2.
Row 5. Repeat Row 3.
Row 6. Repeat Row 2.
Row 7. Ch 1, hdc BLO in each st, sl st into next 2 sts on the Main Body and turn.
Repeat rows 2-7 around, ending on a repeat of row 6. Sl st or sew the ends of the ribbing together, and fasten off.

Finishing
BLOCKING
Lay your cowl out flat and gently pass over it with a garment steamer (I like THIS ONE) or an iron on the steam setting. Take care not to touch the hot surface to your yarn - irons and yarn do not play well together! You may wish to pin the corners or the edges to keep the shape, but take care not to stretch your cowl out too much - you want to keep the stitches close so that they form a solid barrier to keep you warm!
After blocking, weave in all the yarn ends to the wrong side of your cowl. I always save this until the very end so that your stitches are free to settle without bunching or puckering during the blocking process.

Save this pattern to your Ravelry queue, or add a project to the pattern page!
Congratulations on finishing your Stack Ridge Cowl! I hope you enjoyed the meditative stitches and learning a cool new technique. Share your finished cowl on Instagram using the hashtags #StackRidgeCowl and #CapitalCrochet, and tag me, @capital.crochet!
You may sell finished items made from this pattern, but please credit me as the designer by linking back to this blog post. Please do not use my pictures in your listings, and please do not share, reproduce or repost the content from this page anywhere else on the internet. Please DO share the link to this page!
Thank you so much for your support! If you’d like to be the first to know about new patterns and other blog posts, make sure to subscribe to my newsletter below.
If you love scarves as much as I do, check out some of the other patterns in my scarf repertoire! For free patterns, you’ll love the Diamond Scarf (mustard) and the Cozy Clusters Infinity Scarf (blues) both of which were from 2020’s Scarftober series. If ad-free, paid patterns are more your jam, may I suggest the Coniferous Cowl (blue green with ALLLLLL the fringe!) or the Rachel Super Scarf (neutrals). Click on your favourite below to check out the pattern!
Don’t forget, there are more cozy scarves coming up all this month, so make sure to check back each Friday for a new pattern.


All photos in this blog post are property of Capital Crochet and are used with permission.
