Cold Front Scarf - Scarftober 2021
/
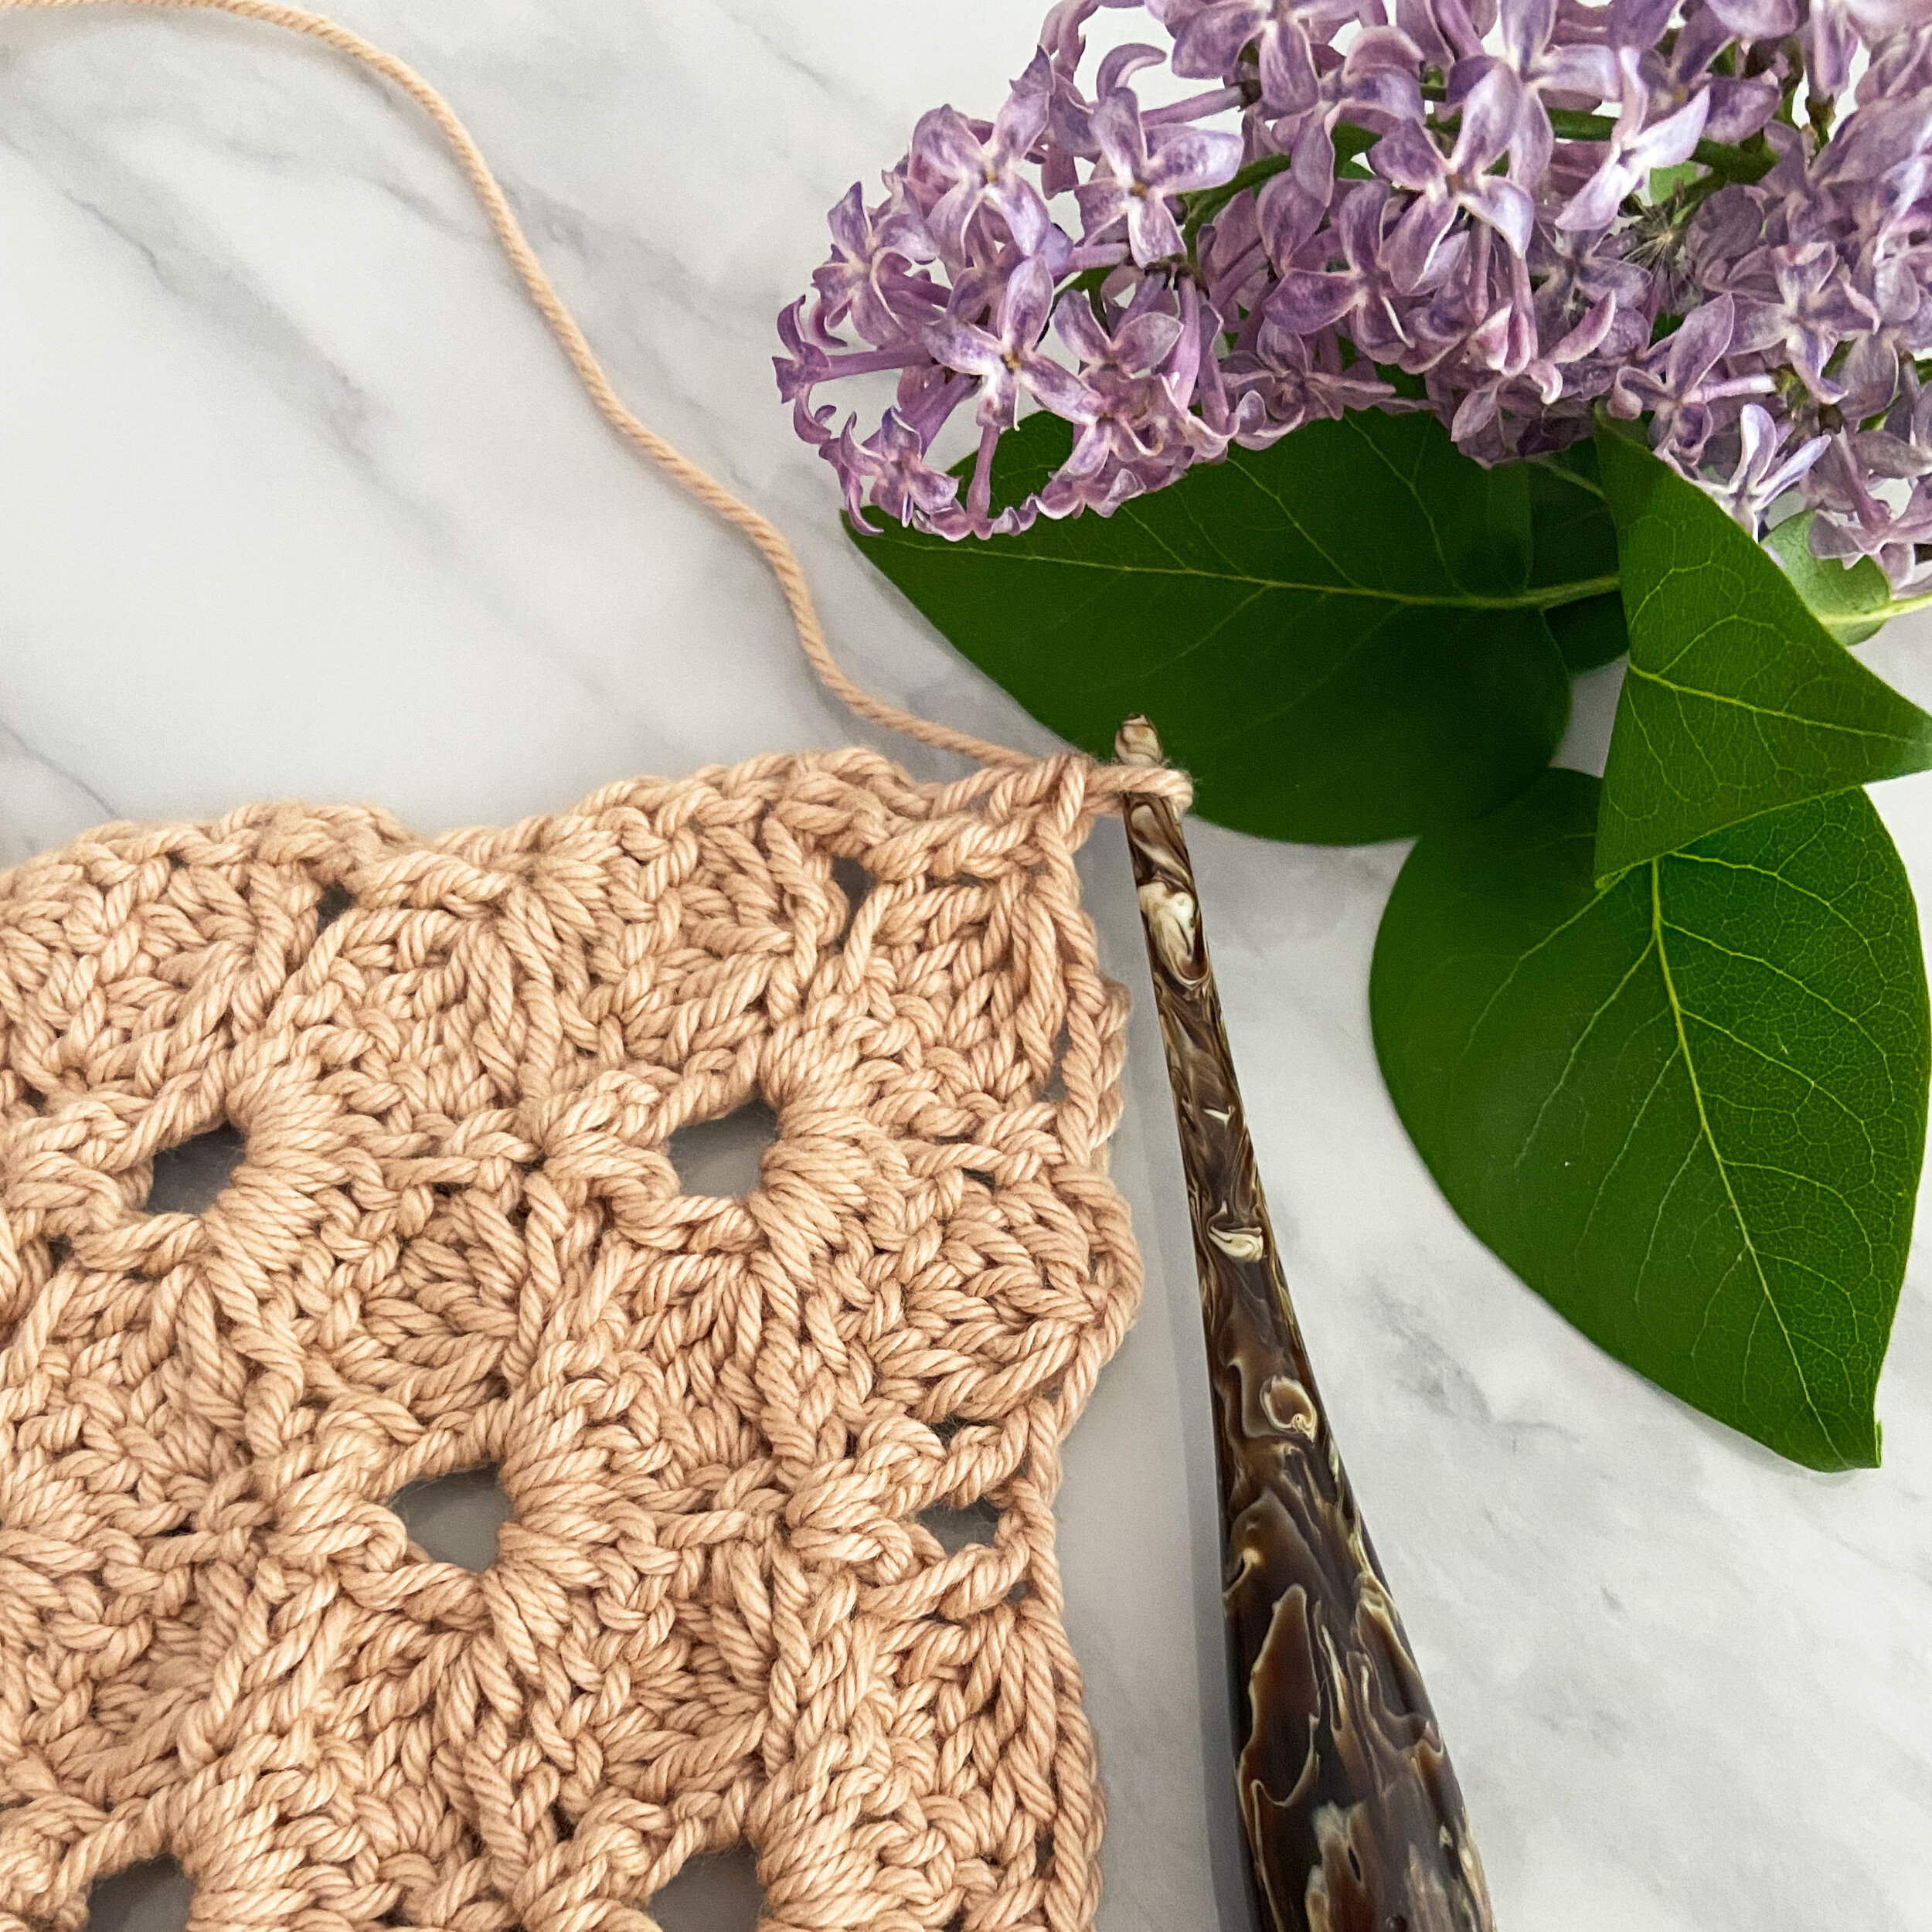
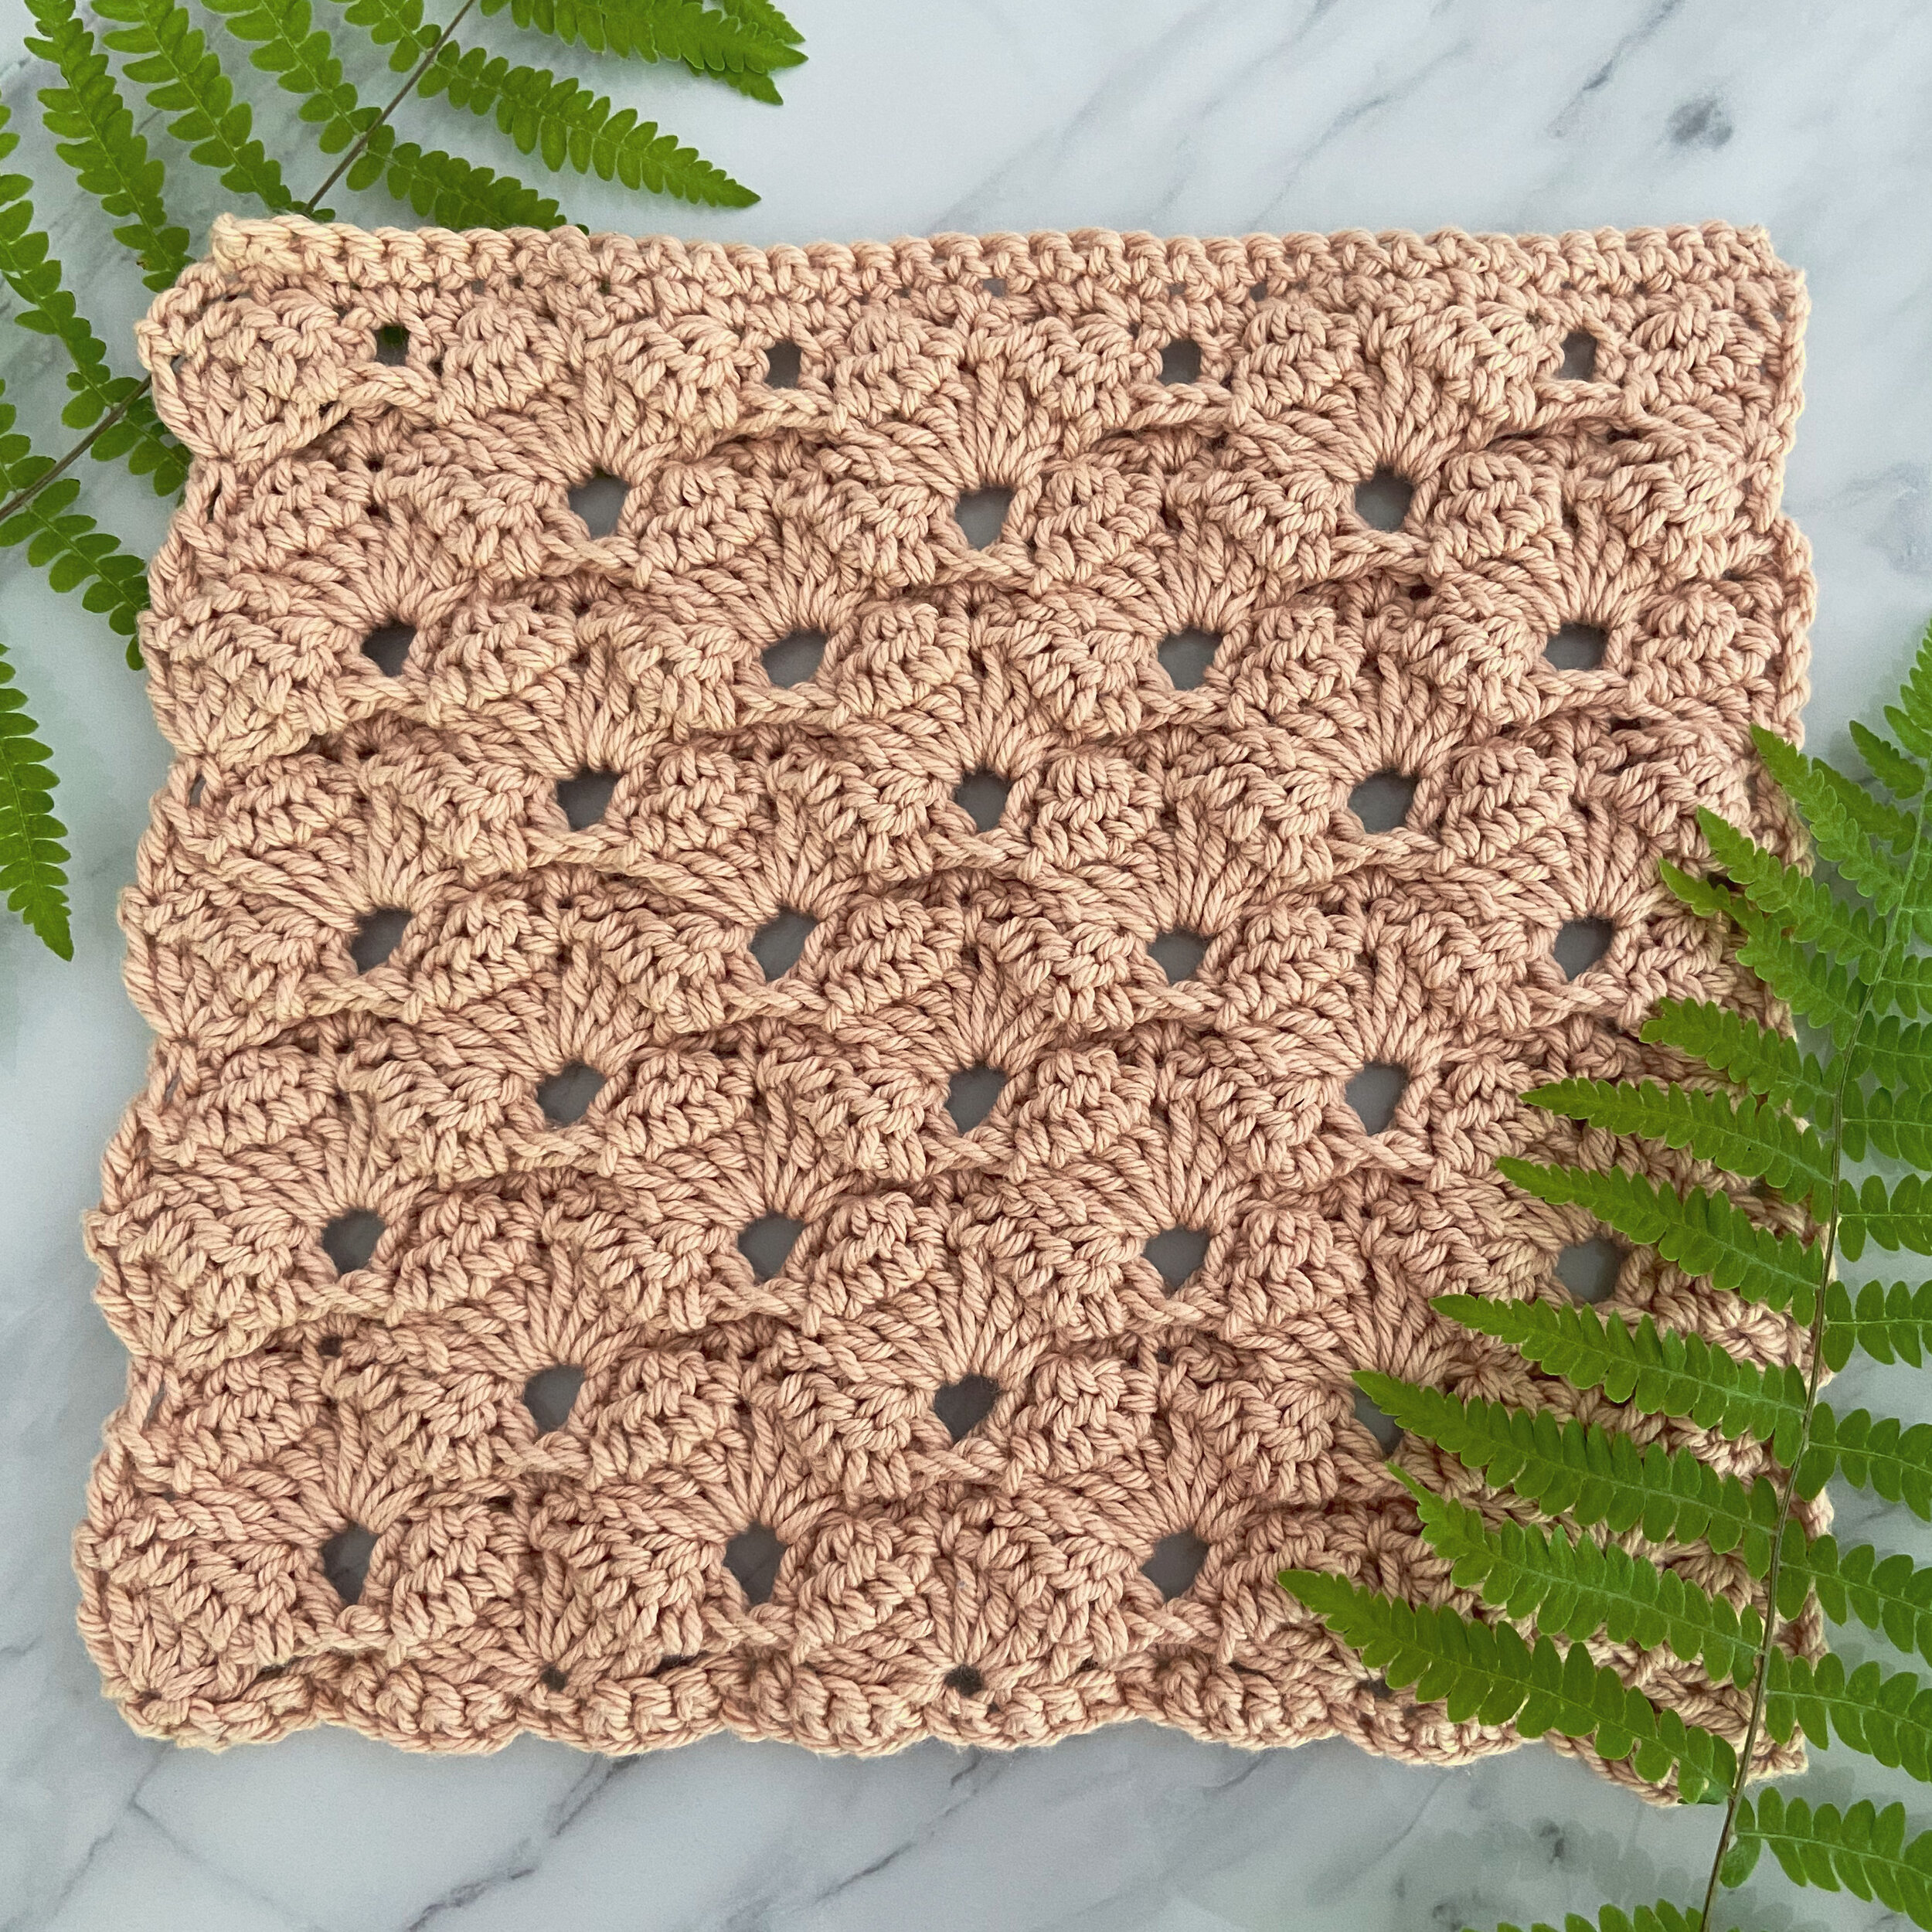
Say hello to the next pattern in the Scarftober series, the Cold Front Scarf!
Read MoreSay hello to the next pattern in the Scarftober series, the Cold Front Scarf!
Read MoreScarftober, Round 1! The Bedford Bandana Cowl is the first pattern in the 2021 Scarftober Series here at Capital Crochet.
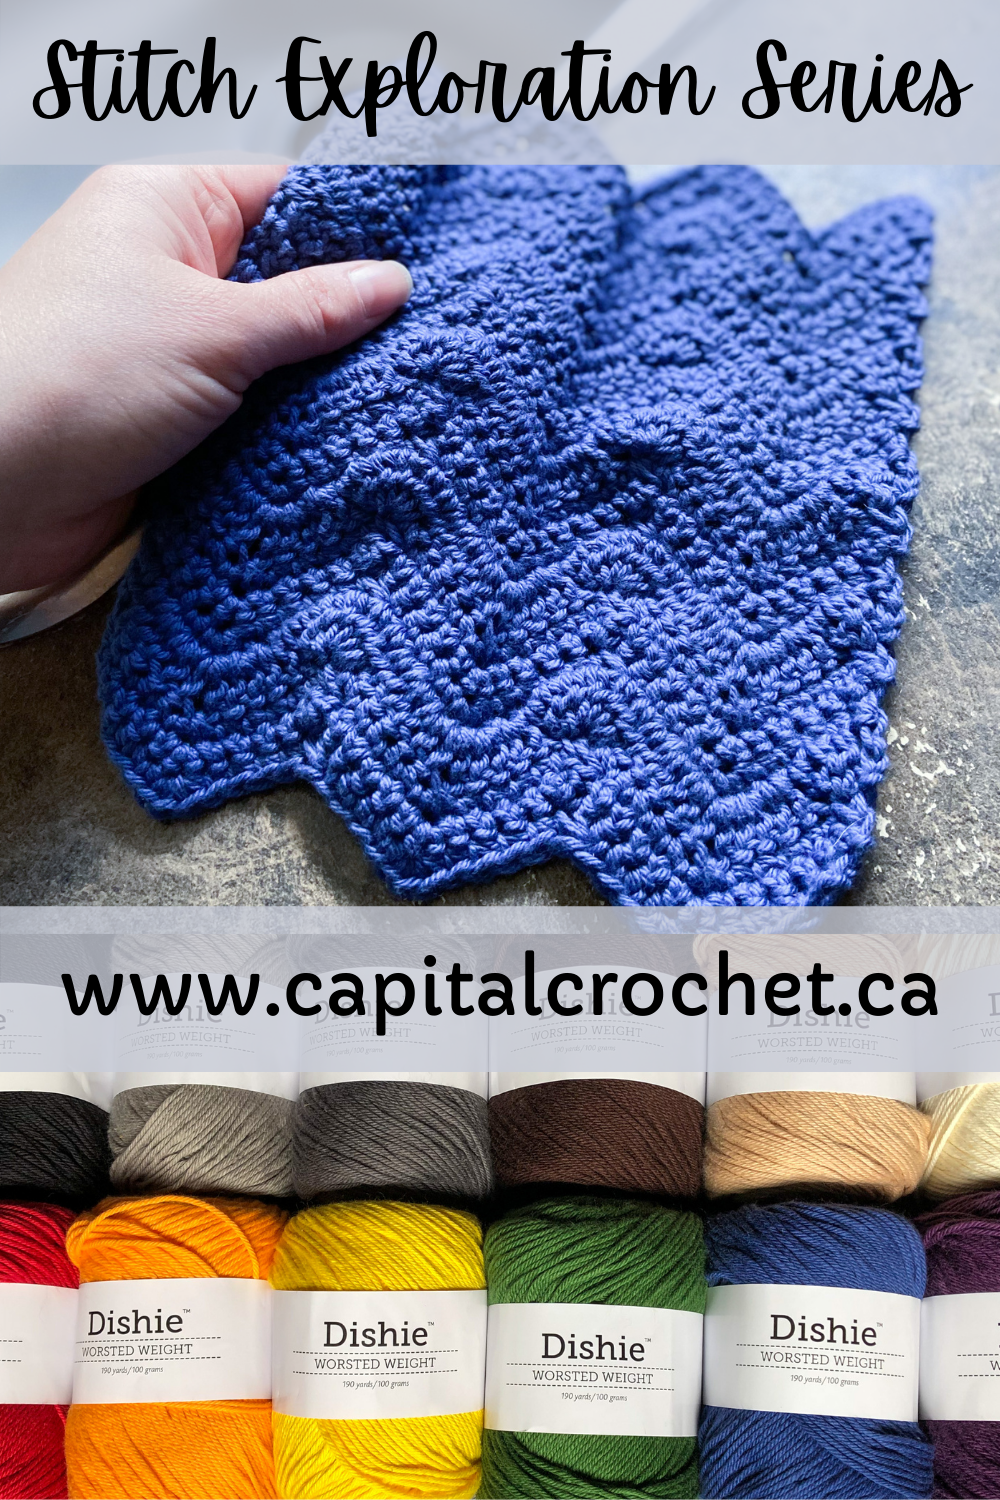
Read MoreAre there any vinyl fans out there? August’s Stitch Exploration Series pattern is heavily inspired by one of my all-time favourite albums - can you guess which one it is? Read on to find out, and grab your Dishie yarn from WeCrochet in the colours of your favourite record!
Read MoreSay hello to the Coffee Bean Dishcloth! Squeaking in at that last moment, July’s Stitch Exploration Series pattern has us matching texture and colour to that glorious, delicious, energy-boosting liquid that for many of us is a big part of our day. Grab your Dishie yarn from WeCrochet and a fresh cuppa and join in on the caffeinated fun!
Read MoreIt’s the Summer wrap of your dreams!
Read MoreThis post may contain affiliate links, meaning that if you click through and make a purchase, I earn a small commission at no extra cost to you. This helps support my business and makes it possible for me to bring you free content.
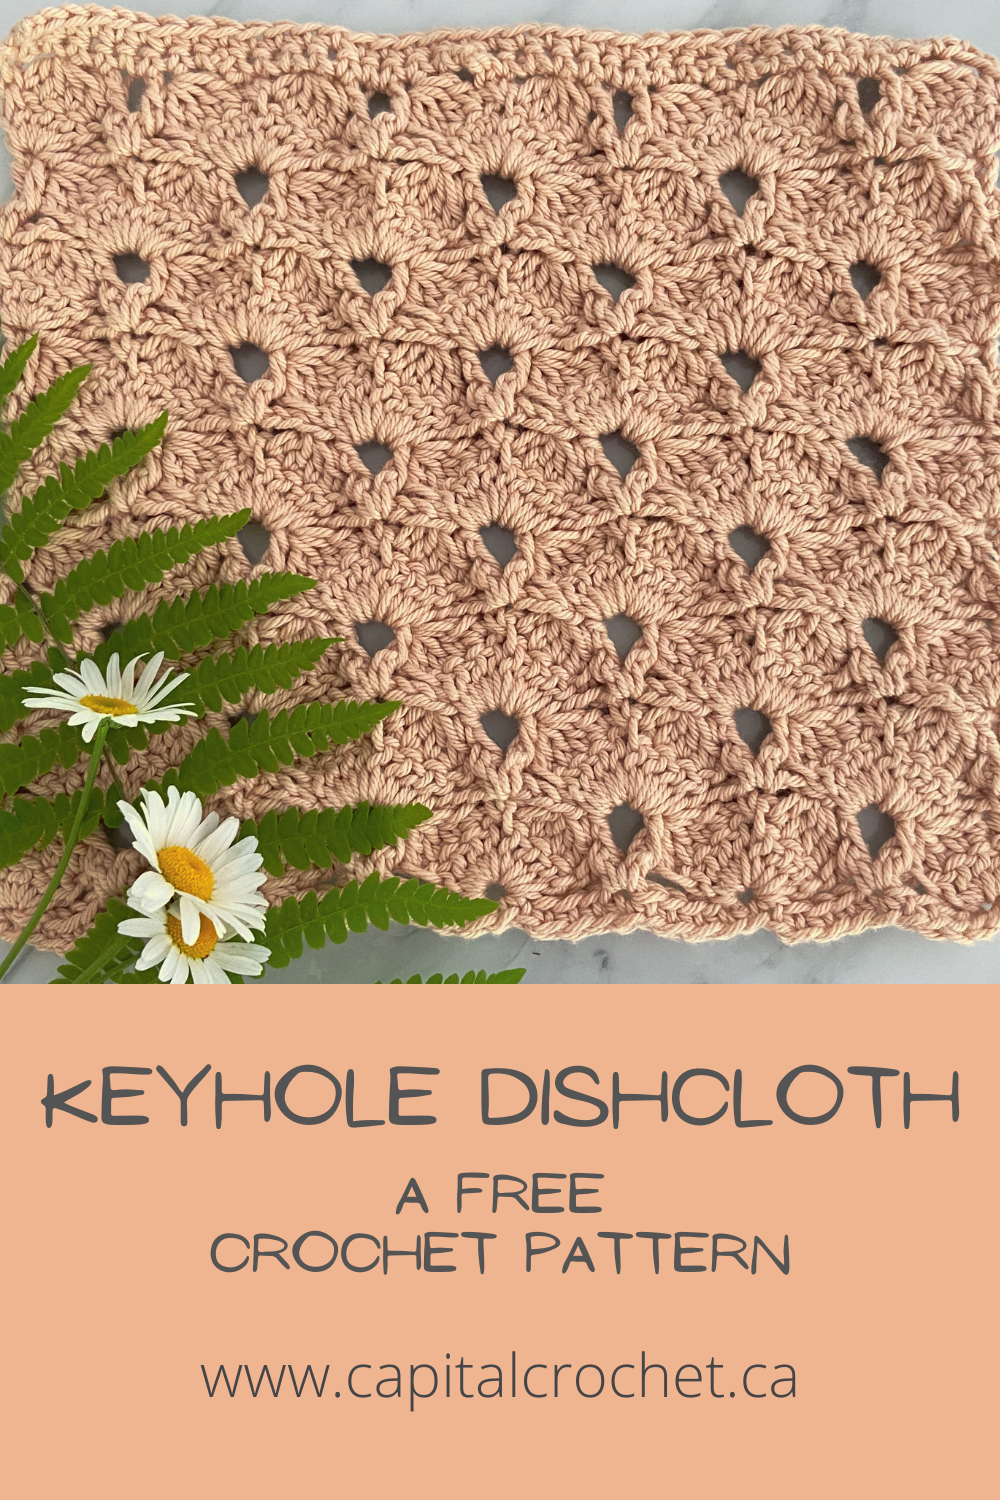
When was the last time you challenged yourself in your craft? For me, it was this month’s Stitch Exploration Series pattern, the Keyhole Dishcloth. I was flipping through some stitch books, and saw this gorgeous texture popping up from the page. I usually admire these complicated-looking patterns for a few moments, then move on to something that seems more my speed. This time, I said to myself, Self, you are not gonna pass this one by.
The funny thing is, this wasn’t even supposed to be June’s pattern! I had already started work on another pattern that I had planned for this month, but once I got started on this super unique texture and saw how easy it was, it pretty much just fell off my hook and I felt like it needed to be out in the world asap.
If you’re not familiar with my Stitch Exploration Series, here are the details: Each month, I post a new FREE dishcloth pattern, and can you believe it, we’re already halfway through the year! This is the sixth pattern in the series - check out the others HERE.
This series is all about testing out new skills without the pressure of having to create a large project like a garment. When I’m designing, I find that I tend to choose familiar stitches, which can limit my creativity. I’ve chosen dishcloths because they’re small enough to finish up quickly, but large enough to get a general idea of the fabric the stitch pattern will create!
This month, we are combining several techniques to create “keyholes” in the fabric. I wouldn’t normally choose a pattern that creates holes or a lacy fabric, but this one was too pretty to pass up. And the texture of the rest of the pattern combined with the cotton yarn is perfect for getting your scrub on with those stubborn dishes.
For this series, I’ve chosen a beautiful, durable cotton yarn, Dishie from WeCrochet. It comes in lots of fun colours (30 solids in total, plus there are also Dishie Twist and Dishie Multi!), and it is really nice to work with. It’s also really durable, making it great for dishcloths! In my experience so far, this yarn really holds up well during tough scrubbing.

So far, my favourite patterns in the series are the Pollyanna Dishcloth (green) and the Mulberry Dishcloth (purple), but this month’s pattern might just bump one of these from the top spot! Do you have a favourite so far?
Hook - US G/4mm, or size needed to meet gauge.
Yarn - WeCrochet Dishie, 100% cotton, 190 yds (174m)/100g (3.5oz) per skein. I used approx. 103 yds (94m) of the colourway Linen.
Notions - scissors, tape measure, yarn needle.
Ch 1 to start some rows do not count as sts.
Ch 3 to start some rows DOES count as a dc.
Gauge is not critical for this project, however, if yardage is a concern, you should aim to meet it as closely as possible. No one will judge an extra half inch on your dishcloth!
Generally, I do not block cotton washcloths, because they’re just going to get wet anyway. If you’re making for gifting, or just want to straighten things out, feel free to block as you see fit.
Gauge is a little bit tricky for this pattern. Luckily, it is not super important, so very generally:
Stitch gauge: there are approx. 2”/5cm between the edges of the “keyholes.”
Row gauge: measure height from Row 2-11 of the pattern. This should measure approx. 4”/10cm tall.
Finished measurements - approx. 9.5” wide x 8.5” tall / 24cm wide x 22cm tall.
This pattern uses standard US terms as detailed by the Craft Yarn Council:
Ch - chain
Chsp - chain space
Dc - double crochet
Dc4tog - double crochet 4 sts together as one (see Special Stitches section)
Fpdc - front post double crochet
Sc - single crochet
St(s) - stitch(es)
[ ] - work sts within brackets into one st
* and ** - repeat instructions as directed
Dc4tog: *Yarn over, insert hook into next st and pull up a loop. Yarn over and pull through first two loops on hook. Repeat from * three more times (5 loops on hook). Yarn over and pull through all 5 loops to finish the stitch. See diagram below for an example.

Row 1 (RS). Ch 42 and turn. Starting in the second ch from hook, sc in each ch across and turn. < 41 sc >
Row 2 (WS). Ch 3, 4dc in the same st. *Skip 4 sts, [dc, ch 1, dc] in next st. Skip 4 sts, [4dc, ch 1, 4dc] in next st. Repeat from * until 10 sts remain. Skip 4 sts, [dc, ch 1, dc] in next st, skip 4 sts, 5dc in last st and turn.
Row 3. Ch 1, sc in first st. *Ch 3, dc4tog over next 4 dc. Fpdc, ch 1 and skip the ch below, fpdc. Dc4tog over next 4 dc, ch 3,** sc in chsp. Repeat from * across, ending last repeat at ** (there should be 1 st remaining). Sc in last st and turn.
Row 4. Ch 3, dc in same st. *Skip ch-3 and next 2 dc, [4dc, ch 1, 4 dc] in next chsp. Skip next 2 dc and ch-3,** [dc, ch 1, dc] in next st. Repeat from * across, ending last repeat at ** (there should be 1 st remaining). 2dc in last st and turn.
Row 5. Ch 3, fpdc next st. *Dc4tog over next 4 dc, ch 3 and sc in chsp. Ch 3, dc4tog over next 4 dc, fpdc,** ch 1 and skip the ch below, fpdc. Repeat from * across, ending last repeat at ** (there should be 1 st remaining). Dc in last st and turn.
Row 6. Ch 3, 4dc in same st. *Skip next 2 dc and ch-3, [dc, ch 1, dc] in next st. Skip ch-3 and next 2 dc,** [4dc, ch 1, 4dc] in next chsp. Repeat from * across, ending last repeat at ** (there should be 1 st remaining). 5dc in last st and turn.
Repeat Rows 3 to 6 three more times, then repeat Row 3 once more.
Second Last Row: Ch 1, sc evenly across the row and turn. The number of sts is approx. 41, however, if you find that this is too many, work as many sts evenly so it will lay flat for you (through trial and error, I ended up with 38 sc).
Last Row: Ch 1, sc in each st across.
Fasten off and weave in the ends.
To make your dishcloth narrower or wider, work fewer or more chain sts in Row 1, starting with a multiple of 10+2. Each increment of 10 sts will give you approximately 2”/5cm, or one additional "keyhole.”
To make your dishcloth shorter or longer, work fewer or more full repeats of Rows 3 to 6. Each full repeat will give you just under 2”/5cm of height.
Keep in mind that any alterations to the stitch or row counts will adjust the yardage required.

Save this pattern to your Ravelry queue, or add a project to the pattern page!
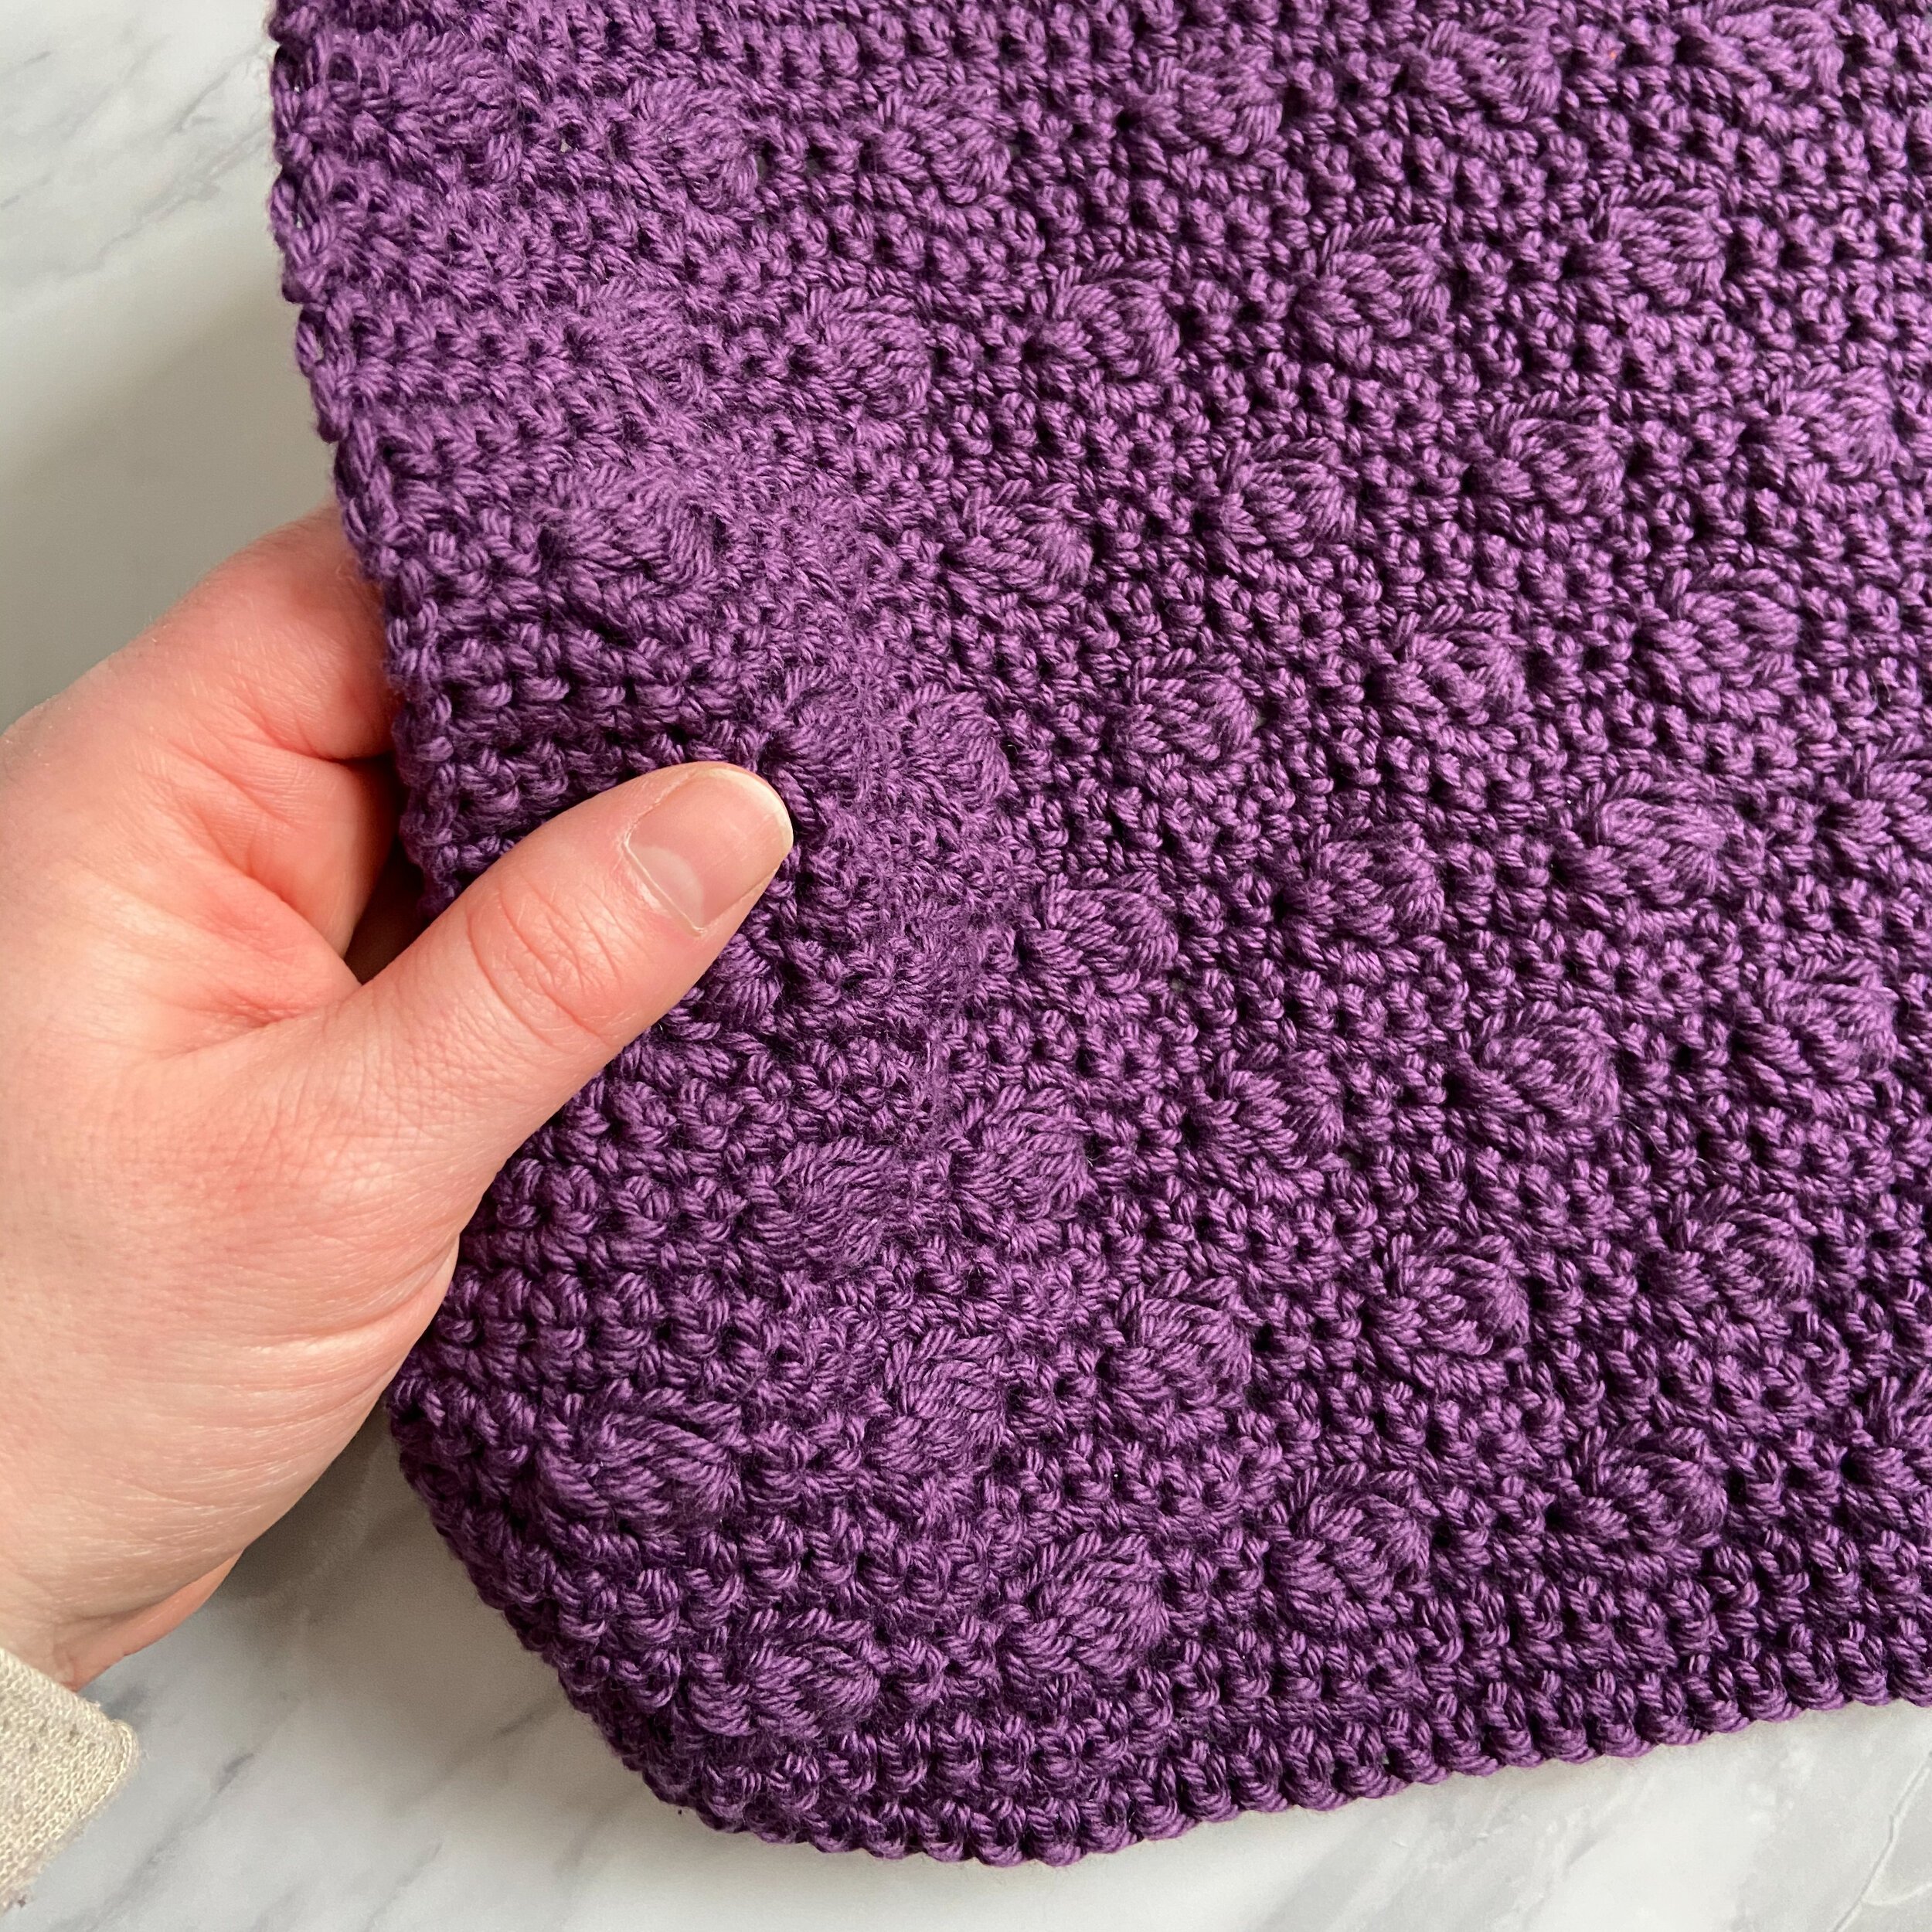
As a little bonus, check out the “wrong side” of this pattern - isn’t that a gorgeous texture?! I love when the backside of stitches looks just as good as the front side. If you enjoy this as well, check out the hashtag I started on instagram - #WIPItAndReverseIt - I would love for you to use it when you share your beautiful reversible textures!
Congratulations on finishing your Keyhole Dishcloth! Give yourself a big pat on the back (like I definitely did!) because this pattern is no walk in the park. I bet you are super proud of yourself for using such simple stitches to create such a gorgeous texture - I almost don’t want to use mine for scrubbing dirty dishes!
I’m having a lot of fun exploring these new-to-me techniques, and I hope you are too! I’d love to see your dishcloths (in finished or WIP form!), or how you’re using the things you’re learning here in your own designs. Share your dishcloth on Instagram using the hashtags #KeyholeDishcloth and #StitchExplorationSeries, and tag me, @capital.crochet!
You may sell finished items made from this pattern, but please credit me as the designer by linking back to this blog post.
Thank you so much for your support! If you’d like to be the first to know about new patterns in this series and other blog posts, make sure to subscribe to my newsletter below.

This post may contain affiliate links, meaning that if you click through and make a purchase, I earn a small commission at no extra cost to you. This helps support my business and makes it possible for me to bring you free content.
Wow… how is it May already?! Nevermind, I’m not going to question it because May means that we can FINALLY look forward to summer and all the warmth it brings. I’m definitely a “I’d rather be hot than cold” kind of person, and the cold weather seems to last longer and longer each year…
…but enough rambling - it’s time to introduce this month’s dishcloth pattern! The Parallel Lines Dishcloth is full of texture, and it uses such a simple technique. By crocheting into individual loops of different crochet stitches, it opens up so many options for creating ridges and ribbing!

This is the fifth pattern in my monthly Stitch Exploration Series, which is dedicated to exploring different stitch techniques and textures. Check out the other patterns in the series HERE.
This series is all about testing out new skills without the pressure of having to create a large project like a garment. When I’m designing, I find that I tend to choose familiar stitches, which can limit my creativity. I’ve chosen dishcloths because they’re small enough to finish up quickly, but large enough to get a general idea of the fabric the stitch pattern will create!
This month’s pattern features a bit of an anatomy lesson as we look at the loops in different crochet stitches.
For this series, I’ve chosen a beautiful, durable cotton yarn, Dishie from WeCrochet. It comes in lots of fun colours (30 solids in total, plus there are also Dishie Twist and Dishie Multi!), and it is really nice to work with. It’s also really durable, making it great for dishcloths! In my experience so far, this yarn really holds up well during tough scrubbing.
So far, my favourite patterns in the series are the Pollyanna Dishcloth (green) and the Mulberry Dishcloth (purple). I love the unique textures! Do you have a favourite so far?
Hook - US G/4mm, or size needed to meet gauge.
Yarn - WeCrochet Dishie, 100% cotton, 190 yds (174m)/100g (3.5oz) per skein. I used approx. 92 yds (84m) of the colourway Silver.
Notions - scissors, tape measure, yarn needle.
Ch sts to start each row do not count as sts.
Gauge is not critical for this project, however, if yardage is a concern, you should aim to meet it as closely as possible. No one will judge an extra half inch on your dishcloth!
Generally, I do not block cotton washcloths, because they’re just going to get wet anyway. If you’re making for gifting, or just want to straighten things out, feel free to block as you see fit.
Gauge - 4”/10cm = 14 sts x 16 rows in sc, unblocked.
Finished measurements - approx. 8” wide x 8.5” tall / 20.5cm wide x 22cm tall.
This pattern uses standard US terms as detailed by the Craft Yarn Council:
BLO - work into the back loop of the stitch (see Special Stitches section)
Ch - chain
Hdc - half double crochet
Sc - single crochet
Sl st - slip stitch
St(s) - stitch(es)
Third loop - work into the third loop of the hdc st (see Special Stitches section)
Crochet stitches have different parts to them, including loops formed as we work the stitches. The pictures below demonstrate the different loops we will be working into for this pattern.
Third Loop: the black arrows in photo B below indicate the front loops of the hdc stitch (the back loop is behind, we can’t see it from this angle). Below the front loop is the third loop, indicated here by the white arrows. To work into the third loop, insert your hook from bottom to top (follow the direction of the white arrow).
Back Loops: the black arrows in photo A below indicate the back loops, these are farthest from you. The white arrows indicate the front loops, these are the closest to you. To work in the back loops only (BLO), insert your hook in between these loops, underneath the back loops.


Row 1 (RS). Ch 40 and turn. Starting in the second ch from hook, hdc in each ch across and turn. <39 sts>
Row 2 (WS). Ch 1, sc in the third loop of each st across, and turn.
Row 3. Ch 1, hdc blo of each st across and turn.
Rows 4 and 5. Repeat Rows 2 and 3.
Row 6. Repeat Row 2.
Rows 7 and 8. Ch 1, sc in each st across and turn.
Row 9. Ch 1, hdc in each st across and turn.
Repeat Rows 2 to 9 three more times, then repeat Rows 2 to 5 once more.
Last Row. Ch 1, sl st in the third loop of each st across.
Fasten off and weave in the ends.
To make your dishcloth narrower or wider, start with fewer or more chain sts in Row 1. Every additional 7 sts will give you approximately 2”/5cm of width.
To make your dishcloth shorter or longer, work fewer or more full repeats of Rows 2 to 9. Each full repeat will give you just over 1.5”/4cm of height.
Keep in mind that any alterations to the stitch or row counts will adjust the yardage required.

Save this pattern to your Ravelry queue, or add a project to the pattern page!

Congratulations on finishing your Parallel Lines Dishcloth! I think this ridged texture is great for dishcloths because it is such a sturdy texture. You can also experiment with different stitches into different loops to create unique ribbing for garments - slip stitch ribbing is one of my favourites, despite it being so tedious!
I’m having a lot of fun exploring these new-to-me techniques, and I hope you are too! I’d love to see your dishcloths (in finished or WIP form!), or how you’re using the things you’re learning here in your own designs. Share your dishcloth on Instagram using the hashtags #ParallelLinesDishcloth and #StitchExplorationSeries, and tag me, @capital.crochet!
You may sell finished items made from this pattern, but please credit me as the designer by linking back to this blog post.
Thank you so much for your support! If you’d like to be the first to know about new patterns in this series and other blog posts, make sure to subscribe to my newsletter below.

This post may contain affiliate links, meaning that if you click through and make a purchase, I earn a small commission at no extra cost to you. This helps support my business and makes it possible for me to bring you free content.
Despite the freak snowfall we’ve had this past week, I think Spring has FINALLY arrived! We’re expecting warm temps and sun over the weekend, and I am so happy to be putting those cold days behind me. What better way to do that than with a pattern that reminds us of where all that snow and ice is going… say hello to the Spring Melt Dishcloth!

This is the fourth pattern in my monthly Stitch Exploration Series, which is dedicated to exploring different stitch techniques and textures. Check out the other patterns in the series HERE.
I find that when I’m designing, I gravitate to the same couple of stitches in my designs, and I hope that this series will allow me to test out new skills and get outside my comfort zone without the pressure of having to create a whole garment. I’ve chosen dishcloths because they’re small enough to finish up quickly, but large enough to get a general idea of the fabric the stitch pattern will create!
The technique I’m trying out this month is chevrons, or ripple stitches. It features flowing lines and a beautiful blue, reminiscent of flowing rivers and streams as Winter’s ice and snow melt away.

Check out some of the other patterns in the series! Shown here are the Studded Dishcloth (yellow) and the Mulberry Dishcloth (purple). I’m using a beautiful, sturdy cotton yarn for this series, Dishie from WeCrochet. It comes in lots of fun colours (30 solids in total, plus there are also Dishie Twist and Dishie Multi!), and it is really nice to work with. It’s also really durable, making it great for dishcloths! In my experience so far, this yarn really holds up well during tough scrubbing.
Hook - US G/4mm, or size needed to meet gauge.
Yarn - WeCrochet Dishie, 100% cotton, 190 yds (174m)/100g (3.5oz) per skein. I used approx. 74 yds (68m) of the colourway Blue.
Notions - scissors, tape measure, yarn needle.
Ch sts to start each row do not count as sts.
Gauge is not critical for this project, however, if yardage is a concern, you should aim to meet it as closely as possible. No one will judge an extra half inch on your dishcloth!
Generally, I do not block cotton washcloths, because they’re just going to get wet anyway. If you’re making for gifting, or just want to straighten things out, feel free to block as you see fit.
Gauge - 4”/10cm = 12 rows (3 repeats) in pattern stitch, unblocked.
Finished measurements - approx. 7.5” x 8.5” / 19 x 21.5cm square.
This pattern uses standard US terms as detailed by the Craft Yarn Council:
Ch - chain
Chsp - chain space
Dc - double crochet
Sc - single crochet
St(s) - stitch(es)
Xtog - work one stitch over X number of stitches (see Special Stitches section)
* - repeat instructions following the asterisk as specified
ScXtog - work one sc over X number of sts: (Insert hook into next st and pull up a loop) X times; there will be X+1 loops on the hook. Yarn over and pull through all loops on the hook - one stitch completed.
DcXtog - work one dc over X number of sts: (Yarn over, insert hook into next st and pull up a loop. Yarn over, pull through first two loops on the hook) X times; there will be X+1 loops on the hook. Yarn over and pull through all loops on the hook - one stitch completed.
Row 1 (RS). Ch 38 and turn. Starting in the second ch from hook, sc in each ch across and turn. <37 sc>
Row 2 (WS). Ch 1, sc2tog, *sc next 4, 3 sc in next st, sc next 4, sc3tog. Repeat from * once more. Sc next 4, 3 sc in next, sc next 4, sc2tog and turn. <37 sc>
Row 3. Repeat Row 2.
Row 4. Ch 3, skip first st. Dc3tog, ch 1, *2 dc in each of next 2 sts, (dc, ch 1, dc) in next st. 2 dc in each of next 2 sts, ch 1,** dc7tog, ch 1. Repeat from * once more, then repeat from * to **. Dc4tog over the last 4 sts, and turn. <34 dc>
Row 5. Ch 1, sc2tog over first st and chsp. *Sc next 5, sc in chsp, sc next 5**, sc2tog over the next 2 chsps (skip the dc7tog). Repeat from * once more, then repeat from * to **. Sc2tog over chsp and last st, and turn. <37 sc>
Rows 6 and 7. Repeat Row 2.
Repeat Rows 4-7 four more times. Fasten off and weave in the ends.
To make your dishcloth narrower or wider, start with fewer or more chain sts in Row 1, making sure to start with a multiple of 12+2.
To make your dishcloth shorter or longer, work fewer or more repeats of Rows 4-7.
Keep in mind that this any changes will adjust the yardage required.

Save this pattern to your Ravelry queue, or add a project to the pattern page!
Congratulations on finishing your Spring Melt Dishcloth! Have you enjoyed this rippling pattern? I’ve seen it used often in blankets, and I think it would be a really nice addition as an edging detail on a t-shirt or sweater.
I’m having a lot of fun exploring these new-to-me techniques, and I hope you are too! I’d love to see your dishcloths (in finished or WIP form!), or how you’re using the things you’re learning here in your own designs. Share your dishcloth on Instagram using the hashtags #SpringMeltDishcloth and #StitchExplorationSeries, and tag me, @capital.crochet!
You may sell finished items made from this pattern, but please credit me as the designer by linking back to this blog post.
Thank you so much for your support! If you’d like to be the first to know about new patterns in this series and other blog posts, make sure to subscribe to my newsletter below.
This post may contain affiliate links, meaning that if you click through and make a purchase, I earn a small commission at no extra cost to you. This helps support my business and makes it possible for me to bring you free content.
Breathe in… breathe out… Hello friends! I don’t know who else needs a few moments to just breathe, but I sure have been feeling the need to ground myself lately. This is a particularly stressful time in my life, and while crocheting brings me so much joy, the pressures (often self-inflicted) of designing patterns or keeping up with pattern testing and social media engagement can sap my cro-jo.
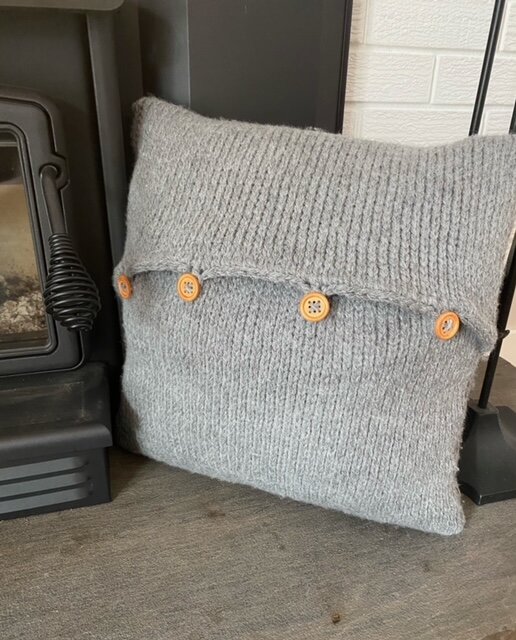
Recently I just picked up my hook and some pretty yarn and I started stitching. Before long, the stitches told me what they should be, and the Easy Stitches Pillow pattern was born.

This pattern is so simple, and it allows you to get into a nice, meditative rhythm while you stitch. It’s a good one for taking on the go, since it’s not too big to stash in a cute project bag. It’s also great for getting in a just few rows here and there, if you don’t have a big chunk of free time to devote to crocheting.
For this pattern, I’ve used a really cool yarn from one of my favourite companies, Lion Brand Yarn. It’s called Twisted Cotton Blend, and it’s a Bulky (5) weight blend of 69% cotton/31% acrylic. At first I thought it was going to be splitty, but I was pleasantly surprised - it is sturdy and really easy to work with. The unique texture makes it great for patterns like this that use simple stitches. The two-tone look really gives this pillow design depth, making it a perfect addition to both cozy reading corners and upscale sitting room decor.

Hook - US L/8mm Tunisian Crochet hook with 16”/40.5cm cord attached (or size needed to meet gauge). I use these ones from WeCrochet!
Yarn - approx. 600 yds/ 549m of Lion Brand Twisted Cotton Blend (I used the colour Ecru/Tan) or another Bulky (5) weight yarn of your choice.
Notions - 16”/40.5cm square pillow form, 4 buttons of any size (1”/2.5cm is recommended), locking stitch markers (2-4), scissors, tape measure, yarn needle.
The first loop on your hook to start each row counts as a stitch.
If you wish to block your work to settle the stitches, I recommend a gentle steam blocking prior to assembly.
Gauge: 12 sts x 15 rows = 4”/10cm in tks.
Measurement before assembly: approx. 40”/ 101.5cm long x 17.5”/44.5cm wide.
The finished pillow cover will fit snugly on a 16”/40.5cm square pillow form.
This pattern uses standard US terms as detailed by the Craft Yarn Council:
ch: chain
lts: last Tunisian stitch – the very last stitch of the row; insert your hook under both loops of the edge stitch
RetP: return pass – Ch 1, *yarn over and pull through 2 loops. Repeat from * until 1 loop remains on your hook
sc: single crochet
sl st: slip stitch
st(s): stitch(es)
tks: Tunisian Knit stitch – insert your hook into the middle of the stitch. Check out this excellent tutorial video!
Row 1. Ch 53. Starting in the second ch from hook, pull up a loop in the back bumps of each ch st (53 loops on hook). Work a RetP.
Row 2. Tks in each st across until the last st, lts and work a RetP.
Repeat Row 2 until your work measures approximately 40”/101.5cm long.
You will now work a bind off row, which includes small loops that will secure the buttons. You may wish to switch to a slightly smaller hook for this last row.
Bind off row: Ch 1, insert hook into next st as for tks and work a sc. Sc in next 8 sts, then work a buttonhole as follows: ch 4, join with a sl st to the last sc worked. *Sc next 11, work a buttonhole. Repeat from * twice more, then sc in last 10 sts (including the edge st, remember to insert your hook under both loops). Fasten off and proceed to Assembly instructions.
Note: make sure your buttonhole size matches the button you are using. I used a 1”/2.5cm button and cotton yarn (which does not stretch much). If you’re using yarn that has more stretch, you might want to only ch 3, or if you’re using a bigger button, work more chs as needed.
Assembly: Refer to the photos below when following along with the assembly instructions.
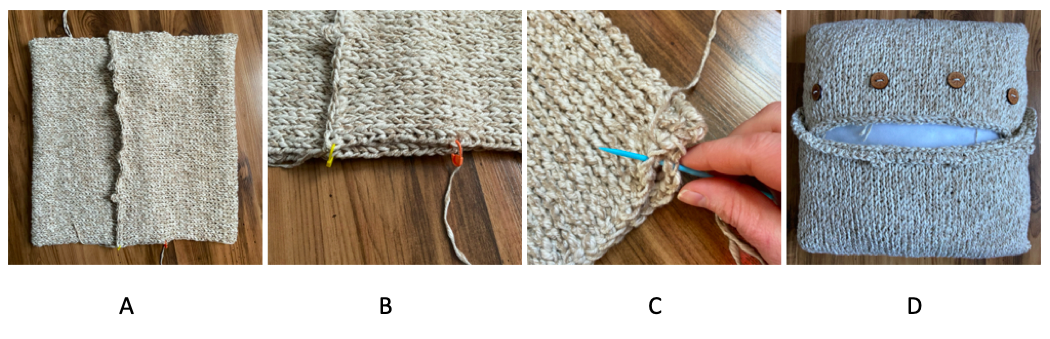
Lay your work flat out, right side facing down. Fold the starting edge in, then fold the buttonhole edge over the starting edge to form a square that is approximately 17”/43cm in length, with about 3”/7.5cm of overlap of the two ends (picture A). Secure the sides where these edges overlap (picture B). Turn the pillow inside out, and *starting at one corner, seam one side closed using the whip stitch, or your favourite seaming method. Make sure to go through both edges (picture C), and all three thicknesses where they overlap. Fasten off at the opposite corner. Repeat from * on the other side of the pillow.
Turn the pillow right side out. Insert the pillow form, and gently pull the buttonhole edge up over the other edge to see where the buttons should be placed. When buttoned closed, the edges should not gape or look too stretched. Place your buttons evenly so they match up with the buttonholes, and secure them in place (picture D).

Save this pattern to your Ravelry queue, or add a project to the pattern page!
Congratulations on finishing your Easy Stitches Pillow! Share your photos on Instagram using the hashtags #EasyStitchesPillow and tag me, @capital.crochet!
My patterns and thoroughly tested and edited, and come with my full support - if you find an error or have a question, please don’t hesitate to get in touch! You may sell finished items made from this pattern, but please credit me as the designer by linking back to this blog post.
Thank you so much for your support! If you’d like to be the first to know about new patterns, blog posts, and freebies (yay!), please join the email list below.
If you enjoy working with cotton yarn, check out my Stitch Exploration Series! Each month, I try out a new-to-me stitch pattern or technique, and create FREE cotton dishcloth patterns so that you can try out new skills, too! Below are the two most recent patterns in the series, March’s Pollyanna Dishcloth and February’s Mulberry Dishcloth, both using WeCrochet Dishie yarn.

This post may contain affiliate links, meaning that if you click through and make a purchase, I earn a small commission at no extra cost to you. This helps support my business and makes it possible for me to bring you free content.
It’s that time again, friends - the newest pattern in the Stitch Exploration Series is this green beauty, the Pollyanna Dishcloth!
If you’re new ‘round these parts, this monthly series is dedicated to exploring different stitch techniques and textures. Check out the other patterns in the series HERE.
I find that when I’m designing, I gravitate to the same couple of stitches in my designs, and I hope that this series will allow me to test out new skills and get outside my comfort zone without the pressure of having to create a whole garment. I’ve chosen dishcloths because they’re small enough to finish up quickly, but large enough to get a general idea of the fabric the stitch pattern will create!
This month’s pattern features a gorgeous bright green yarn and texture like the beautiful plant it is named for - read on to learn more about my dive down the Pollyanna rabbit hole!

When I was thinking about what to name this pattern, I started looking at different ground cover plants, because I thought this texture reminded me of the moss-like growth you often see between stones in pretty, manicured garden pathways. I found soleirolia soleirolii - what a mouthful! It goes by many common names, one of which is Pollyanna Vine. I liked the way that rolled off the tongue.

Image credit: Shutterstock.
I always do my due diligence when naming patterns. I like to make sure there are no similar patterns with the same name, and I also like to make sure I’m not inadvertently using a name or word that has alternate meanings or associations. In searching “Pollyanna,” I found some interesting info.
The character Pollyanna is from a book written in 1913 by Eleanor H. Porter. The title character is a young girl who, despite all the unpleasant things in her life, chooses to see the positive elements in all situations. Psychology picked up on this in the 1970s and applied the name Pollyanna Principle to the psychological construct known as the positivity bias. There is research that shows people generally tend to be more positive and upbeat than miserable and cranky, and we also tend to assume the best about situations in which we do not have the complete story. Of course, there are exceptions, but as a student who is about to finish up a Psychology degree, I was super excited to go down this rabbit hole and learn a little more about human nature.
To make a long story short, I chose the name Pollyanna for this pattern because it reminds me of the plant, but there’s so much more in a name. I thought it was important to share this because it’s part of my creative process, and I know there are lots of fellow polymaths out there who enjoy learning new tidbits of information!

For this series, I’ve chosen a beautiful, durable cotton yarn, Dishie from WeCrochet. It comes in lots of fun colours (30 solids in total, plus there are also Dishie Twist and Dishie Multi!), and it is really nice to work with. It’s also really durable, making it great for dishcloths! In my experience so far, this yarn really holds up well during tough scrubbing.
If you missed the first two patterns in the series, check out the Studded Dishcloth (yellow) and the Mulberry Dishcloth (purple).
Hook - US G/4mm, or size needed to meet gauge.
Yarn - WeCrochet Dishie, 100% cotton, 190yds (174m)/100g (3.5oz) per skein. I used approx. 125yds (114m) of the colourway Jalapeño.
Notions - scissors, tape measure, yarn needle.
Ch 2 to start each row counts as a sc st.
Gauge is not critical for this project, however, if yardage is a concern, you should aim to meet it as closely as possible. No one will judge an extra half inch on your dishcloth!
Generally, I do not block cotton washcloths, because they’re just going to get wet anyway. If you’re making for gifting, or just want to straighten things out, feel free to block as you see fit.
Gauge - 4”/10cm = 17 sts x 18 rows in pattern stitch, unblocked.
Finished measurements - approx. 9.25”/23.5cm square.
This pattern uses standard US terms as detailed by the Craft Yarn Council:
Ch - chain
Dc - double crochet
Fpdc - front post double crochet (see Special Stitch section)
St(s) - stitch(es)
Sc - single crochet
RS/WS: right side and wrong side of your dishcloth
* - repeat instructions following the asterisk as specified
Front post double crochet (fpdc) - yarn over, insert hook from right to left around the back of the post of the st indicated (pushing the post forward), pull up a loop. (Yarn over and pull through two loops) twice. For a helpful tutorial video, click HERE.
Row 1 (RS). Ch 40 and turn. Starting in the third ch from hook (first 2 chs count as the first sc), and working into the back bumps of each ch st, sc across and turn. <39 sts>
Row 2 (WS). Ch 2, sc in each st across until the last st. Sc in ch-2 space and turn.
Row 3. Ch 2, fpdc around the next st 2 rows below, *sc next st, fpdc around the next st 2 rows below.* Repeat from * to * until the last st. Sc in ch-2 space and turn.
Repeat Rows 2 and 3 until work measures approx. 9” or desired length, ending on a repeat of Row 3. For me, this was 39 total rows.
Last Row. Ch 2, sc in each st across until the last st. Sc in ch-2 space.
Fasten off and weave in the ends.
To make your dishcloth narrower or wider, start with fewer or more chain sts in Row 1, making sure to start with an even number.
To make your dishcloth shorter or longer, work fewer or more repeats of Rows 2 and 3. Keep in mind that this will adjust the yardage required.

Save this pattern to your Ravelry queue, or add a project to the pattern page!
Congratulations on finishing your Pollyanna Dishcloth! Are you a fan of post stitches? I love how they add relief to a project, and they work well for dishcloths because they offer robust structure for tough scrubbing.
I’ve used post stitches quite a bit to create ribbing in garment projects, but this is the first time I’ve featured the stitches as the main texture in a pattern. I wonder how it would look as the main texture in a sweater using softer yarn… So many new things to explore!
I’m having a lot of fun exploring these new-to-me techniques, and I hope you are too! I’d love to see your dishcloths (in finished or WIP form!), or how you’re using the things you’re learning here in your own designs. Share your dishcloth on Instagram using the hashtags #PollyannaDishcloth and #StitchExplorationSeries, and tag me, @capital.crochet!
You may sell finished items made from this pattern, but please credit me as the designer by linking back to this blog post.
Thank you so much for your support! If you’d like to be the first to know about new patterns in this series and other blog posts, make sure to subscribe to my newsletter below.

This post may contain affiliate links, meaning that if you click through and make a purchase, I earn a small commission at no extra cost to you. This helps support my business and makes it possible for me to bring you free content.
Welcome to the second instalment of the Stitch Exploration Series, the Mulberry Dishcloth!
If you’re new ‘round these parts, this monthly series is dedicated to exploring different stitch techniques and textures. Check out the other patterns in the series HERE.
I find that when I’m designing, I gravitate to the same couple of stitches in my designs, and I hope that this series will allow me to test out new skills and get outside my comfort zone without the pressure of having to create a whole garment. I’ve chosen dishcloths because they’re small enough to finish up quickly, but large enough to get a general idea of the fabric the stitch pattern will create!
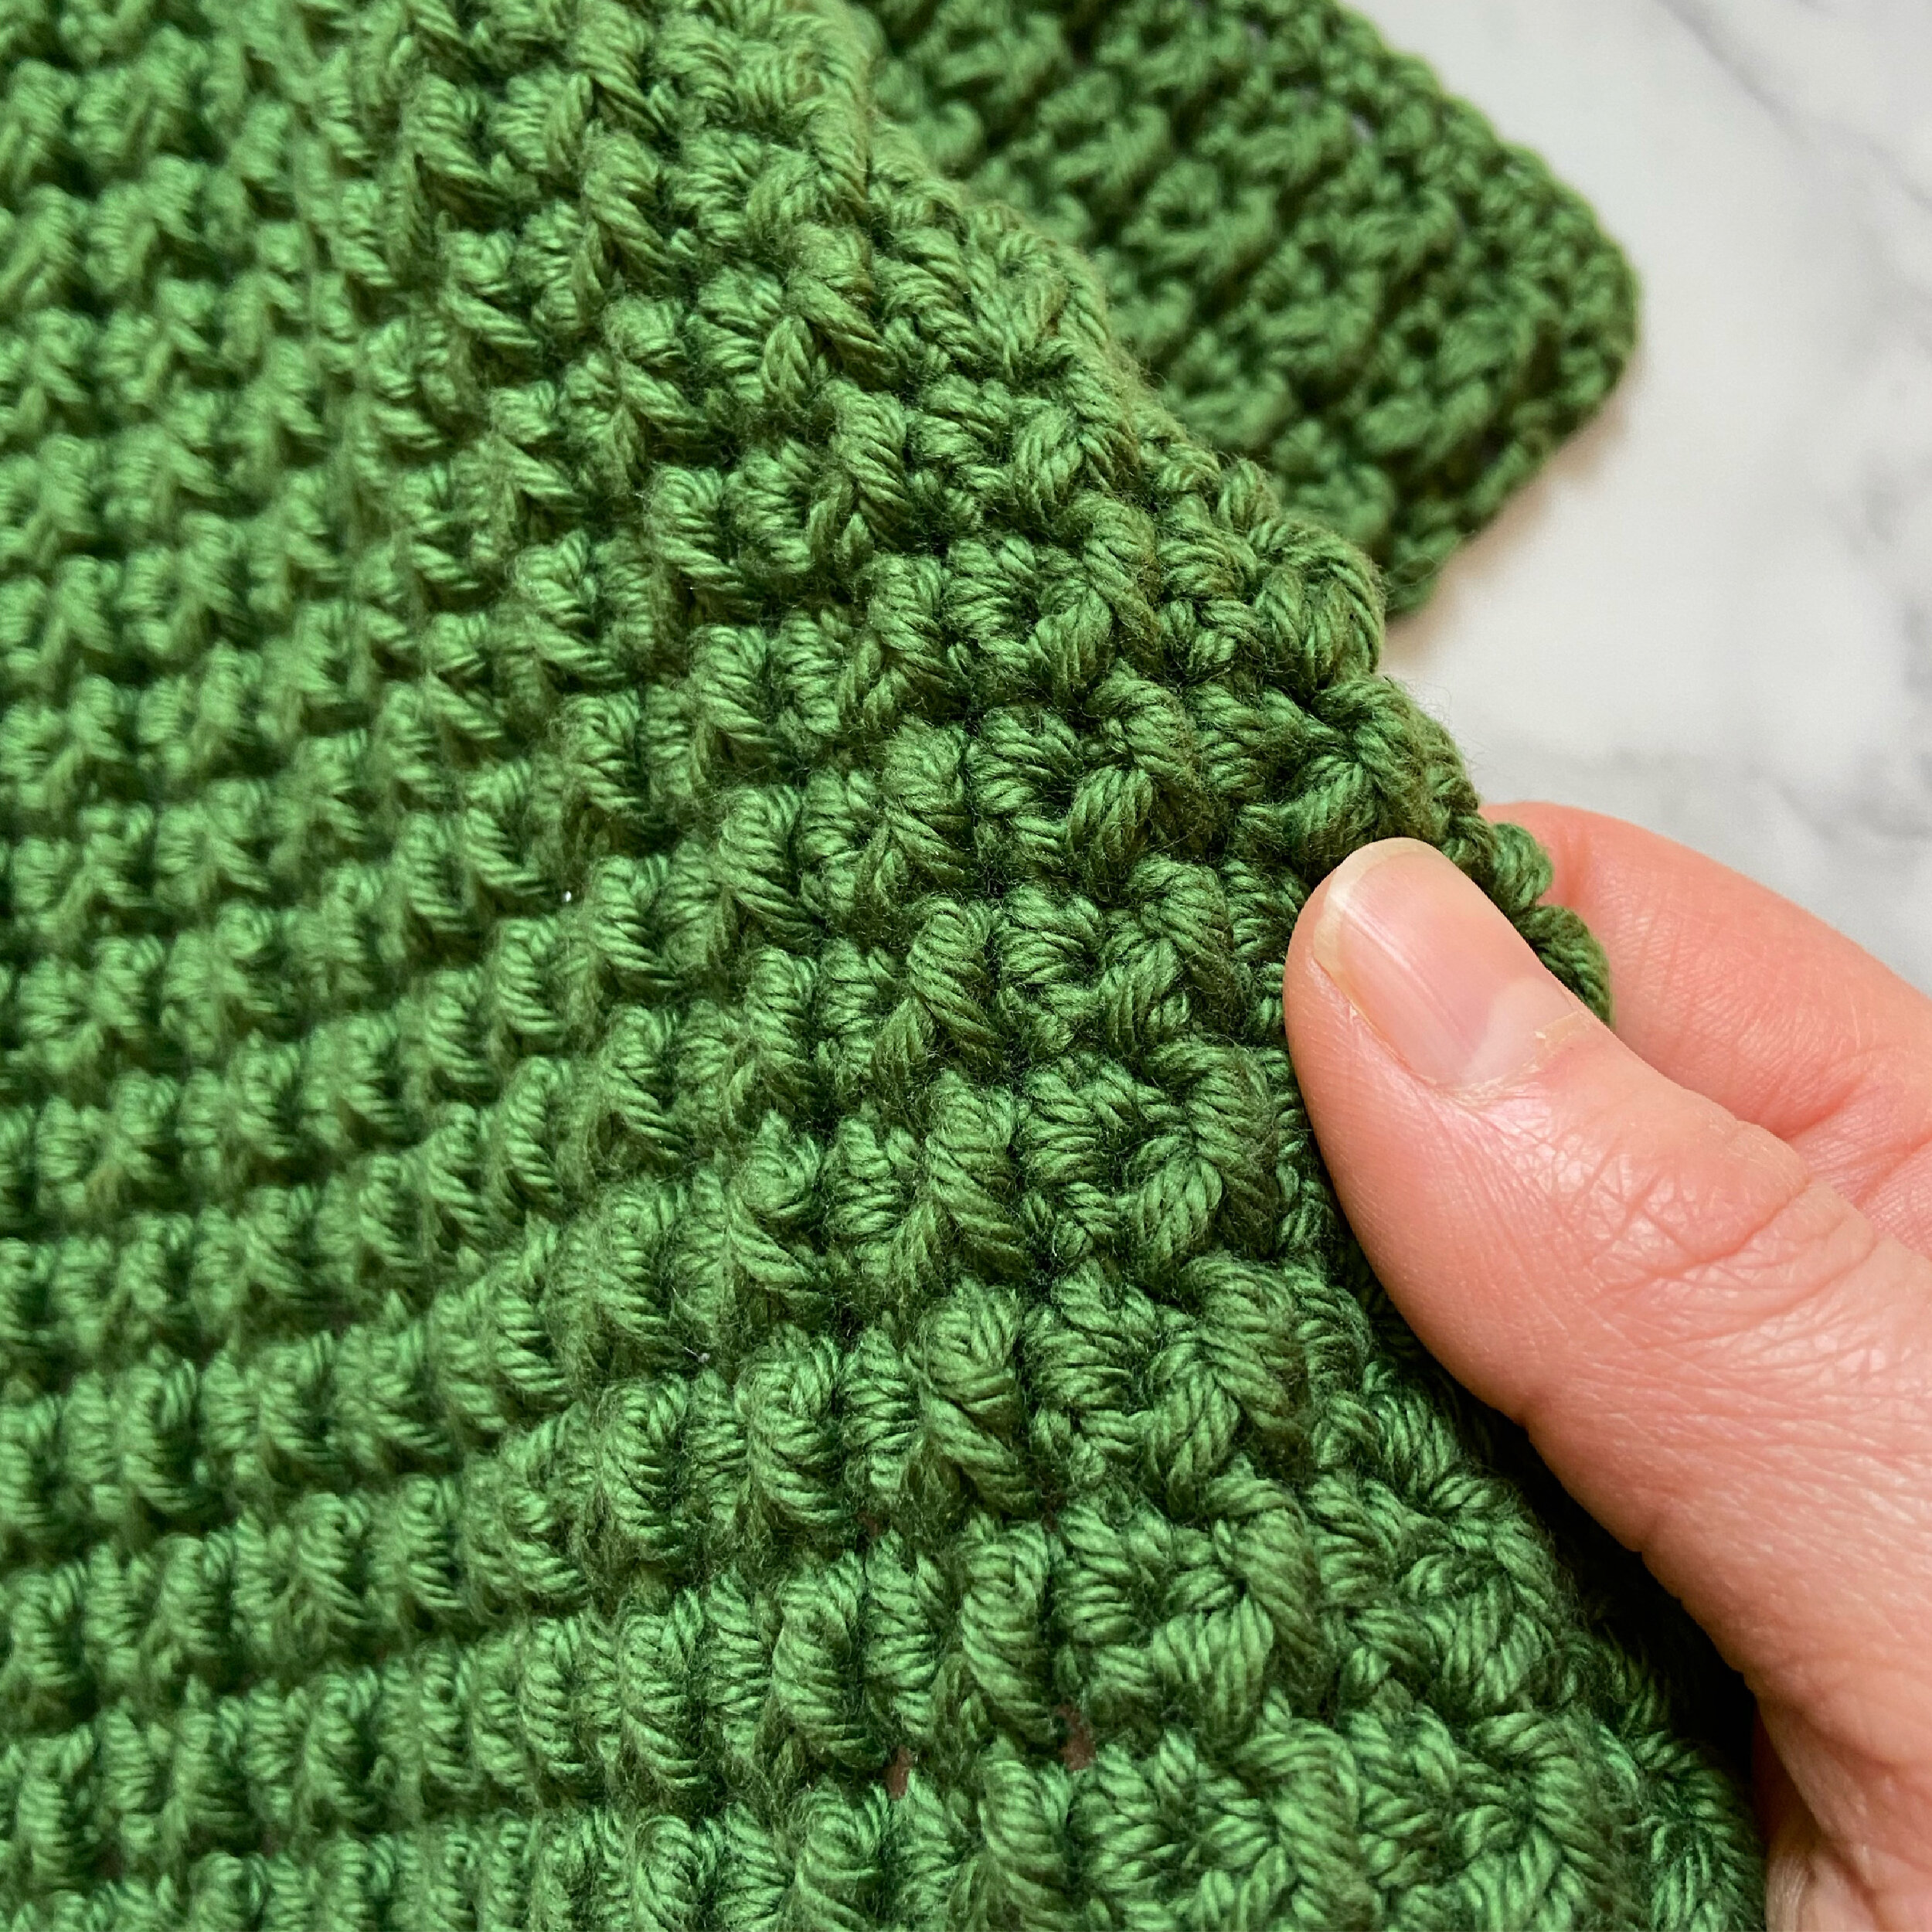
This month’s pattern features a really neat technique - working into the side of some stitches to create interesting lines and texture. Read on to learn more about the Mulberry Dishcloth!
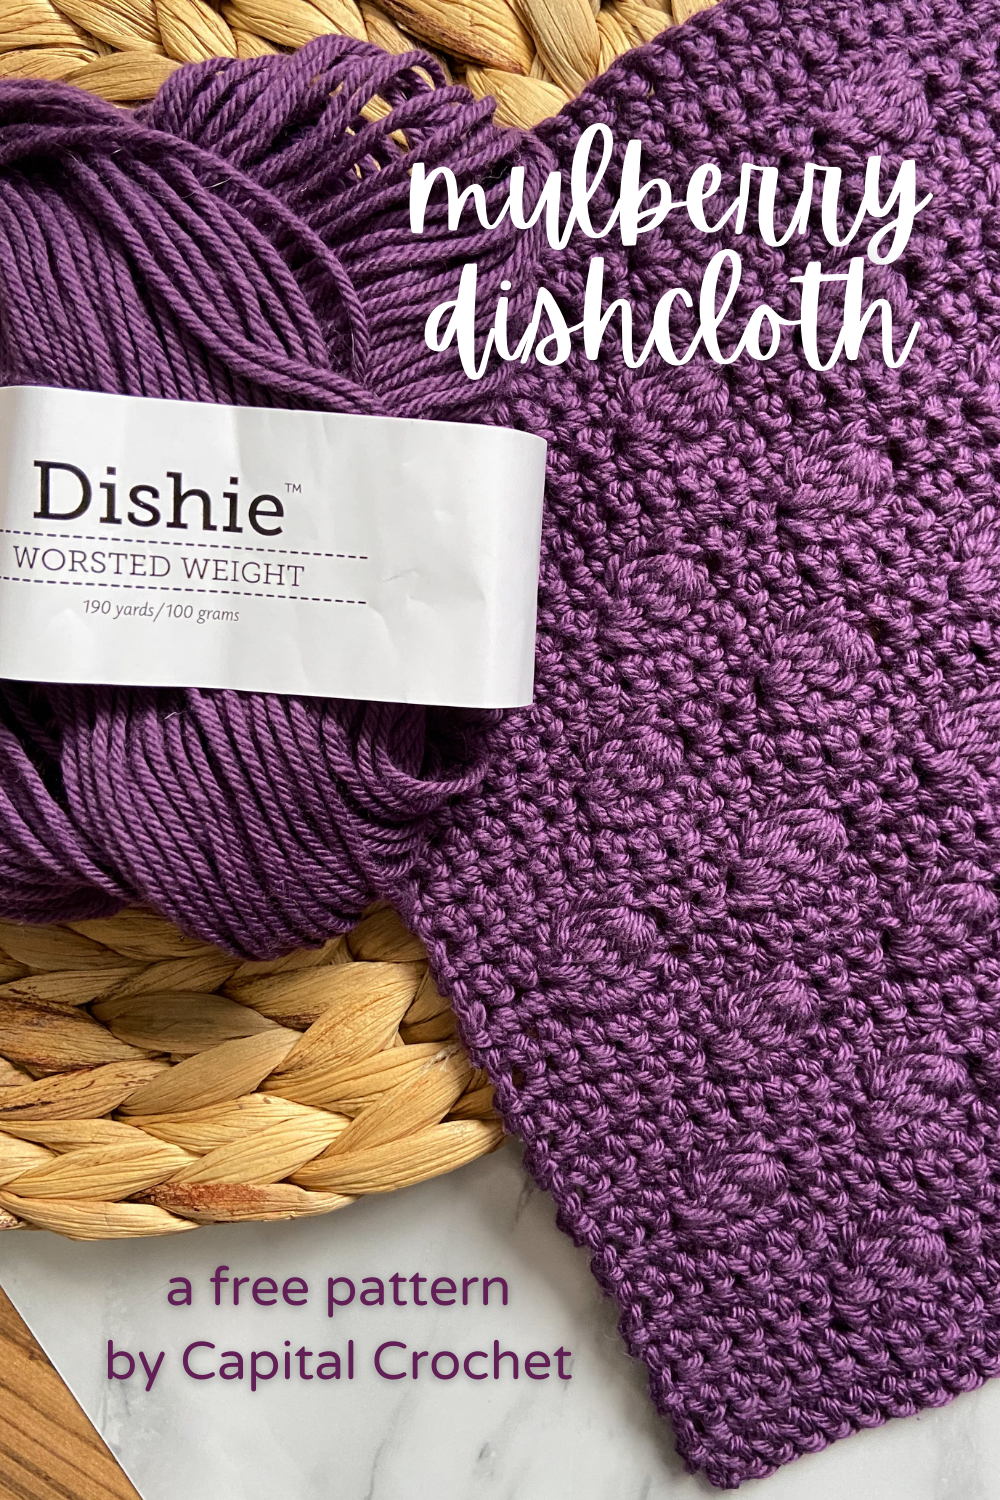
For this series, I’ve chosen a beautiful, durable cotton yarn, Dishie from WeCrochet. As you can see, it comes in lots of fun colours (30 solids in total, plus there are also Dishie Twist and Dishie Multi!), and it feels great. And I’ve heard people say that this yarn is good for other things, too - summer garments and tote bags come to mind (we’re getting sooooo close to Spring!).

If you missed the first pattern, the Studded Dishcloth, check it out as well!
Hook - US G/4mm, or size needed to meet gauge.
Yarn - WeCrochet Dishie, 100% cotton, 190yds (174m)/100g (3.5oz) per skein. I used approx. 108yds (99m) of the colourway Mulberry (hence the pattern name!).
Notions - scissors, tape measure, yarn needle.
Ch 1 to start each round does not count as a st.
Gauge is not critical for this project, however, if yardage is a concern, you should aim to meet it as closely as possible. No one will judge an extra half inch on your dishcloth!
Generally, I do not block cotton washcloths, because they’re just going to get wet anyway. If you’re making for gifting, or just want to straighten things out, feel free to block as you see fit.
Gauge - 4” = 17 sts x 19 rows in sc unblocked.
Finished measurements - approx. 9” wide x 9” tall
This pattern uses standard US terms as detailed by the Craft Yarn Council:
Ch - chain
CL - cluster (see Special Stitch section)
St(s) - stitch(es)
Sc - single crochet
* * - repeat instructions contained within the asterisks as specified
Cluster (CL) - consists of a group of clustered double crochet stitches worked into the side of a single crochet to create a horizontal cluster. You will skip the 3 sts under the cluster so that it sits nicely within the rows of single crochet stitches (photo F, below). The written instructions correspond with the photos below, indicated by letter.
Ch 3 (A), *yarn over and insert hook into the middle of the last sc worked (B shows a side view after inserting the hook into the V of the stitch). Pull up a loop, yarn over and pull through two loops (C).* Repeat from * to * three more times (5 loops on hook, D). Yarn over and pull through all loops (E).


Row 1. Ch 40 and turn. Starting in the second ch from hook, and working into the back bumps of each ch st, sc across and turn. <39 sts>
Rows 2-4. Ch 1, sc in each st across and turn.
Row 5. Ch 1, sc in next 3 sts, *CL, skip next 3 sts, sc in next 3 sts.* Repeat from * to * across and turn. <6 CL>
Rows 6-8. Ch 1, sc in each st across and turn.
Row 9. Ch 1, sc in next 6 sts, *CL, skip next 3 sts, sc in next 3 sts.* Repeat from * to * until 3 sts remain. Sc in last 3 sts and turn. <5 CL>
Rows 10-33. Repeat Rows 2-9 three more times.
Rows 34-37. Ch 1, sc in each st across and turn.
Fasten off and weave in the ends.
To make your dishcloth narrower or wider, start with fewer or more chain sts in Row 1 in multiples of 9+1, and work fewer or more * * repeats accordingly in Row 2.
To make your dishcloth shorter or longer, work fewer or more repeats of Rows 2-9.

Save this pattern to your Ravelry queue, or add a project to the pattern page!
Congratulations on finishing your Mulberry Dishcloth! What did you think about this technique? I think working into the sides of stitches is such an easy way to add some interesting texture without using complicated stitches. By simply changing the orientation of a few stitches, it creates a whole new look.
I’m curious about how other types of cluster stitches might look in this configuration, or even if bobbles would work… I’m having a lot of fun exploring these new-to-me techniques, and I hope you are too! I’d love to see your dishcloths (in finished or WIP form!), or how you’re using the things you’re learning here in your own designs. Share your dishcloth on Instagram using the hashtags #MulberryDishcloth and #StitchExplorationSeries, and tag me, @capital.crochet!
You may sell finished items made from this pattern, but please credit me as the designer by linking back to this blog post.
Thank you so much for your support! If you’d like to be the first to know about new patterns in this series and other blog posts, make sure to subscribe to my newsletter below.

This post may contain affiliate links, meaning that if you click through and make a purchase, I earn a small commission at no extra cost to you. This helps support my business and makes it possible for me to bring you free content.
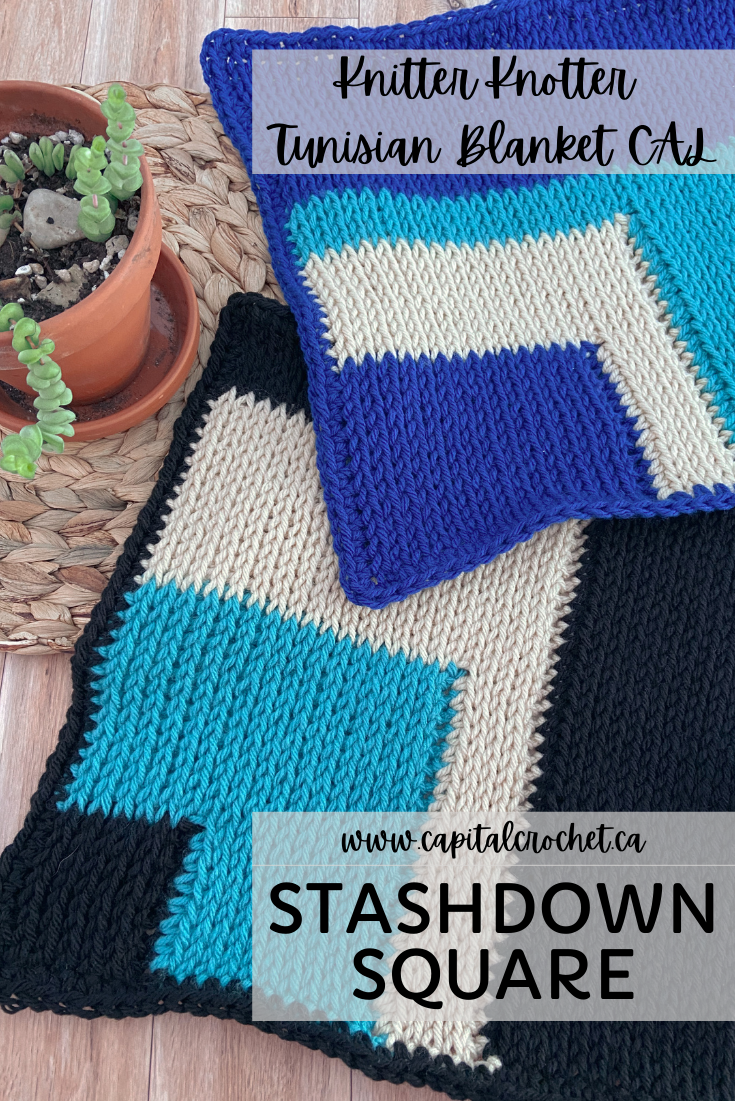
This unique square is part of the amazing line up of patterns in this year’s Knitter Knotter Tunisian Blanket CAL, hosted by Arunima over at www.knitterknotter.com! It’s the perfect way to use up those partial skeins and scraps while keeping the colour theme of your blanket.
What is a CAL? Well, it stands for Crochet-ALong, and as the name of this one suggests, everyone who participates in this CAL is making a blanket. Every two weeks a new 12x12”/30x30cm square pattern by a different designer will be released for free on their blog or other platforms. By the end of 2021 you’ll have made 24 completely unique Tunisian crochet squares! For further information about the CAL, including what supplies you need and the links to all the squares, check out the main blog post. While you’re there, you can also sign up to the CAL mailing list and join the Facebook group, if you’re into that!
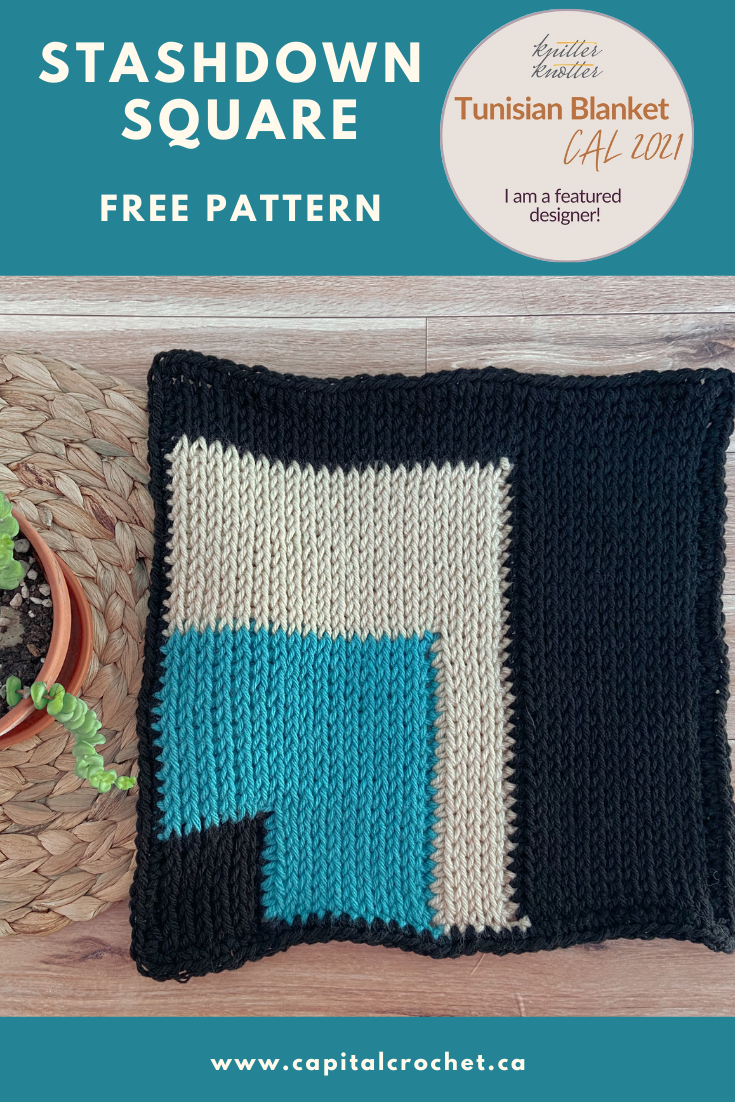
This is also a great stashbusting pattern, since you can use up bits and pieces of yarn you have laying around, and there’s no concrete yardage requirement. My samples shown here use 3 different colours, but feel free to experiment and make this square your own!
Don’t forget to grab the premium, ad-free PDF on Ravelry or in my pattern shop, as it includes a detailed photo tutorial for this pattern, along with a blank chart that you can use to fill in your own colour plan. Or, you can really go wild and just wing it - it truly is a totally customizable pattern!
Yarn - approximately 145 yds/133m worsted (4) weight in various colours (I used 3 different colours - A, B and C - of Loops and Threads Impeccable from Michael’s Stores).
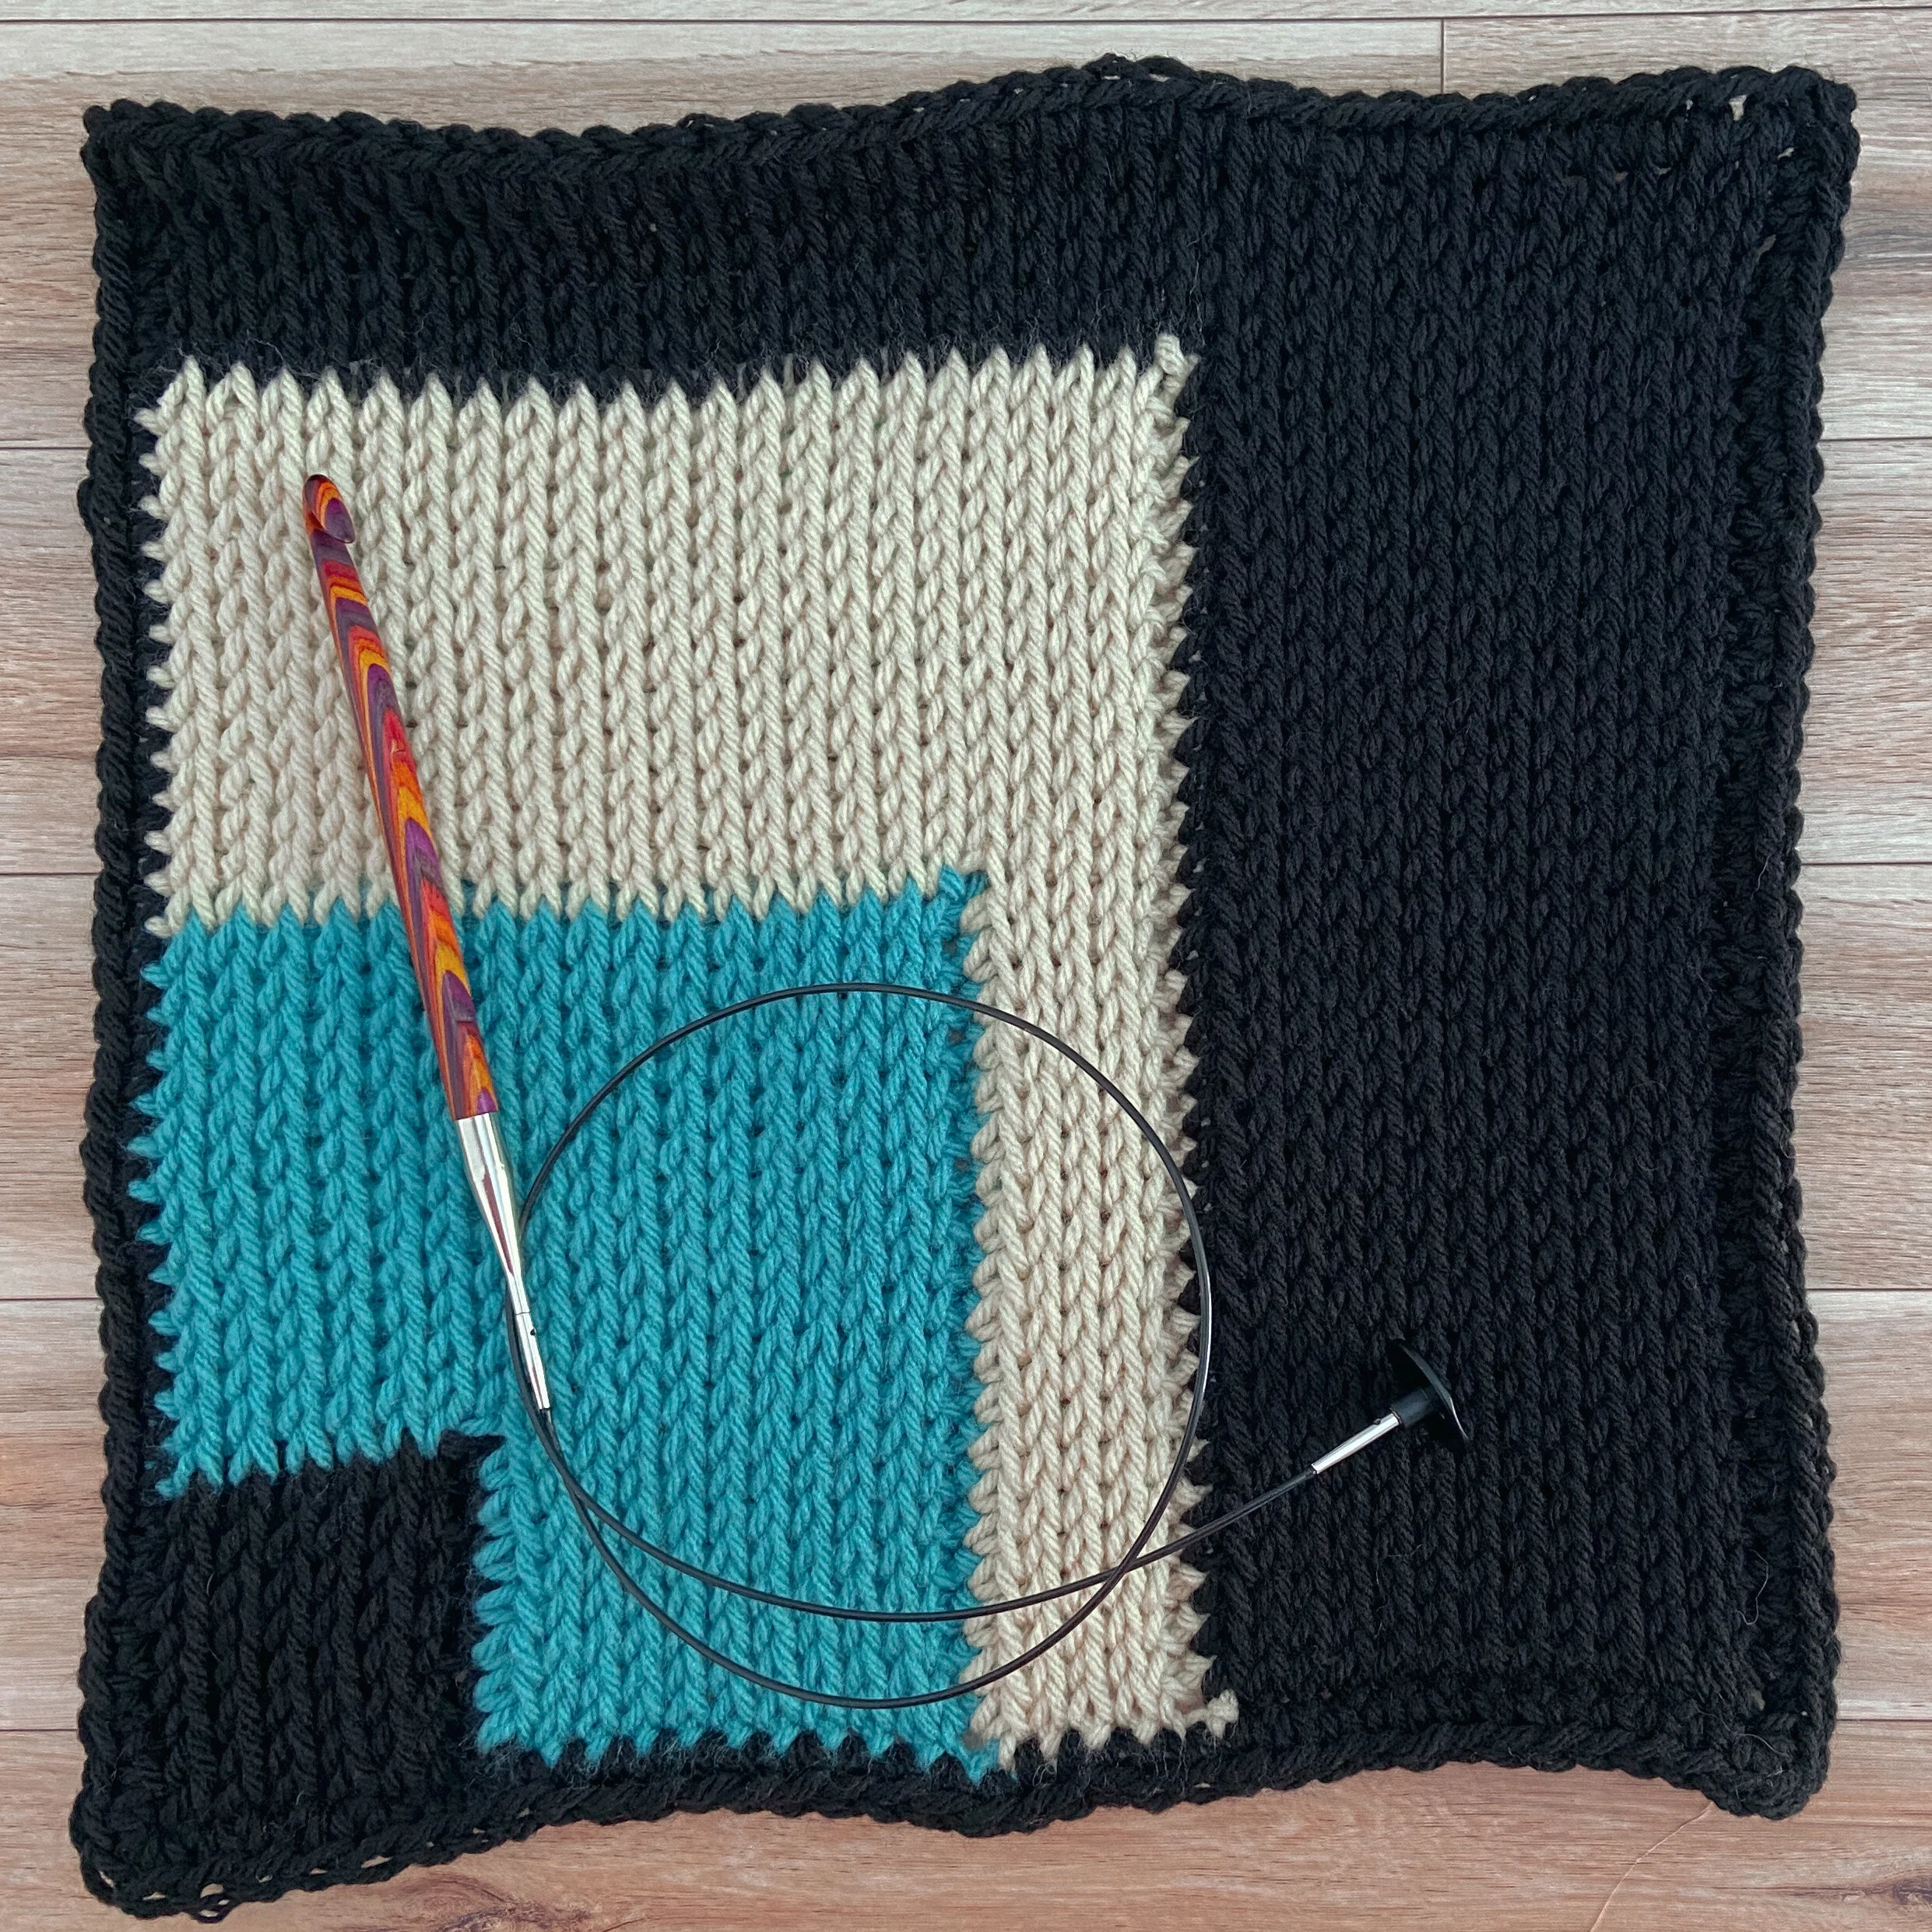
Hooks - L/11 8mm Tunisian crochet hook with 12”/30cm cord (or hook needed to meet gauge) – you will use this hook for the main part of the square; AND 7mm regular crochet hook (or two sizes/1mm down from the hook that meets gauge) – you will use this hook for the bind off row and the border. I use the Radiant Wood Interchangeable Hooks from WeCrochet, and I love them!
Notions - locking stitch marker (1), scissors, tape measure, yarn needle, blocking mats and pins.
The square is worked in four sections using the JAYG technique. The Pattern Instructions and Colour Chart shown below will create the square exactly as pictured. The premium, ad-free PDF has a blank chart that can be coloured in with your own custom colours, so you can vary the placement and size of your colour blocks and create unique squares with as many colours as you like!
The remaining loop on your hook after the RetP is the first stitch of each row, and is not included in the stitch count instruction (i.e., tks next 10 = the first loop is already on your hook, then work a tks in the next 10 sts, for a total of 11 loops on hook).
When you work the last (edge) st of each row, insert your hook under both vertical bars.
Gauge: 12 sts x 14 rows = 4”/10cm in tks, blocked
Finished Measurements: approximately 12 x 12”/30 x 30cm
This pattern uses standard US terms as detailed by the Craft Yarn Council:
ch: chain
st(s): stitch(es)
sl st: slip stitch
sc: single crochet
tks: Tunisian knit stitch (insert hook between two vertical bars and pull up a loop)
JAYG: join as you go (working your square in sections)
RetP: return pass
Regular: ch 1, *yarn over, pull through 2 loops. Repeat from * until 1 loop remains on hook
JAYG: join yarn to first st of previous section, *yarn over, pull through 2 loops. Repeat from * until 1 loop remains on hook
RS/WS: right side/wrong side
Colour A: Black Colour B: Teal Colour C: Cream

The numbers at the bottom of the chart represent the number of stitches in each section. Overall, the square is 36 stitches wide.
If your gauge is very different from mine, feel free to add or remove sts and/or rows from the fourth section in order to meet the finished measurements.
Sections
First Section (Colour A, Black)
Row 1: With larger hook, ch 7. Starting in the second ch from hook, pull up a loop in the back bump of each ch st (7 loops on hook). Complete a Regular RetP.
Rows 2-7: Tks each st, complete a Regular RetP.
Row 8: Tks each st. Work the Regular RetP until 2 loops remain on your hook. Place these 2 loops on a stitch marker and cut yarn, leaving a 4” tail.
Second Section (Colour B, Teal)
Row 1: Join B as per JAYG instructions and ch 11. Starting in the second ch from hook, pull up a loop in the back bump of each ch st (11 loops on hook). Complete a JAYG RetP.
Rows 2-8: Tks in each st, complete a JAYG RetP.
Row 9: Tks in next 10 sts, then place both loops of A on your hook. With B, yarn over and pull through both loops of A. Continue working tks across the top of the first section with B, then complete a Regular RetP.
Rows 10-20: Tks each st, complete a Regular RetP.
Row 21: Tks each st. Work the Regular RetP until 2 loops remain on your hook. Place these 2 loops on a stitch marker and cut yarn, leaving a 4” tail.
Third Section (Colour C, Cream)
Row 1: Join C as per JAYG instructions and ch 5. Starting in the second ch from hook, pull up a loop in the back bump of each ch st (5 loops on hook). Complete a JAYG RetP.
Rows 2-21: Tks in each st, complete a JAYG RetP.
Row 22: Tks in next 4 sts, then place both loops of B on your hook. With C, yarn over and pull through both loops of B. Continue working tks across the top of the second section with C, then complete a Regular RetP.
Rows 23-33: Tks in each st, complete a Regular RetP.
Row 34: Tks each st. Work the Regular RetP until 2 loops remain on your hook. Place these 2 loops on a stitch marker and cut yarn, leaving a 4” tail.
Fourth Section (Colour A, Black)
Row 1: Join A as per JAYG instructions and ch 13. Starting in the second ch from hook, pull up a loop in the back bump of each ch st (13 loops on hook). Complete a JAYG RetP.
Rows 2-34: Tks in each st, complete a JAYG RetP.
Row 35: Tks in next 12 sts, then place both loops of C on your hook. With A, yarn over and pull through both loops of C. Continue working tks across the top of the third section with A, then complete a Regular RetP.
Rows 36-39: Tks in each st, complete a Regular RetP.
Do not fasten off Colour A, switch to smaller hook and proceed to Border.
Border
Bind off row: Ch 1, *insert hook into next st as for tks and work a sc st. Repeat from * across the row, until the last st. In the last st, work 3 sc.
Rotate your square to work along the side edge, RS facing up. In the end of each row, work a sc st until you reach the last row. In this row, work 3 sc and rotate your square to work along the bottom. Sc in each ch st from the foundation ch until you reach the last st. Work 3 sc in this last st and rotate your square to work up the other side. In the first st of each row, work a sc until you reach the last row. Sl st to join to the ch-1 space of the Bind off row, and fasten off.
Finishing
Block your square using your preferred method. If you’ve used an acrylic yarn (like I have), or if you find that the edges of your square are curling quite a bit, I recommend a full wet block: soak your square for 15-20 minutes in the sink or a tub of lukewarm water and a bit of wool wash. Drain and gently squeeze out as much water as you can (do not wring or stretch). Lay the square flat on a towel, and either fold the towel up or roll it neatly, then step on it to draw the rest of the water out of the square. Lay it out flat, and you may pin the edges if you like to help the stitches settle. Leave pinned until completely dry.
When your square is dry, weave in all ends to the WS. I like to save this until the very end, so that there’s no chance of puckering or pulling during the blocking process.

Congratulations on finishing the Stashdown Square pattern! I hope this customizable pattern helps you use up your scraps to make a beautifully coordinated square that fits nicely with the rest of your blanket. You could even make a few different ones to tie the whole thing together!
If you share your project on social media, don’t forget to tag me @capital.crochet and @knitterknotter, and use the hashtags #StashdownSquare and #KnitterKnotterTunisianBlanketCAL2021!
You may sell finished items made from this pattern, but please credit me as the designer by linking back to this blog post.
Thank you so much for your support! If you’d like to be the first to know about free patterns and other exciting news, make sure to subscribe to the newsletter below.
Save this pattern to your Ravelry queue, or add a project to the pattern page!
This post may contain affiliate links, meaning that if you click through and make a purchase, I earn a small commission at no extra cost to you. This helps support my business and makes it possible for me to bring you free content.
Have you ever wanted to try new stitches or techniques, but always seem to end up going back to the same familiar textures? I love a good double crochet as much as the next person, but there are only so many ways to arrange the same couple of stitches before they become boring or worse, it’s already been done.
As a designer, one of my biggest fears is working through the development of a pattern idea, making the sample and going through the editing and testing process only to find out that I’ve unintentionally copied someone else - GAH! Anyone else had that dream, or worse, had it happen in real life? It ain’t fun.
I’ve been thinking a lot lately about how I can change things up, or use common stitches a little differently to make sure I’m creating unique and distinct patterns. When I first started designing, I often got stuck because I’d be trying out all these completely new stitch techniques and expecting them to act the same as basic stitches. I would get discouraged when something didn’t work out, and fall back on the stitches I knew and loved.
A goal of mine this year is to branch out and explore different textures and techniques, without the pressure to immediately turn them into a full garment pattern. This way, I can learn about how the stitches behave when they’re worked up together, and then consider what type of garment or accessory pattern they might be best suited for. I thought this would be a great journey to share, since I’m certain I am not the only designer/maker who struggles in this area. So without further ado, welcome to the Stitch Exploration Series!

As the name suggests, I will be exploring new stitches and techniques in a series of FREE dishcloth patterns here on the blog. I’ve chosen dishcloths as the pattern type, because they are just the right size to get a good feel for how the stitch works up, but small enough that you can try out these new techniques while also completing a project and making something useful. My motivation is also practical… I need some new dishcloths - my old ones are in bad shape!
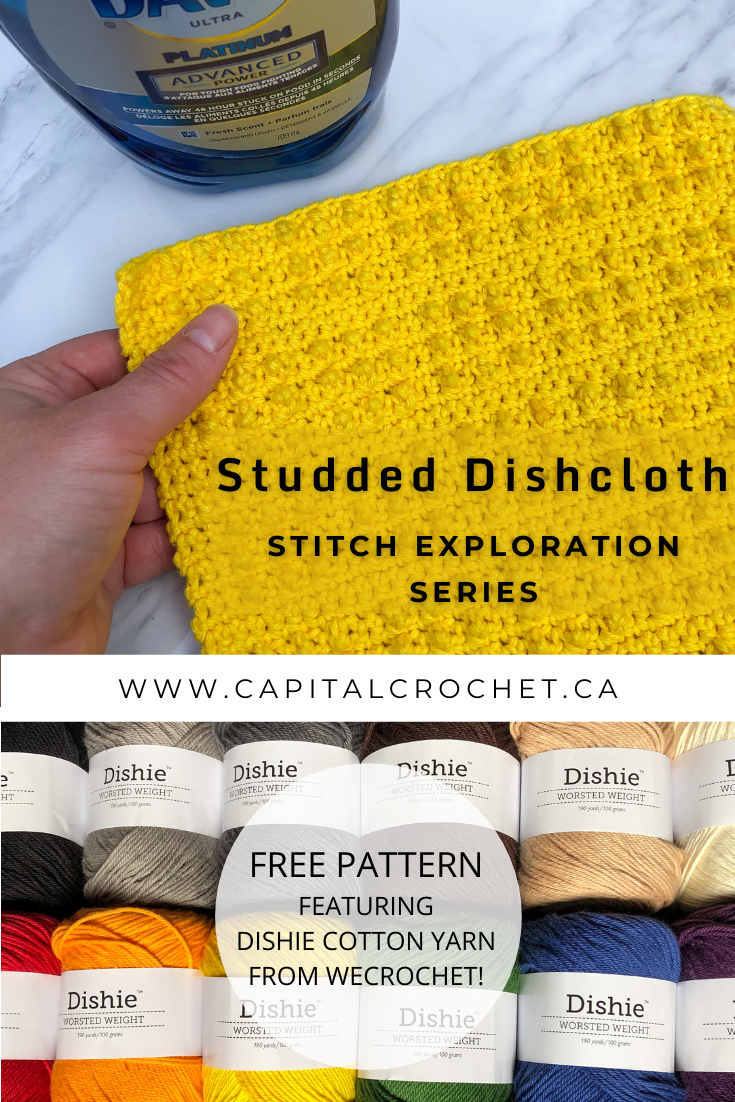
I’ve chosen a beautiful, durable cotton yarn, Dishie from WeCrochet. As you can see, it comes in lots of fun colours (30 solids in total, plus there are also Dishie Twist and Dishie Multi!), and it feels great. And I’ve heard people say that this yarn is good for other things, too - summer garments and tote bags come to mind. Grab some for yourself, and let’s get started on our first Stitch Exploration pattern, the Studded Dishcloth!
Texture is the name of the game here, and this deceptively simply pattern creates a sturdy dishcloth with studded texture that hopefully will make you actually want to tackle that pile in the sink!
Hook - US G/4mm, or size needed to meet gauge.
Yarn - WeCrochet Dishie, 100% cotton, 190yds (174m)/100g (3.5oz) per skein. I used approx. 107yds (98m) of the colourway Bumblebee.
Notions - scissors, tape measure, yarn needle.
Ch 1 to start each round does not count as a st.
Gauge is not critical for this project, however, if yardage is a concern, you should aim to meet it as closely as possible. No one will judge an extra half inch on your dishcloth!
Generally, I do not block cotton washcloths, because they’re just going to get wet anyway. If you’re making for gifting, or just want to straighten things out, feel free to block as you see fit.
Gauge - 4” = 17 sts x 19 rows in sc unblocked.
Finished measurements - approx. 9” wide x 8.5” tall
This pattern uses standard US terms as detailed by the Craft Yarn Council:
Ch - chain
St(s) - stitch(es)
Sc - single crochet
Tr - treble crochet
( ) - repeat instructions contained within the parentheses as specified
* * - repeat instructions contained within the asterisks as specified
Row 1. Ch 40 and turn. Starting in the second ch from hook, and working into the back bumps of each ch st, sc across. <39 sts>
Row 2. Ch 1, sc in next 3 sts, *(tr in next, sc in next) three times, sc in next.* Repeat from * to * four more times, and sc in last 2 sts.
Row 3. Ch 1, sc in each st across and turn.
Rows 4-7. Repeat Rows 2 and 3.
Rows 8-9. Repeat Row 3.
Rows 10-33. Repeat Rows 2-9 three more times.
Rows 34-39. Repeat Rows 2-7 once more.
Fasten off and weave in the ends.
To make your dishcloth narrower or wider, start with fewer or more chain sts in Row 1 in multiples of 9, and work fewer or more * * repeats accordingly in Row 2.
To make your dishcloth shorter or longer, work fewer or more repeats of Rows 2-9.
Congratulations on finishing your Studded Dishcloth! I really enjoy how combining the simple treble with single crochets creates a uniquely studded texture. I’d love to know what you think about the texture, and if you’ve ever tried a stitch combination similar to this before. I’m also curious to see how this stitch will work with less sturdy fibre, like merino wool or acrylic!
Share your dishcloth on Instagram using the hashtag #StuddedDishcloth, and tag me, @capital.crochet!
You may sell finished items made from this pattern, but please credit me as the designer by linking back to this blog post.
Thank you so much for your support! If you’d like to be the first to know about new patterns in this series and other blog posts, make sure to subscribe to my newsletter below.
Save this pattern to your Ravelry queue, or add a project to the pattern page!
This post may contain affiliate links, meaning that if you click through and make a purchase, I earn a small commission at no extra cost to you. This helps support my business and makes it possible for me to bring you free content.
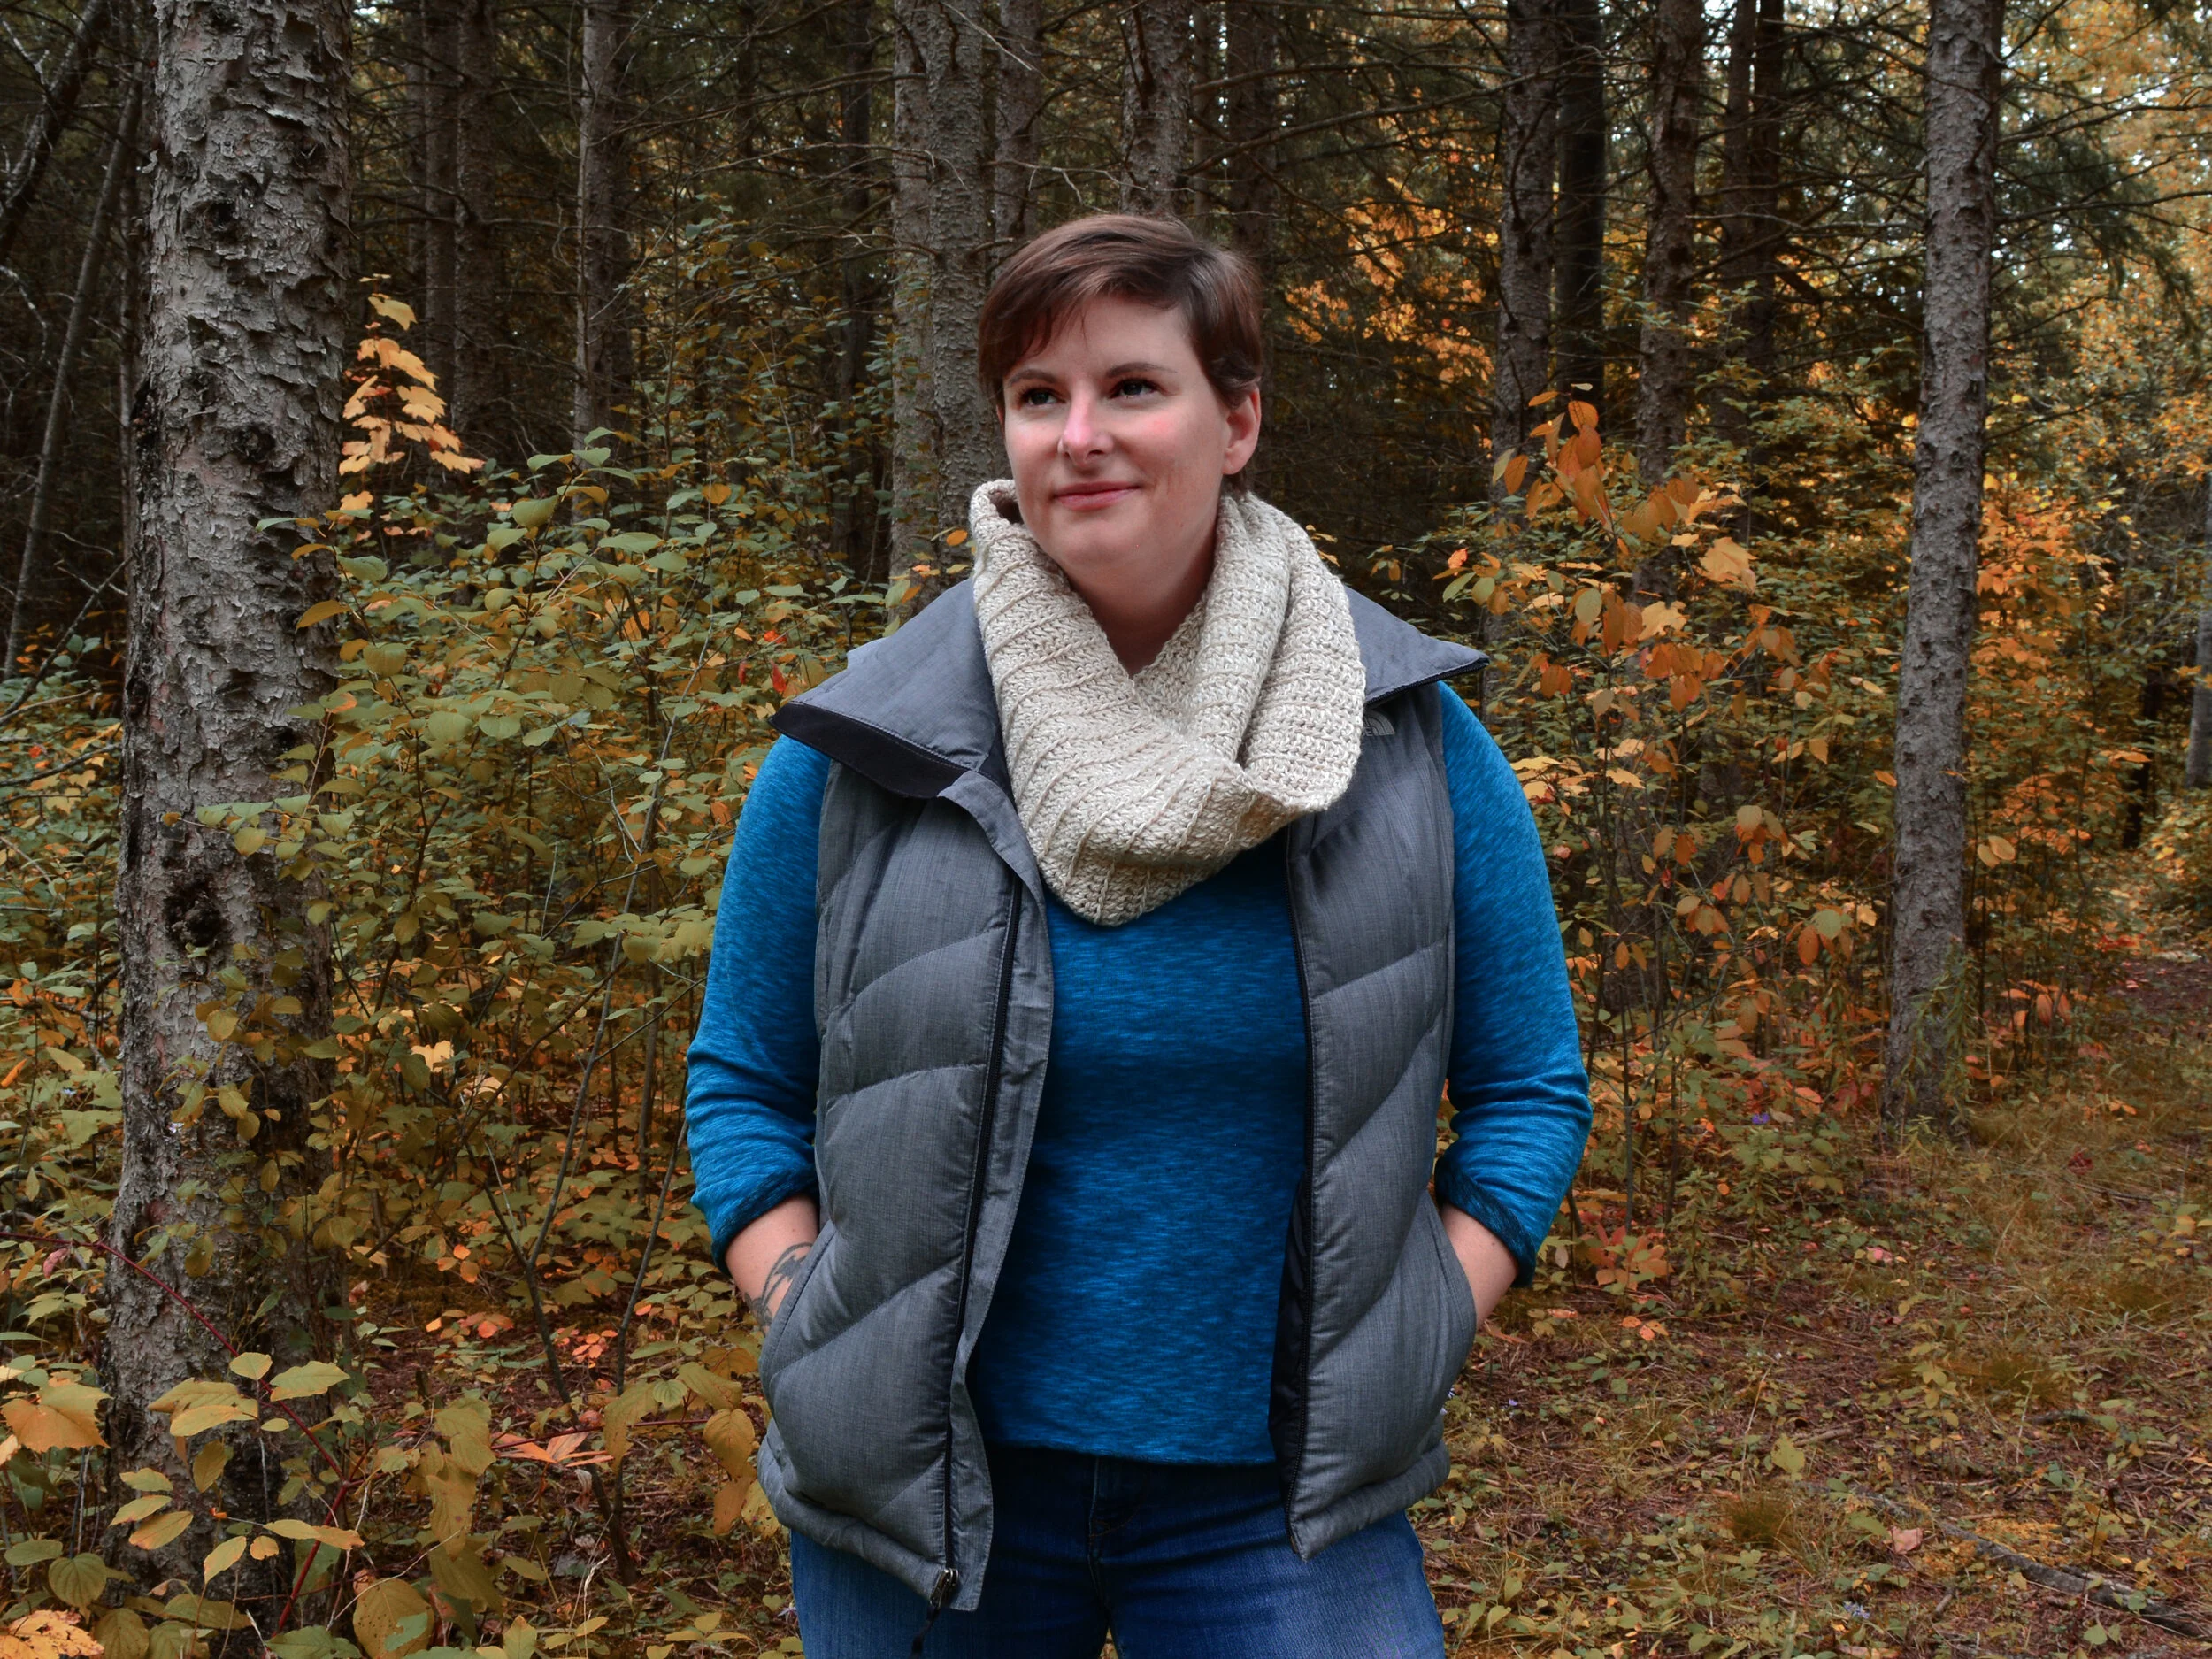
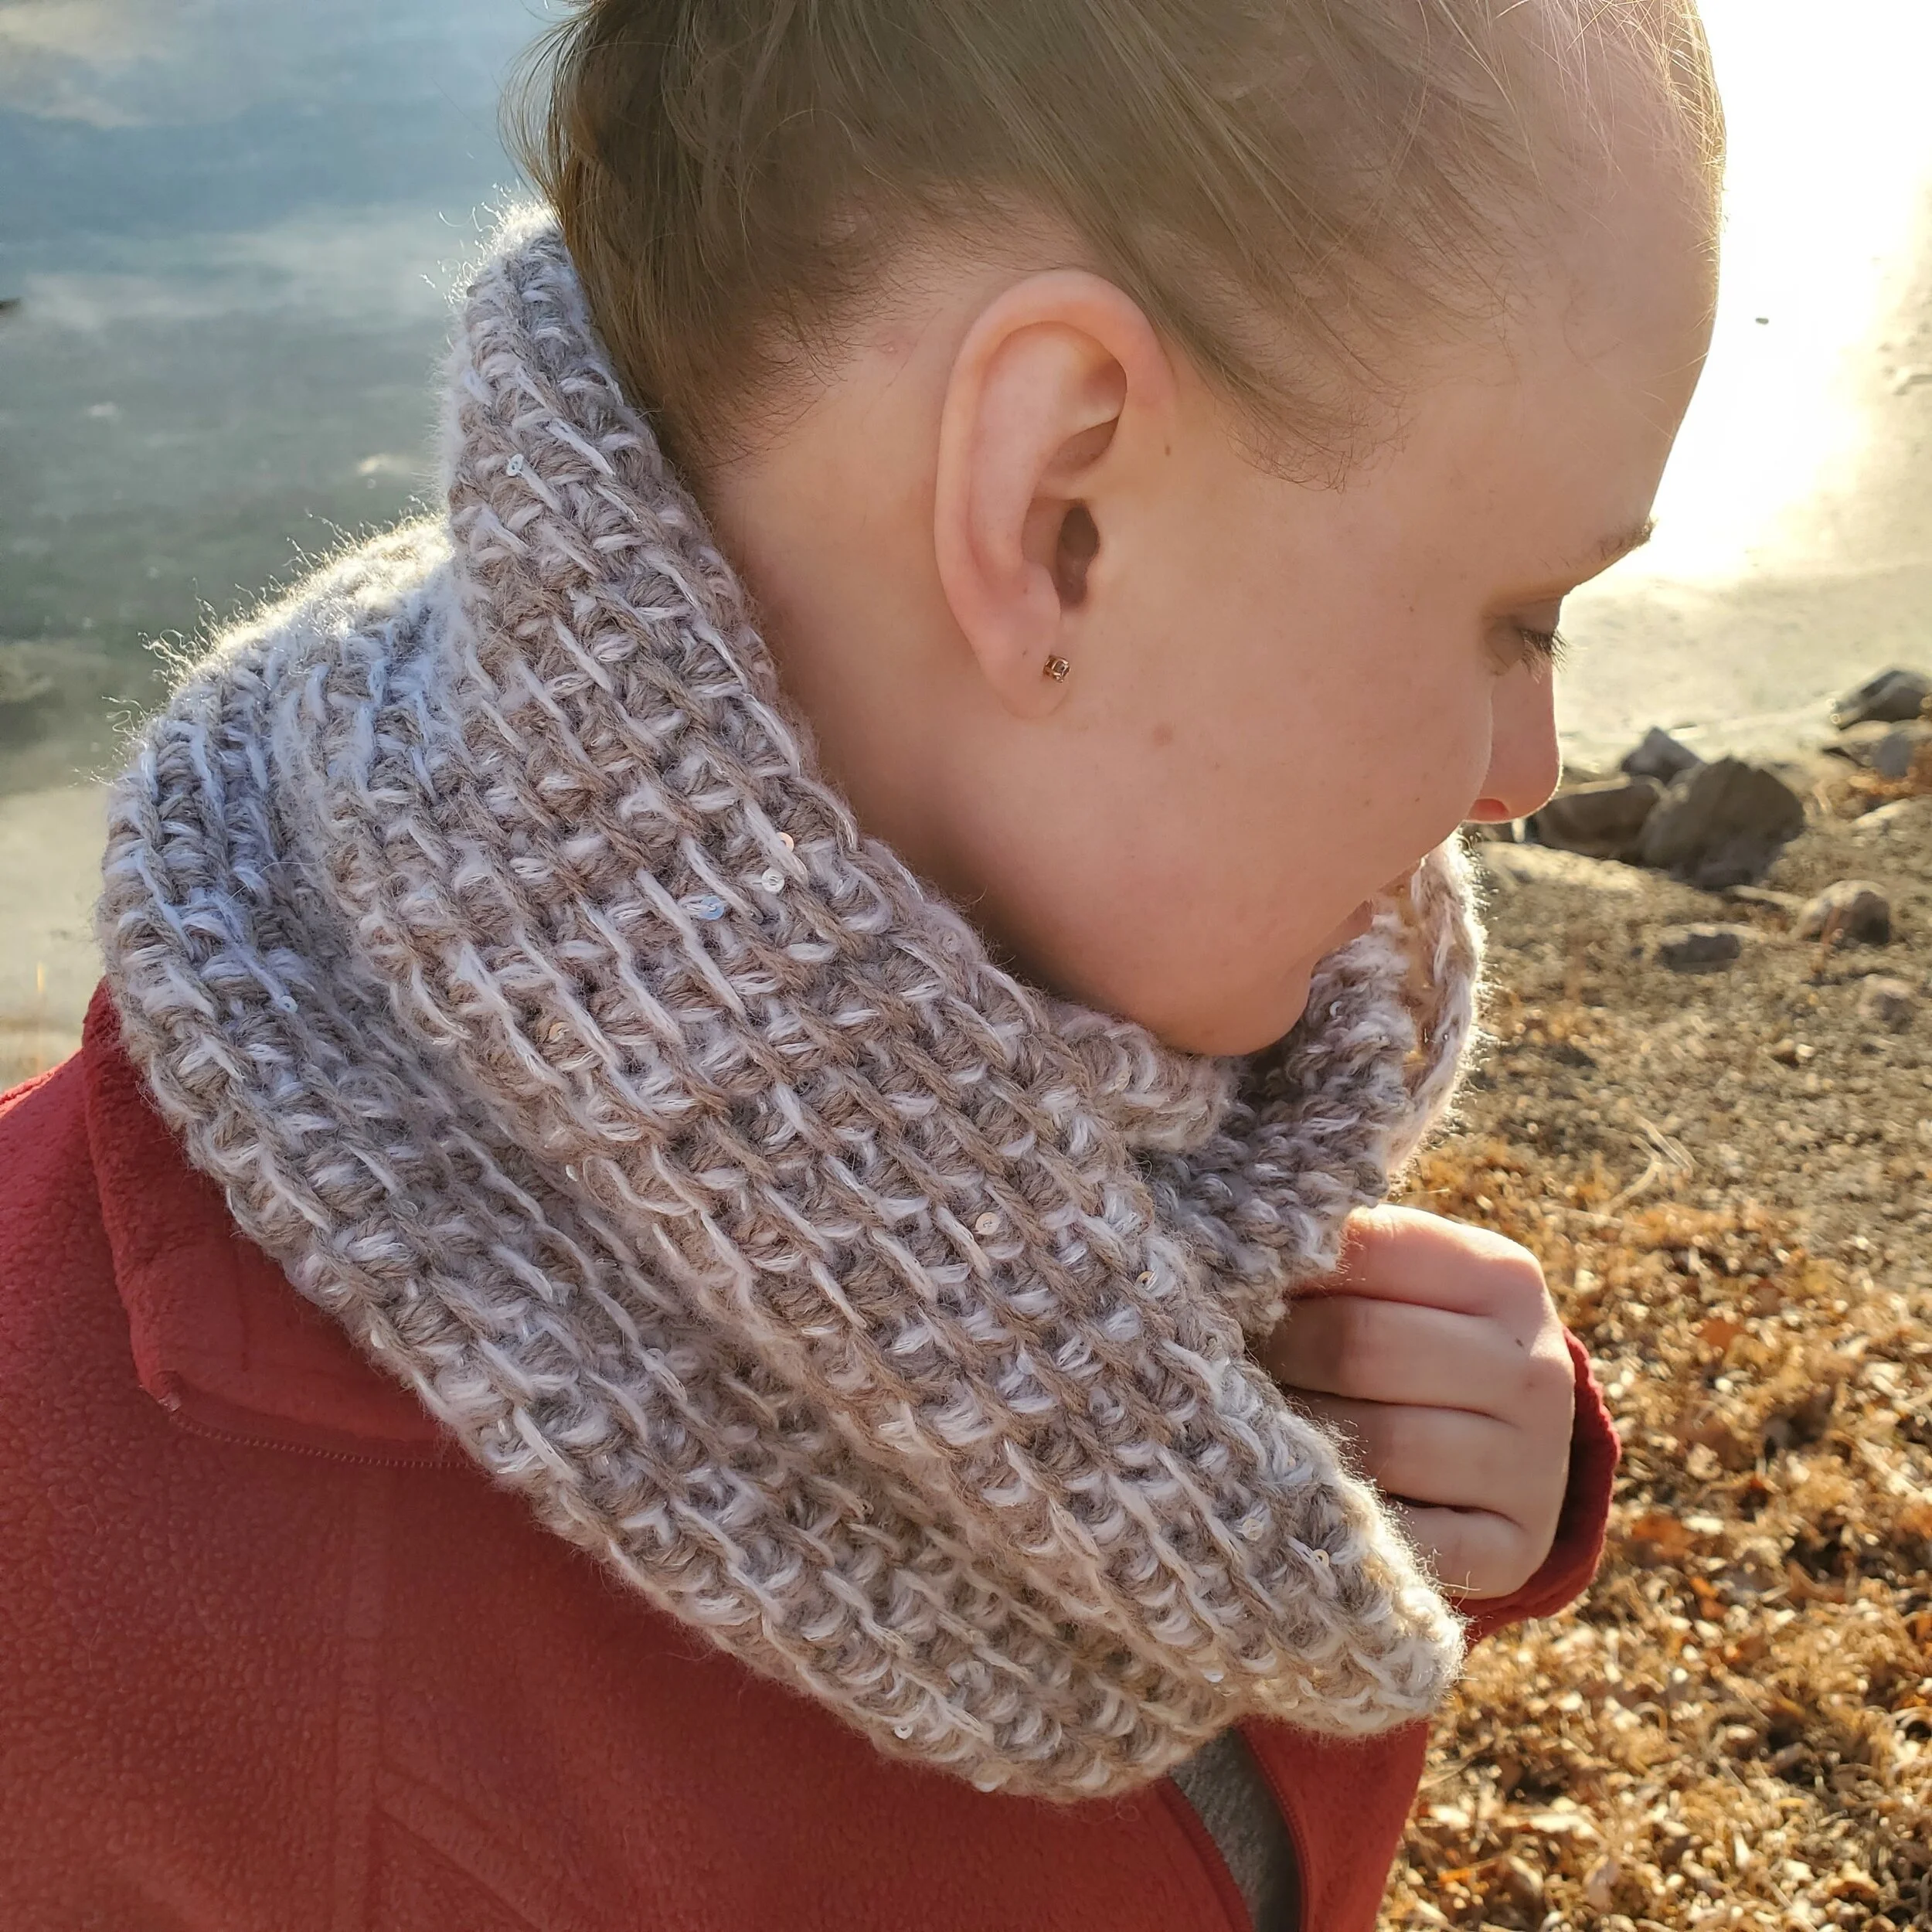
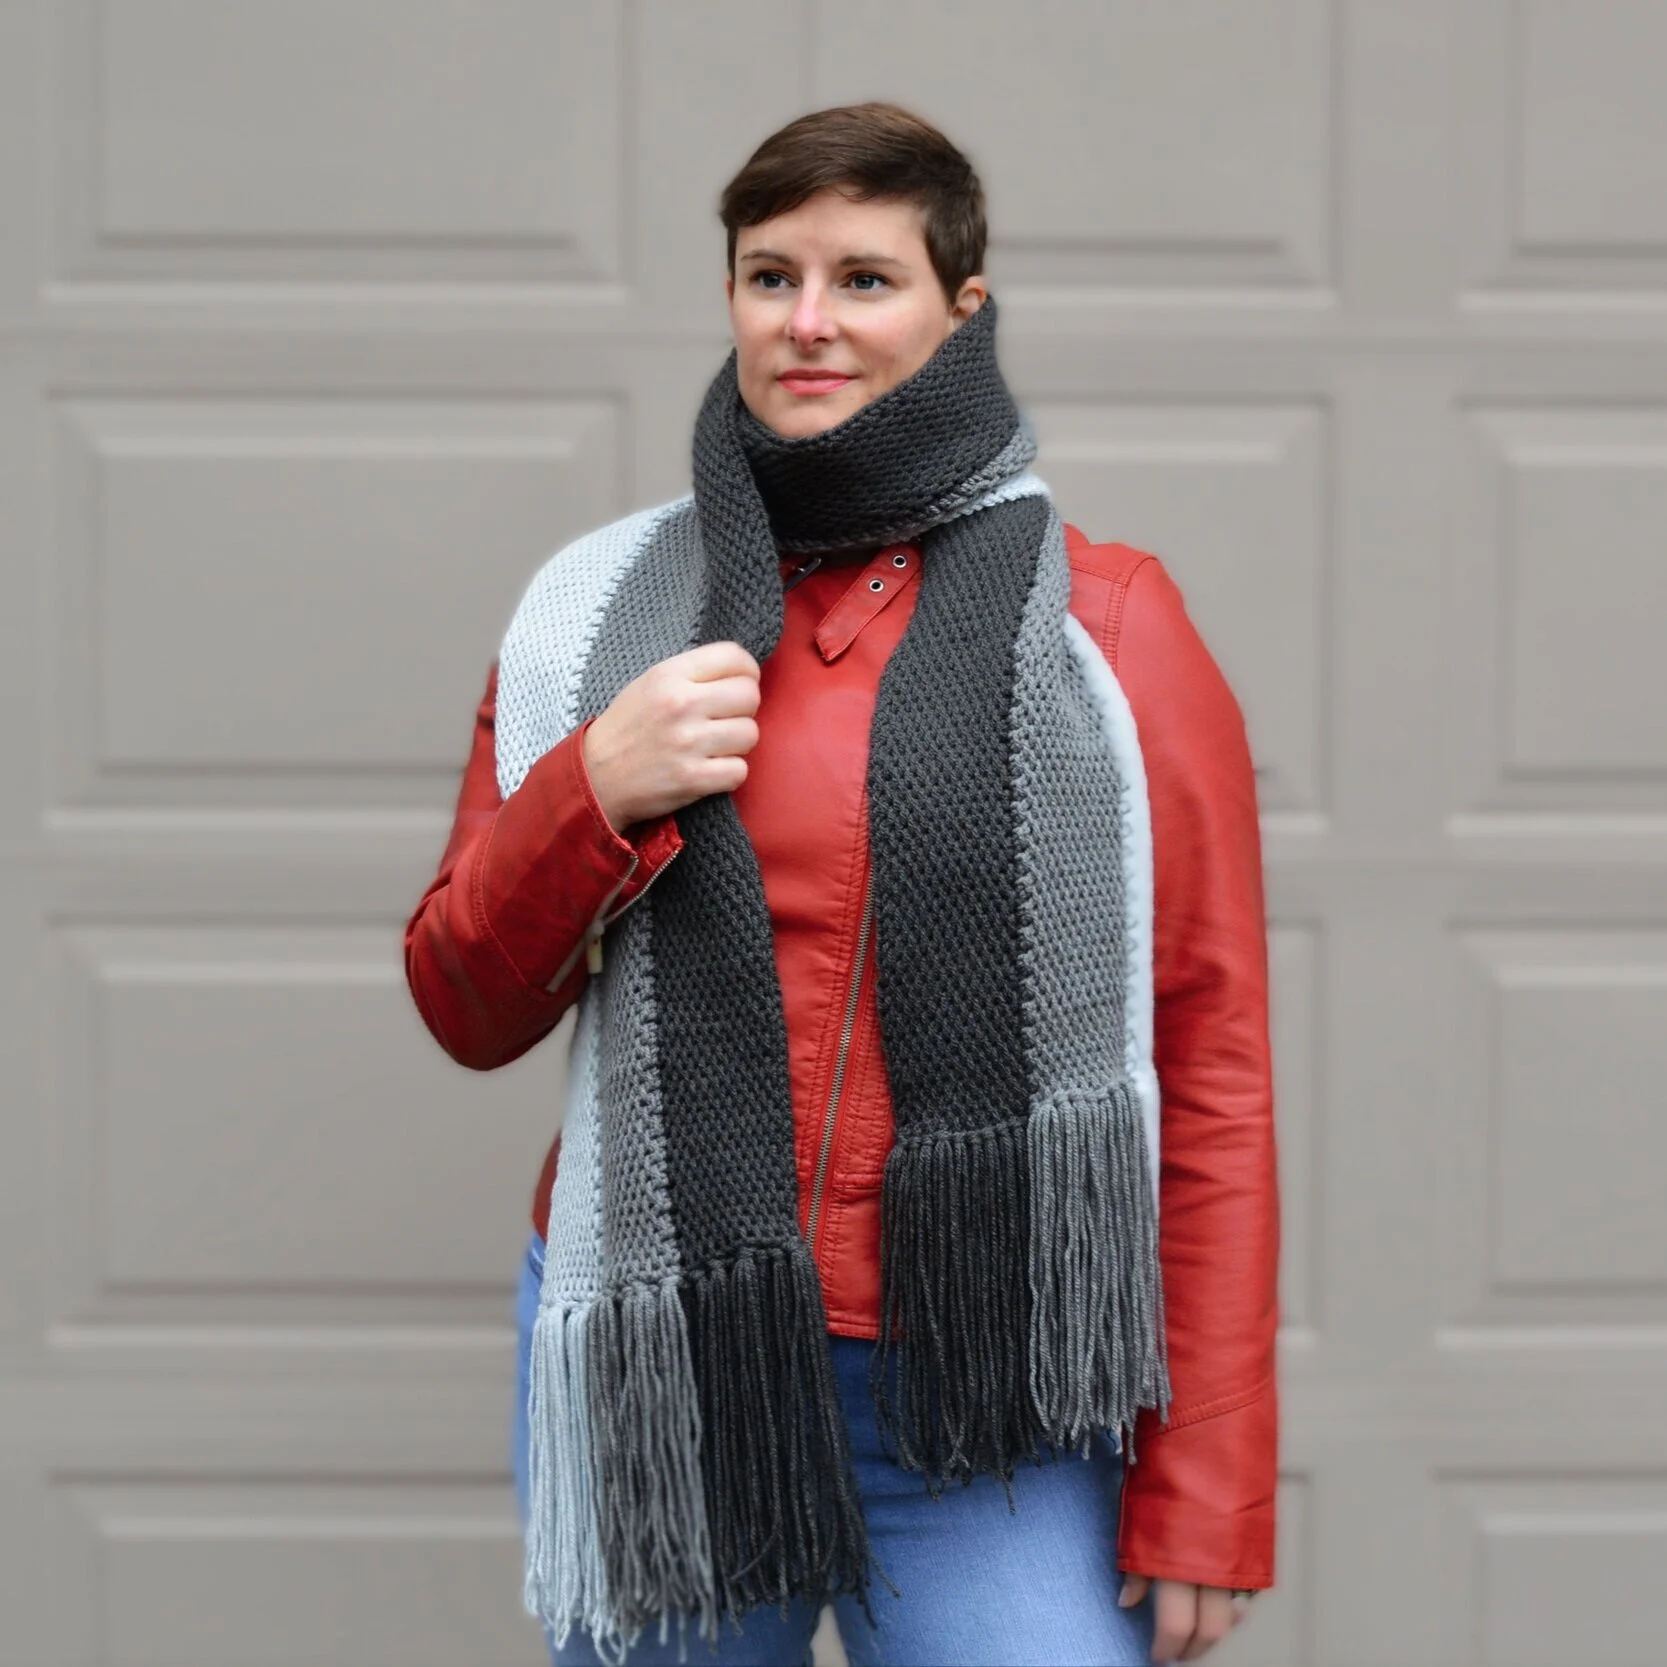
Hello friends! We’ve made it to the final pattern in the Winter Sparkle series - the Winter Sparkle Scarf!
Towards the end of November, when the days started to get real short and dark, I was sitting in my craft room one gloomy afternoon. I felt bleh, you know, lots I should be doing, no motivation to do anything. Yeah, that was me. Up on my shelf, I caught a glimpse of some Winter Nights yarn and thought, heck yes, gimme some sparkle!

The Winter Sparkle patterns are really fun, because they use two yarns held double to create a unique texture and colour look. The Winter Sparkle Scarf is a relaxing, meditative make that you can easily finish in a Netflix bing sesh or two. Match it up with the other patterns from the Winter Sparkle series, and you’ve got yourself a beautifully coordinated set!
I used Lion Brand Winter Nights for the sparkly yarn, and paired it with Lion Brand Touch of Alpaca. This gives the cowl warmth and comfort.
The pattern uses the Tunisian Simple Stitch, which is the basic Tunisian crochet stitch. It is the perfect stitch to introduce yourself to the fabulous world of Tunisian crochet!
Hook - US 10mm, or size needed to meet gauge, and a short cord attached. I love these interchangeable hooks and cords from WeCrochet.
Yarn - Lion Brand Touch of Alpaca (I used the colour Oxford Grey) and Lion Brand Winter Nights (I used the colour Chinchilly). You will need approx. 270 yds of each yarn. You may also combine any two worsted (4) weight yarns, or use a bulky (5) yarn on its own, as long as you can meet gauge.
Notions - scissors, tape measure, yarn needle, blocking pins and mat (optional).
Curling at the edges of Tunisian crochet is common. See the Finishing section below for blocking instructions to help tame the curl.
I’ve made the Infinity scarf version - see the Variations section at the end of the pattern for instructions on how to adjust the size and fit.
Gauge - 4” = 8.5 sts x 8 rows in tss unblocked.
Finished measurements - approx. 8” wide x 64” long (prior to seaming, if making the infinity version).
This pattern uses standard US terms as detailed by the Craft Yarn Council:
Ch - chain
St(s) - stitch(es)
Sl st - slip stitch
Tss - Tunisian Simple Stitch (see HERE for an excellent tutorial!)
Lts - Last Tunisian Stitch (insert hook under both bars)
RetP - Return Pass (Ch 1, *yarn over, pull through 2 loops. Repeat from * until 1 loop remains on your hook)

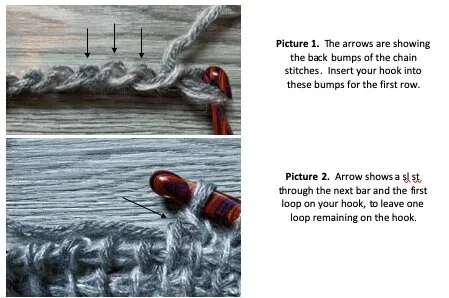
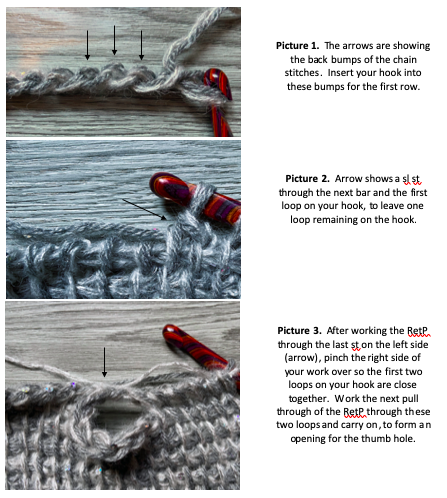
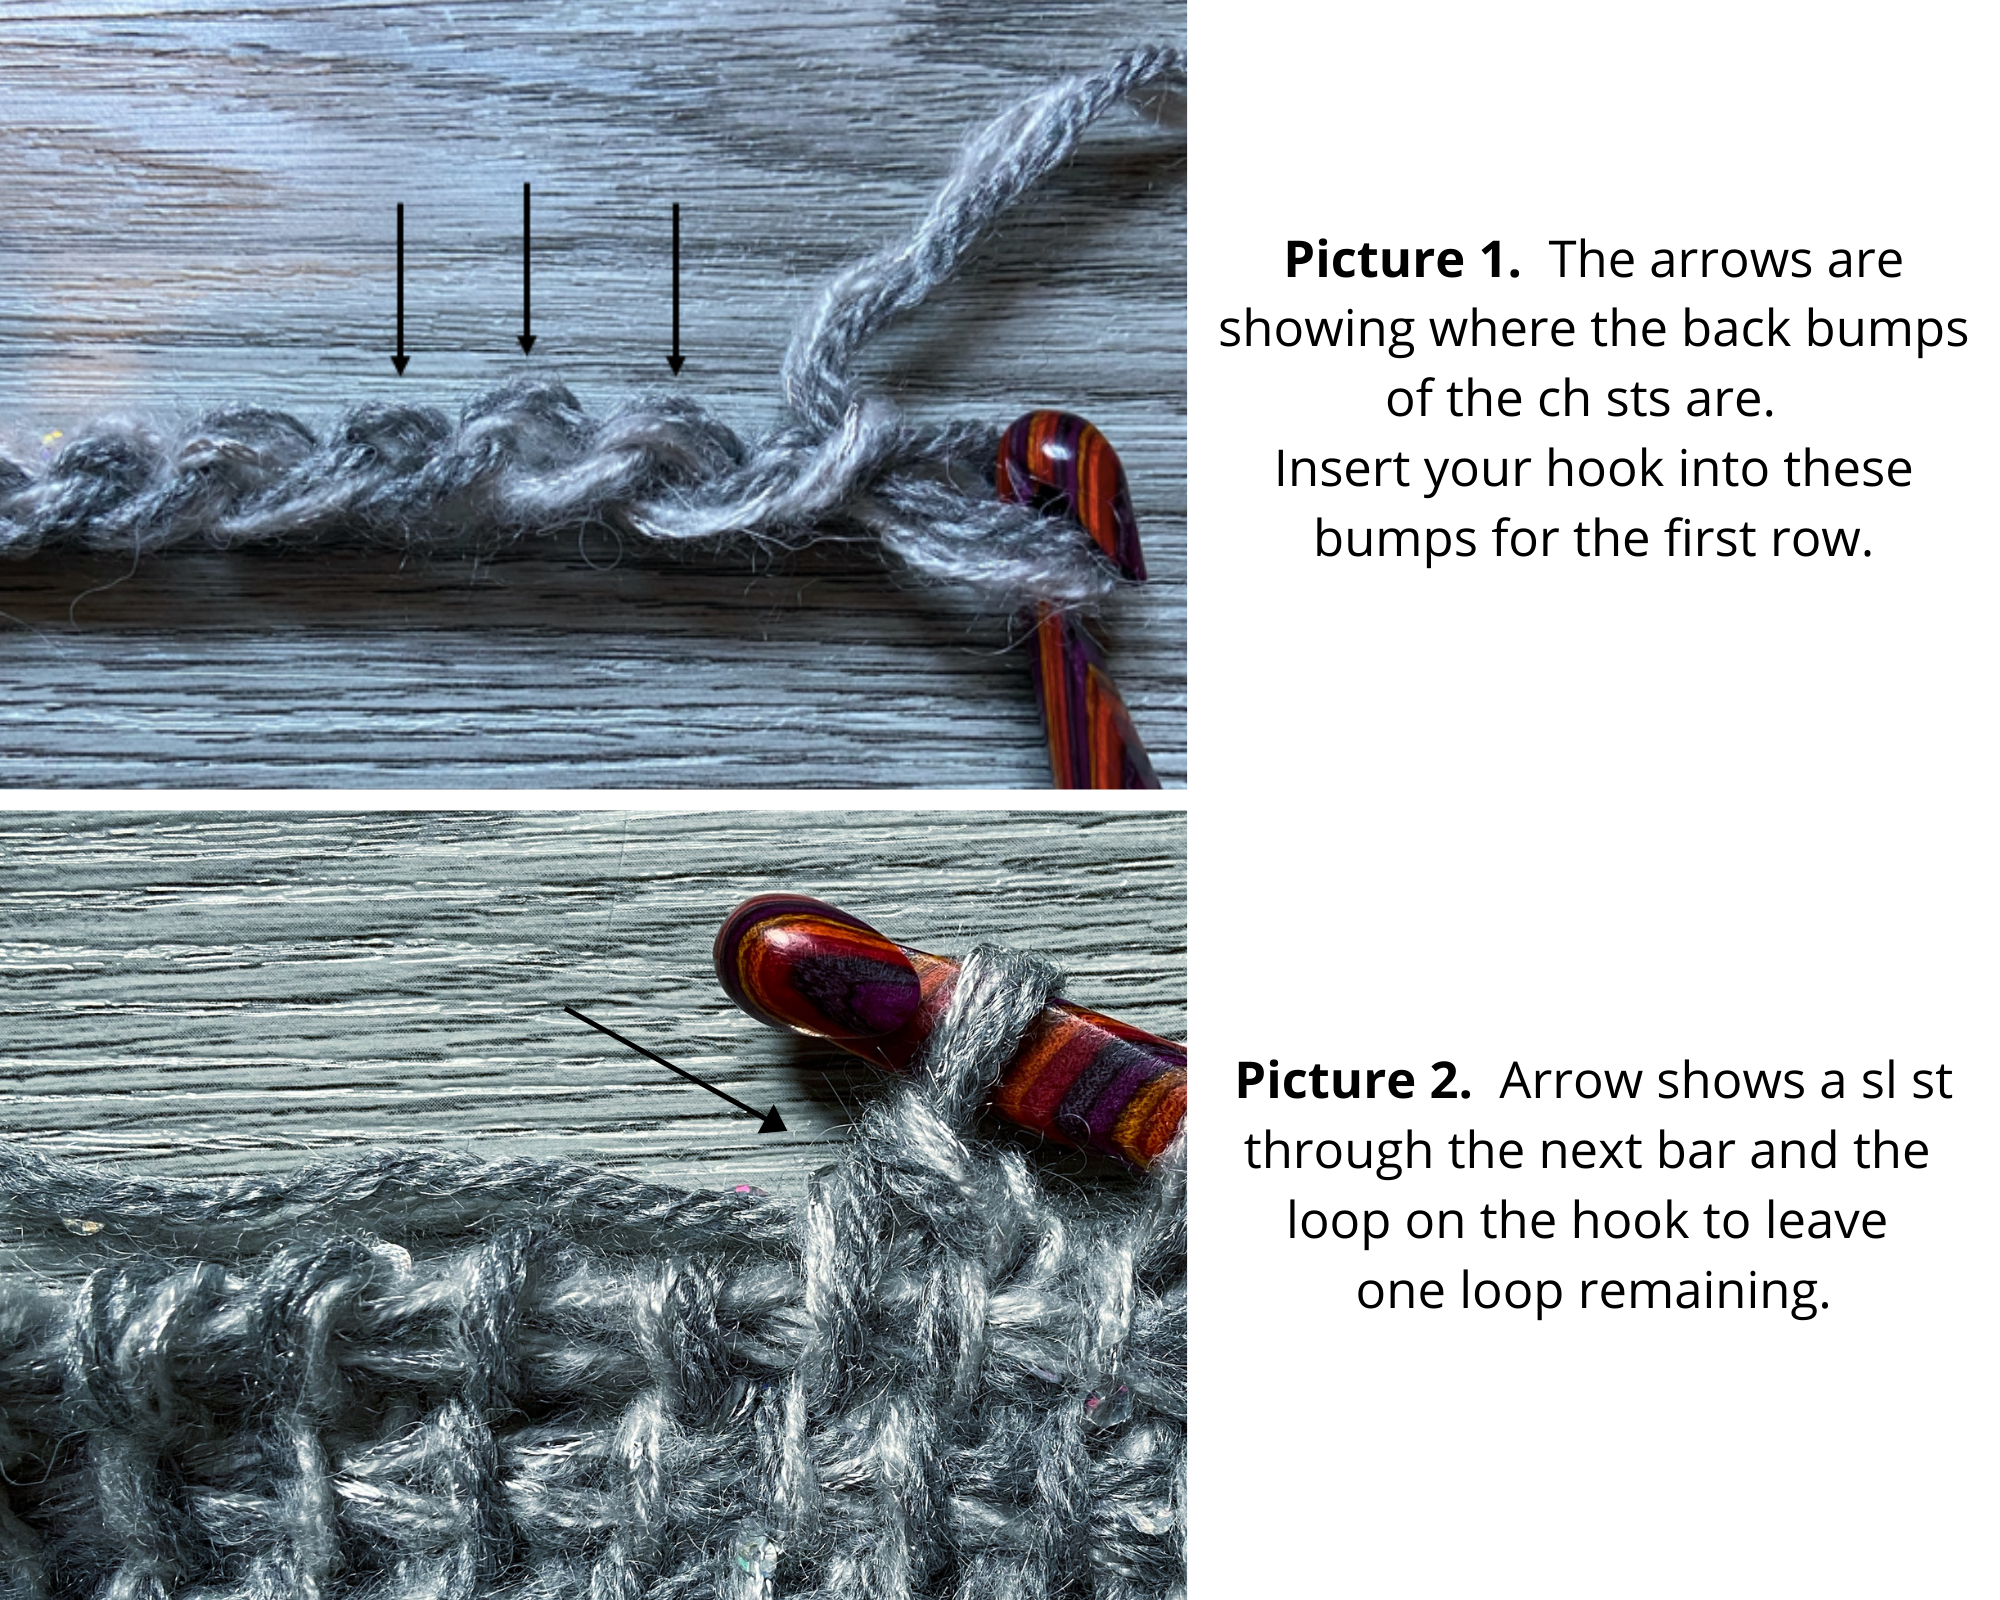
Row 1. Ch 18. Working in the back bumps (see Picture 1, below), pull up a loop in the second ch from hook, and each ch across. Work a RetP.
Row 2. Tss in each st across, Lts, RetP.
Repeat Row 2 until your work measures 64” long, or desired length.
Bind off row: Ch 1, *sl st next st (see Picture 2, below). Repeat from * until last st. Insert your hook as for Lts and pull up a loop. Yarn over and pull through both loops. Fasten off, leaving a 12” tail for seaming.
Blocking: You may wish to steam block or wet block your work prior to seaming.
To steam block, pin your work down to mats or another flat surface, taking care not to stretch the fabric. Use an iron or steaming tool, gently pass over the whole piece, applying steam to help relax the fibres. Leave pinned until dry.
To wet block, soak your work in cool water for 15-20 mins. Gently squeeze out excess water (do not wring!) by laying it flat on a towel and rolling it up tight. Lay the wet piece down on mats or a towel, and secure the edges with pins. Take care not to stretch your work; you can use the finished measurements as a guide. Leave pinned until dry.
Seaming: Fold your work so that the two short edges are matched up. Seam the edges together using your preferred seaming method (I like to use the Mattress Stitch technique). Weave in all ends.
To make your scarf narrower or wider, start with fewer or more chain sts in Row 1.
To make your scarf shorter or longer, work as many rows as you wish to achieve desired length.
To make a traditional long scarf, simply omit the seaming to leave your scarf open. Add tassels or fringe to take it to the next level!
Congratulations on finishing your Winter Sparkle Scarf! I hope you have enjoyed this quick and easy Tunisian crochet pattern. Share your pics on social media and tag me @capital.crochet and use the hashtag #WinterSparkleScarf.
You may sell finished items made from this pattern, but please credit me as the designer by linking back to this blog post.
Thank you so much for your support! Make sure to check out the other Winter Sparkle patterns in the series: Ear Warmer, Cowl and Mitts!
If you enjoyed this pattern, I thought you might be interested these similar Tunisian crochet scarf patterns, too! Shown below are the Stashdown Scarf (available FREE on the blog!) and the Juliet Cowl, available in my pattern shop, or on Ravelry and Etsy!

This post may contain affiliate links, meaning that if you click through and make a purchase, I earn a small commission at no extra cost to you. This helps support my business and makes it possible for me to bring you free content.
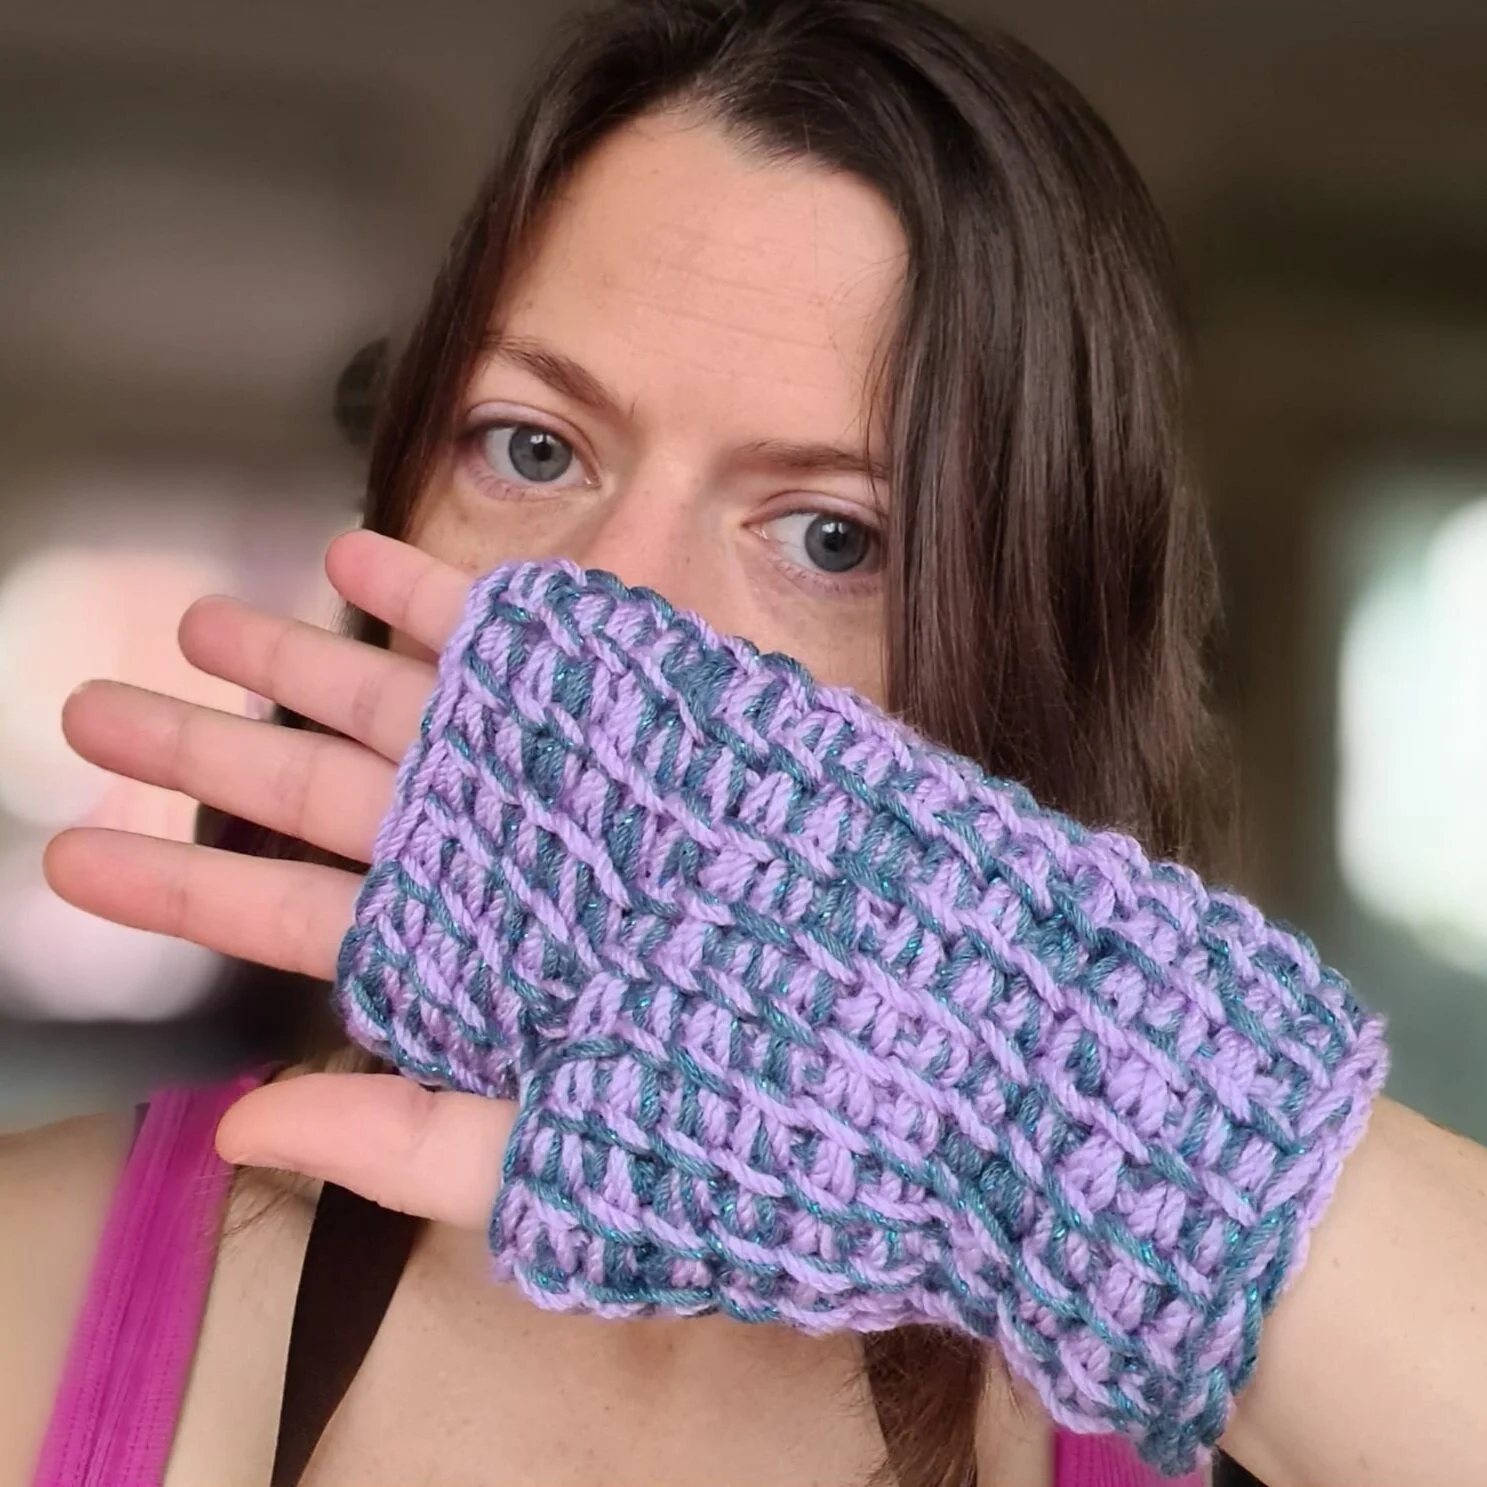
Hello friends! Welcome to the third pattern in the Winter Sparkle series - the Winter Sparkle Mitts!
Towards the end of November, when the days started to get real short and dark, I was sitting in my craft room one gloomy afternoon. I felt bleh, you know, lots I should be doing, no motivation to do anything. Yeah, that was me. Up on my shelf, I caught a glimpse of some Winter Nights yarn and thought, heck yes, gimme some sparkle!

The Winter Sparkle patterns are really fun, because they use two yarns held double to create a unique texture and colour look. The Winter Sparkle Mitts work up quickly, making them a great last-minute gift item that you can whip up whenever you need something in a flash. They also pair well with other free patterns from the series, like the Winter Sparkle Ear Warmer.
I used Lion Brand Winter Nights for the sparkly yarn, and paired it with Lion Brand Touch of Alpaca. This gives the cowl warmth and comfort.
The pattern uses the Tunisian Simple Stitch, which is the basic Tunisian crochet stitch. It is the perfect stitch to introduce yourself to the fabulous world of Tunisian crochet!
Hook - US 10mm, or size needed to meet gauge, and a short cord attached. I love these interchangeable hooks and cords from WeCrochet.
Yarn - Lion Brand Touch of Alpaca (I used the colour Oxford Grey) and Lion Brand Winter Nights (I used the colour Chinchilly). You will need approx. 90 yds of each yarn. You may also combine any two worsted (4) weight yarns, or use a bulky (5) yarn on its own, as long as you can meet gauge.
Notions - scissors, tape measure, yarn needle.
This pattern uses standard US terms as detailed by the Craft Yarn Council:
Ch - chain
St(s) - stitch(es)
Sl st - slip stitch
Inc - increase (pull up a loop in the back bar of the stitch. The next regular tss will be worked in the front bar of the same st, see Special Stitch section)
Tss - Tunisian Simple Stitch (see HERE for an excellent tutorial!)
Lts - Last Tunisian Stitch (insert hook under both bars)
RetP - Return Pass (Ch 1, *yarn over, pull through 2 loops. Repeat from * until 1 loop remains on your hook)
Gauge - 4” = 8.5 sts x 8 rows in tss unblocked.
Finished measurements - approximately 8.5" long x 4.5” wide at the thumb.
Curling at the top and bottom edges of Tunisian crochet is common. See the Finishing section below for blocking instructions to help tame the curl.
These mitts have been designed in one size, to fit a hand that is approximately 8” circumference at the bottom of the fingers. To adjust the size, see the Variations section at the end of the pattern.
Increase - use this internal increase technique to create a bit of a gusset for your thumb. Work
The top picture shows the detail of the back (1) and front (2) bar of the next st that you will work into.
The bottom picture shows the extra st (1) created for the increase, and the next regular tss st (2) worked into the front bar as per normal.


Row 1. Ch 18. Working in the back bumps (see Picture 1, below), pull up a loop in the second ch from hook, and each ch across. Work a RetP.
Rows 2-5. Tss in each st across, Lts, RetP. (18 sts)
Row 6. Tss 7, inc, tss, inc, tss 8, Lts, RetP. (20 sts)
Rows 7-11. Tss in each st across, Lts, RetP. (20 sts)
Row 12. Tss 7, sl st bind off (see Picture 2, below) next 5, tss 6, Lts. You should have 15 loops on your hook, with 5 sts bound off in the middle. Work a RetP, pinching the two groups of sts together to create the thumb hole where the 5 bound off sts are (see Picture 3, below). (15 sts)
Row 13. Tss 5, inc, tss, inc, tss 7, Lts, RetP. (17 sts)
Rows 14-16. Tss in each st across, Lts, RetP. (17 sts)
Bind off row: Ch 1, *sl st next st. Repeat from * until last st. Insert your hook as for Lts and pull up a loop. Yarn over and pull through both loops. Fasten off, leaving a 10” tail for seaming.
Blocking: You may wish to steam block or wet block your work prior to seaming.
To steam block, pin your work down to mats or another flat surface, taking care not to stretch the fabric. Use an iron or steaming tool, gently pass over the whole piece, applying steam to help relax the fibres. Leave pinned until dry.
To wet block, soak your work in cool water for 15-20 mins. Gently squeeze out excess water (do not wring!) by laying it flat on a towel and rolling it up tight. Lay the wet piece down on mats or a towel, and secure the edges with pins. Take care not to stretch your work; you can use the finished measurements as a guide. Leave pinned until dry.
Seaming: Fold your work so that the two side edges are matched up, with the thumb hole opposite. Seam the edges together using your preferred seaming method (I like to use the Mattress Stitch technique). Weave in all ends.
To make your mitts narrower or wider, start with fewer or more chain sts in Row 1.
To make your mitts longer down your arm, work more rows before working Row 6.
To make your mitts taller to cover more of your fingers, work more rows after Rows 14-16, before working the bind off row.
Congratulations on finishing your Winter Sparkle Mitts! I hope you have enjoyed this quick and easy Tunisian crochet pattern. Share your pics on social media and tag me @capital.crochet and use the hashtag #WinterSparkleMitts.
You may sell finished items made from this pattern, but please credit me as the designer by linking back to this blog post.
Thank you so much for your support! Make sure to check out the other Winter Sparkle patterns in the series: Ear Warmer, Cowl and Scarf!
If you enjoyed this pattern, I thought you might be interested these similar Tunisian crochet patterns, too! Shown below are the Bonfire Mitts and the Juliet Cowl, both available in my pattern shop, or on Ravelry and Etsy!

This post may contain affiliate links, meaning that if you click through and make a purchase, I earn a small commission at no extra cost to you. This helps support my business and makes it possible for me to bring you free content.
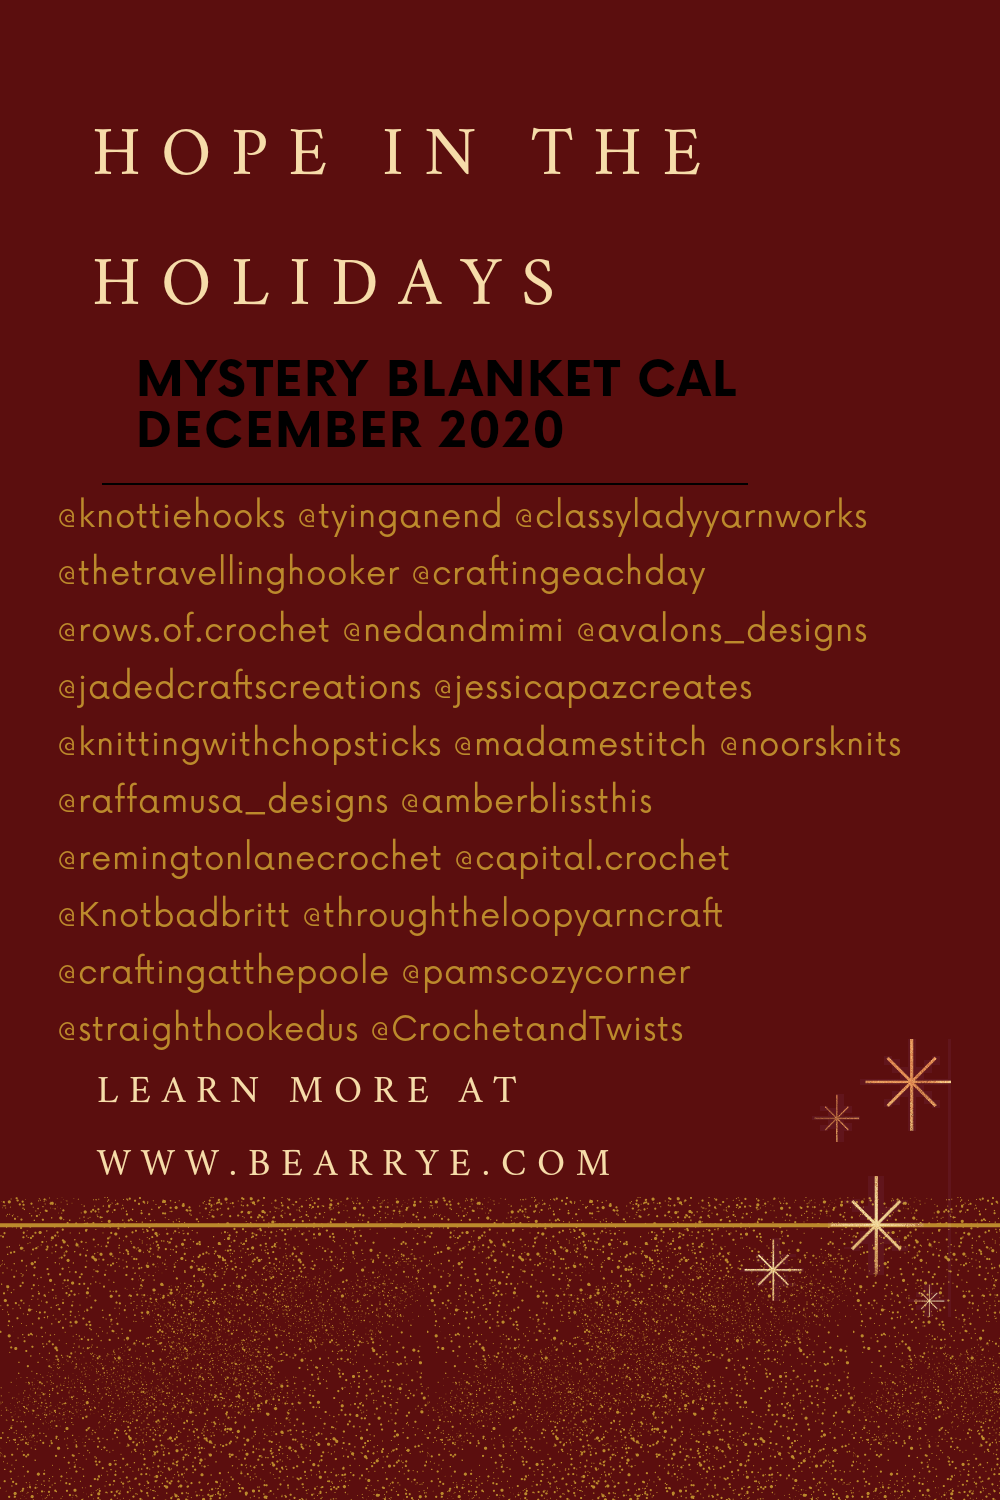
Hello CAL lovers! I’m so please to be participating in the Hope in the Holidays Mystery CAL hosted by Claire of BearRye. I love coming together with other designers to create a beautiful collection of patterns that can be mixed and matched! Before you get started here, check out the CAL landing page to see all the other squares.
For my square, I wanted it to be simple but unique. I was introduced to the technique of cross-stitch on a Tunisian crochet background earlier this year, and I really enjoy how peaceful and calming these simple but repetitive stitches are. The Serene Snowflake Square is a great pattern for beginners to both Tunisian crochet and cross-stitch!

This pattern is also available in PDF format in my pattern shop. Until 9am EST on 23 December, you can get the PDF for FREE! Head to the CAL landing page first to get the code, then follow the link below to my shop.
Hook - USI/9 5.5mm Tunisian hook, or interchangeable with a short cord attached. I love these interchangeable hooks and cords from WeCrochet.
Yarn - Mighty Stitch from WeCrochet. I used Alfalfa for Colour A (60yds/55m), Cream for Colour B (6yds/5.5m).
Notions - scissors, tape measure, yarn needle, blocking mats and pins.
Gauge - 16 sts x 13 rows = 4”/10cm in tss unblocked.
Finished measurements - 8 x 8”/20.5 x 20.5cm.
This pattern uses standard US terms as detailed by the Craft Yarn Council:
Ch – chain
St(s) – stitch(es)
Sc – single crochet
Tss – Tunisian simple stitch
Lts – last Tunisian stitch (insert hook under both vertical bars of the last stitch of each row)
RetP – Return Pass (ch 1, *yarn over and pull through 2 loops. Repeat from * until 1 loop remains on your hook)
Sl st – slip stitch
RS/WS – right side/wrong side
This pattern is worked using Colour A as the background, and Colour B for the cross-stitch.
The loop on your hook to start each row counts as the first st.
Square
Row 1: With Colour A, ch 31 and turn. Starting in the second ch from hook, pull up a loop in the back bump of each ch st. You should have 31 loops on your hook. Complete a RetP.
Rows 2-24: Tss in each st until last, Lts and complete a RetP.
Bind off row (Row 25 on the chart below): Ch 1, *insert hook under next vertical bar and pull up a loop. Yarn over, pull through 2 loops. Repeat from * until last st. Work a sc in the last st of the row and do not fasten off; proceed to Border.
Border: With the RS facing, rotate your work so that you can work down the side of your rows. 2sc in the same st as your last st of the bind off row. Sc in the end of each row and work 3 sc in the last st before turning the corner. Sc along the bottom of the starting row and work 3 sc in the last st before turning the corner. Sc in the first st of each row until you reach the ch-1 space from the bind off row. Sc in the ch-1 space, then sl st into the same space.
Fasten off and block to finished measurements. Weave in the ends after blocking, making sure to weave them in to the WS.
Cross Stitch
With Colour B, work cross-stitch as per the chart below.

Congratulations on finishing your Serene Snowflake square! I hope you have enjoyed this pattern. Share your pics on social media and tag me @capital.crochet and use the hashtag #HopeInTheHolidaysCAL.
You may sell finished items made from this pattern, but please credit me as the designer by linking back to this blog post.
Thank you so much for your support!
If you enjoyed this pattern, I thought you might be interested in a few other easy Tunisian crochet patterns, too! Shown below are the Juliet Ear Warmer and the Stashdown Pillow, both available in my pattern shop, or on Etsy and Ravelry.

This post may contain affiliate links, meaning that if you click through and make a purchase, I earn a small commission at no extra cost to you. This helps support my business and makes it possible for me to bring you free content.
Hello friends! I’m so glad to see you back for the second pattern in the Winter Sparkle series - the Winter Sparkle Cowl!
Towards the end of November, when the days started to get real short and dark, I was sitting in my craft room one gloomy afternoon. I felt bleh, you know, lots I should be doing, no motivation to do anything. Yeah, that was me. Up on my shelf, I caught a glimpse of some Winter Nights yarn and thought, heck yes, gimme some sparkle!
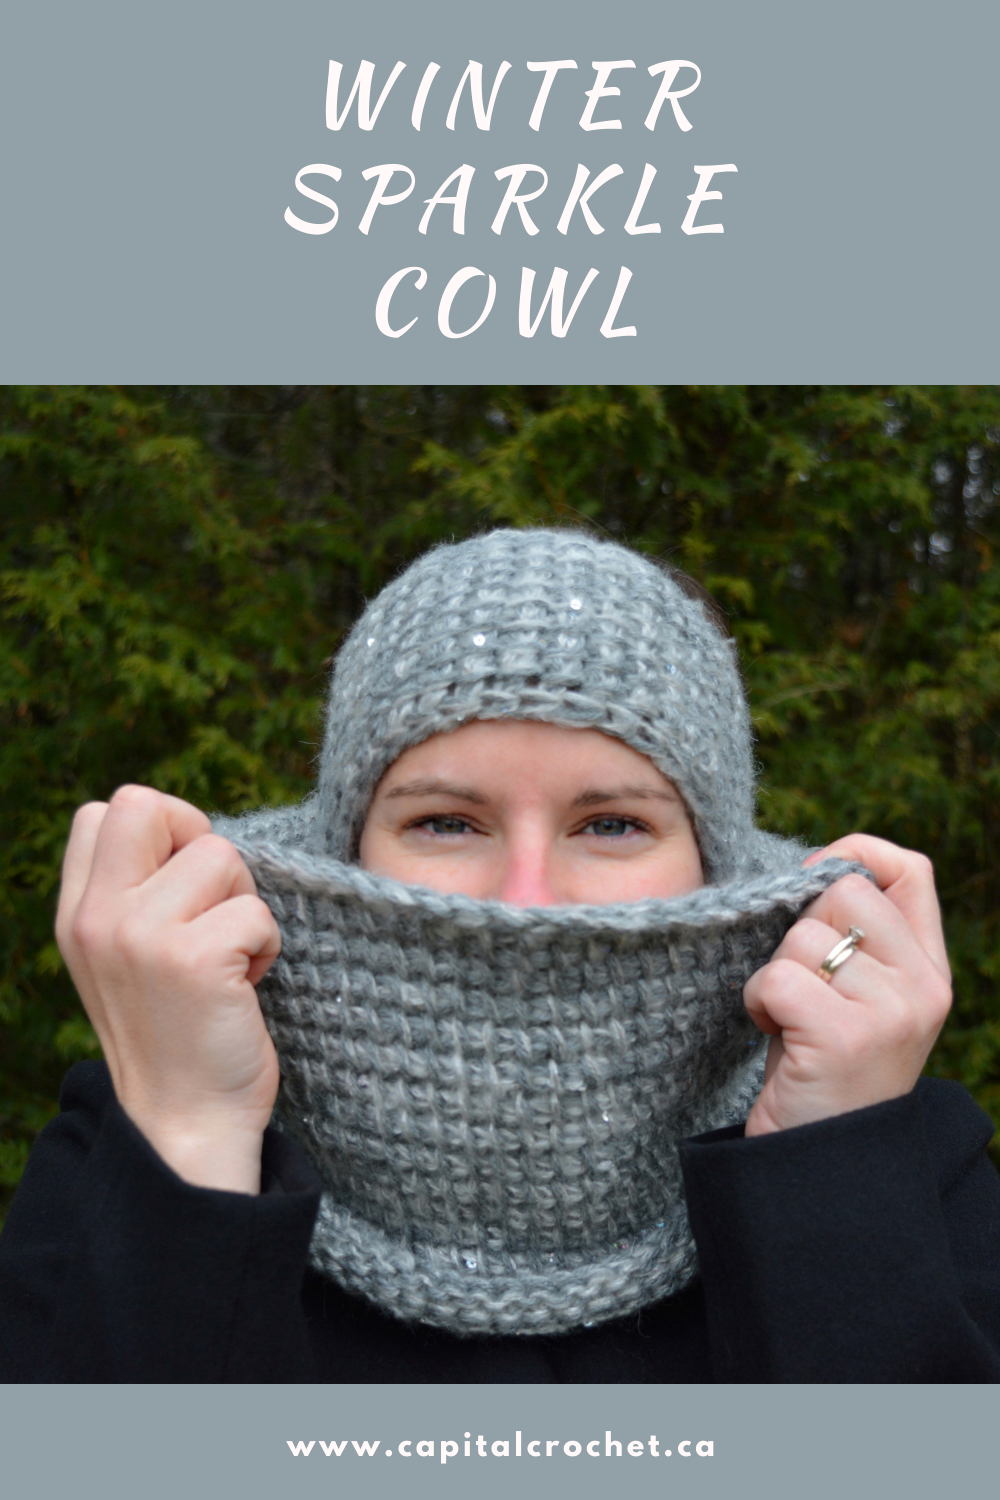
The Winter Sparkle patterns are really fun, because they use two yarns held double to create a unique texture and colour look. The Winter Sparkle Cowl works up quickly and uses about two skeins of yarn, making it a great way to use up those beautiful single skeins from your stash! It also pairs well with other free patterns from the series, like the Winter Sparkle Ear Warmer.
I used Lion Brand Winter Nights for the sparkly yarn, and paired it with Lion Brand Touch of Alpaca. This gives the cowl warmth and comfort.
The pattern uses the Tunisian Simple Stitch, which is the basic Tunisian crochet stitch. It is the perfect stitch to introduce yourself to the fabulous world of Tunisian crochet!
Hook - US 10mm, or size needed to meet gauge, and a long cord. I love these interchangeable hooks and cords from WeCrochet.
Yarn - Lion Brand Touch of Alpaca (I used the colour Oxford Grey) and Lion Brand Winter Nights (I used the colour Chinchilly). You will need approx. 160 yds of each yarn. You may also combine any two worsted (4) weight yarns, or use a bulky (5) yarn on its own, as long as you can meet gauge.
Notions - scissors, tape measure, yarn needle.
Gauge - 4” = 8.5 sts x 8 rows in tss unblocked.
Finished measurements - approximately 8.5" tall x 15” wide (laid flat, before blocking and seaming).
This pattern uses standard US terms as detailed by the Craft Yarn Council:
Ch - chain
St(s) - stitch(es)
Sl st - slip stitch
Tss - Tunisian Simple Stitch (see HERE for an excellent tutorial!)
Lts - Last Tunisian Stitch (insert hook under both bars)
RetP - Return Pass (Ch 1, *yarn over, pull through 2 loops. Repeat from * until 1 loop remains on your hook)
Curling at the edges of Tunisian crochet is common. See the Finishing section below for blocking instructions to help tame the curl.

Row 1. Ch 73. Working in the back bumps, pull up a loop in the second ch from hook (see Picture 1, below), and each ch across. Work a RetP.
Row 2. Tss in each st across, Lts, RetP. (73 sts)
Rows 3-15. Repeat Row 2.
Bind off row: Ch 1, *sl st next st (see Picture 2, below). Repeat from * until last st. Insert your hook as for Lts and pull up a loop. Yarn over and pull through both loops. Fasten off, leaving a 14” tail for seaming.
Blocking: You may wish to steam block or wet block your work prior to seaming. This will help control the curl at the top and bottom of the cowl. I opted for steam blocking, and left a bit of the curl as a design feature.
To steam block, pin your work down to mats or another flat surface. Use an iron or steaming tool, gently pass over the whole piece, applying steam to help relax the fibres. Leave pinned until dry.
To wet block, soak your work in cool water for 15-20 mins. Gently squeeze out excess water (do not wring!) by laying it flat on a towel and rolling it up tight. Lay the wet piece down on mats or a towel, and secure the edges with pins. Take care not to stretch your work; you can use the finished measurements as a guide. Leave pinned until dry.
Seaming: Fold your work so that the two short ends are matched up. Seam the short ends together using your preferred seaming method (I like to use the Mattress Stitch technique). Weave in all ends.
You can adjust the height of the cowl by working fewer or more rows.
You can adjust how closely it fits to your face by starting with fewer ch sts for a closer fit, or more ch sts for a looser fit.
Congratulations on finishing your Winter Sparkle Cowl! I hope you have enjoyed this simple, beginner-friendly Tunisian crochet pattern. Share your pics on social media and tag me @capital.crochet and use the hashtag #WinterSparkleCowl.
You may sell finished items made from this pattern, but please credit me as the designer by linking back to this blog post.
Thank you so much for your support! Watch for the next pattern in the Winter Sparkle series, coming Monday, 21 December!
If you enjoyed this pattern, I thought you might be interested in a few other easy Tunisian crochet patterns, too! Shown below are the Juliet Ear Warmer and the Stashdown Pillow, both available in my pattern shop, or on Etsy and Ravelry.
This post may contain affiliate links, meaning that if you click through and make a purchase, I earn a small commission at no extra cost to you. This helps support my business and makes it possible for me to bring you free content.
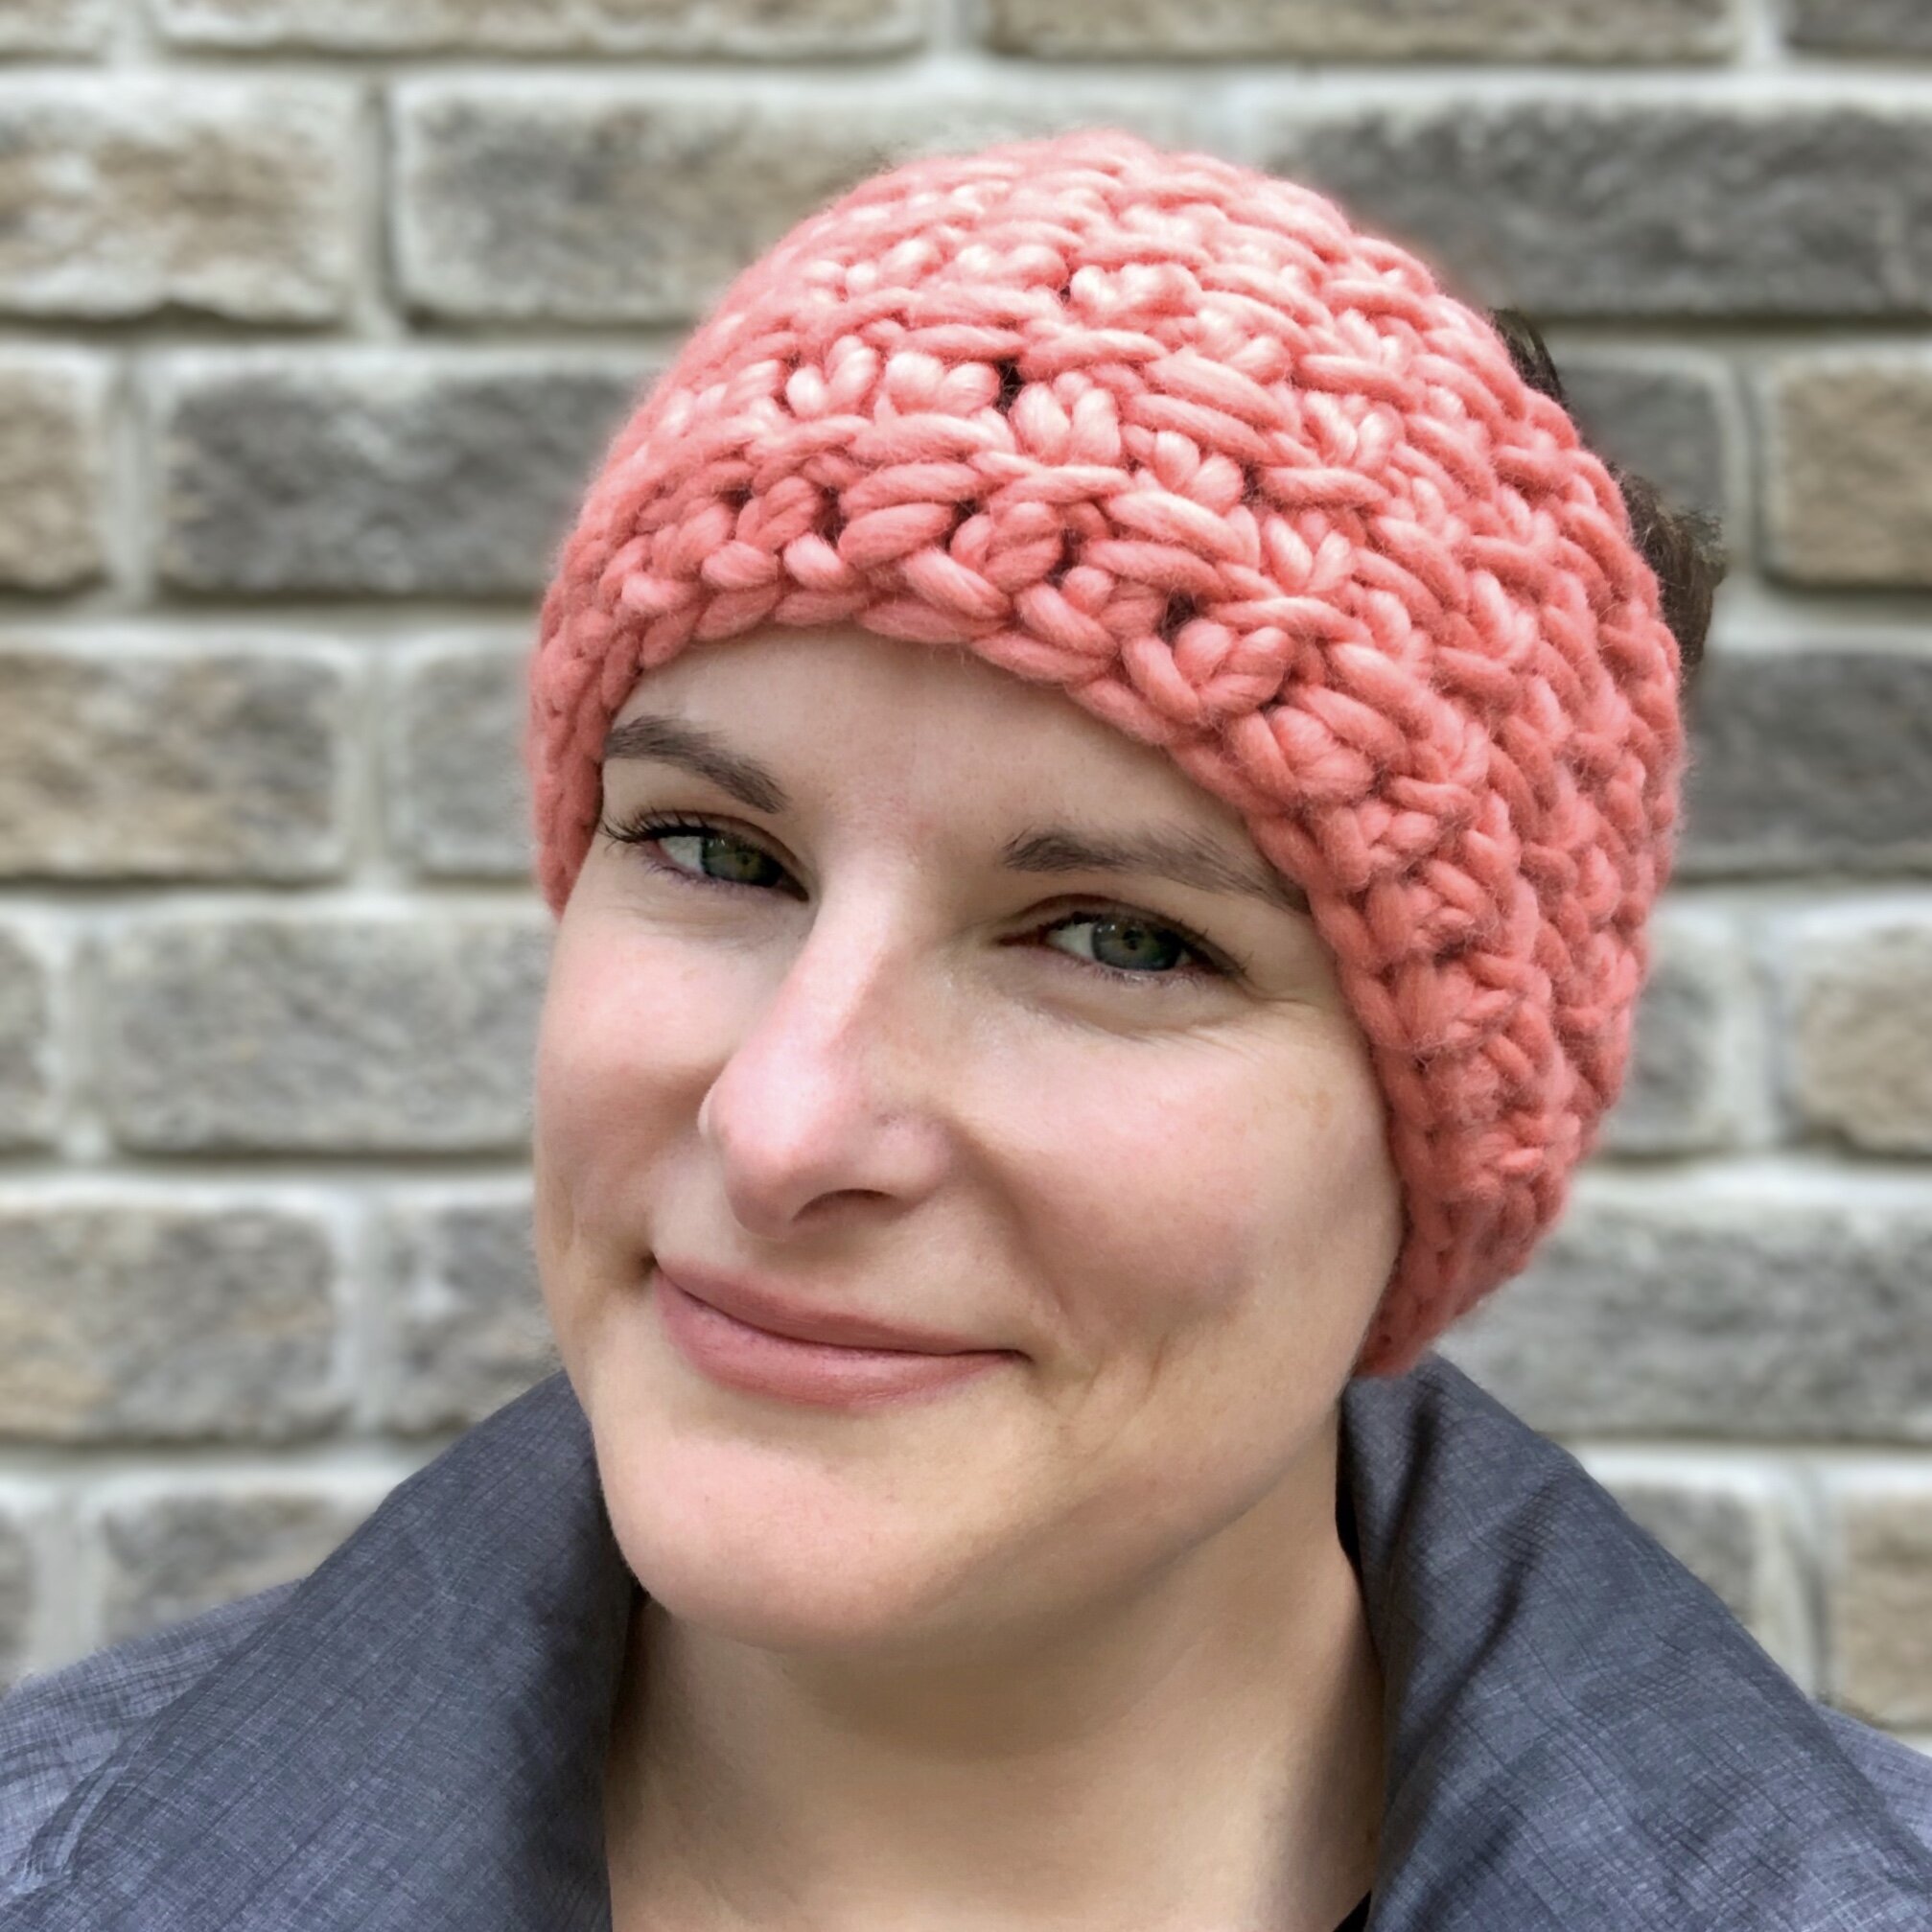
Well hello there! Welcome to the first pattern in my Winter Sparkle Series - the Winter Sparkle Ear Warmer!
Towards the end of November, when the days started to get real short and dark, I was sitting in my craft room one gloomy afternoon. I felt bleh, you know, lots I should be doing, no motivation to do anything. Yeah, that was me. Up on my shelf, I caught a glimpse of some Winter Nights yarn and thought, heck yes, gimme some sparkle!

The Winter Sparkle patterns are really fun, because they use two yarns held double to create a unique texture and colour look. And because you don’t need very much yardage, the Winter Sparkle Ear Warmer makes a great stash buster and gift item! The possibilities are endless.
I used Lion Brand Winter Nights for the sparkly yarn, and paired it with Lion Brand Touch of Alpaca. This gives the ear warmer warmth and comfort.
The pattern uses the Tunisian Simple Stitch, which is the basic Tunisian crochet stitch. It is the perfect stitch to introduce yourself to the fabulous world of Tunisian crochet!
Hook - US 10mm, or size needed to meet gauge (no special Tunisian hook required for this pattern!.
Yarn - Lion Brand Touch of Alpaca (I used the colour Oxford Grey) and Lion Brand Winter Nights (I used the colour Chinchilly). You will need approx. 50 yds of each yarn. You may also combine any two worsted (4) weight yarns, or use a bulky (5) yarn on its own, as long as you can meet gauge.
Notions - scissors, tape measure, yarn needle.
Gauge - 4” = 8.5 sts x 8 rows in tss unblocked.
Finished measurements - approximately 4.5"” wide x variable circumference (customizable based on your own head circumference)
This pattern uses standard US terms as detailed by the Craft Yarn Council:
Ch - chain
St(s) - stitch(es)
Sl st - slip stitch
Tss - Tunisian Simple Stitch (see HERE for an excellent tutorial!)
Lts - Last Tunisian Stitch (insert hook under both bars)
RetP - Return Pass (Ch 1, *yarn over, pull through 2 loops. Repeat from * until 1 loop remains on your hook)
Measure your own head circumference and record the number somewhere.

Row 1. Ch 10. Working in the back bumps (see Picture 1, below), pull up a loop in the second ch from hook, and each ch across. Work a RetP.
Row 2. Tss in each st across, Lts, RetP.
Repeat Row 2 until your work measures approximately 2.5” less than your head circumference. For a looser fit, work until it measures 1.5” less.
Bind off row: Ch 1, *sl st next st (see Picture 2, below). Repeat from * until last st. Insert your hook as for Lts and pull up a loop. Yarn over and pull through both loops. Fasten off, leaving an 8” tail for seaming.
Fold your work so that the two short ends are matched up. Seam the short ends together using your preferred seaming method (I like to use the Mattress Stitch technique). Weave in all ends.
You can adjust the width of this piece by starting with fewer or more ch sts.
Congratulations on finishing your Winter Sparkle Ear Warmer! I hope you have enjoyed this simple, beginner-friendly Tunisian crochet pattern. Share your pics on social media and tag me @capital.crochet and use the hashtag #WinterSparkleEarWarmer!
You may sell finished items made from this pattern, but please credit me as the designer by linking back to this blog post.
Thank you so much for your support! Watch for the next pattern in the Winter Sparkle series, coming Monday, 14 December!
If you enjoyed this pattern, I thought you might be interested in a few other easy Tunisian crochet patterns, too! Shown below are the Juliet Ear Warmer and the Stashdown Pillow, both available in my pattern shop, or on Etsy and Ravelry.
This post may contain affiliate links, meaning that if you click through and make a purchase, I earn a small commission at no extra cost to you. This helps support my business and makes it possible for me to bring you free content.
Well folks, it is officially Winter, because it SNOWED for the first time this year while I was outside taking pics for this pattern. It’s a good thing this latest pattern is thick and cozy, because I think those warm Fall days are behind us now…
I have really enjoyed Scarftober, and I hope you have too. I’m definitely thinking this should be an annual thing - what do you say? In case you missed them, check out the other two free patterns from earlier this month, the Cozy Clusters Infinity pattern, and The Diamond Scarf pattern. This new one, the Stashdown Scarf, just might be my favourite!
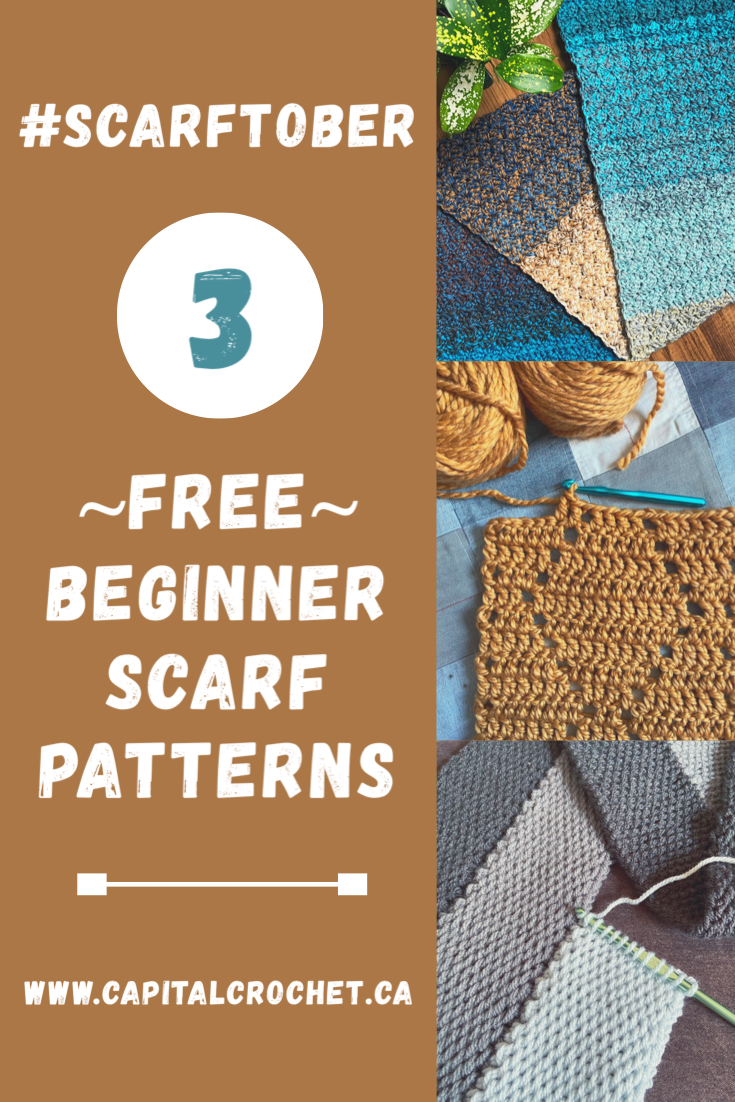
I love a good stashbusting pattern, don’t you? The Stashdown Scarf is an easy, repetitive pattern that is completely customizable. It’s perfect for clearing some space on your shelves so you can finally treat yourself guilt-free to a sweater quantity at your favourite dyer’s next shop update (this may or may not be EXACTLY what I plan to do). I’ve used worsted weight here, but you can use whatever you have!

Look at that SQUISH! This stitch pattern really creates a warm and cozy fabric, no matter what size yarn you use. Now, this is a Tunisian crochet pattern, but if you’ve never tried this craft before, fear not! You won’t need any special hooks, and I’ve linked below to my favourite videos from the Queen of Tunisian herself, Toni at TL Yarn Crafts! Take a few minutes to get familiar with the Tunisian Full Stitch and the Join As You Go technique, then come on back when you’re ready to get started.
Learn the Tunisian Full Stitch from start to finish in this quick crochet tutorial. WHAT YOU'LL LEARN: -Foundation forward and return pass -Two row repeat of...
Expand your Tunisian crochet skills by learning to add panels as you go! This is a great skill to learn for creating beautiful blankets, like my Temperature ...
I do plan to offer an ad-free, printable pdf version of the pattern very soon but for now, follow along below for the beginner-friendly directions, and get started on your very own Stashdown Scarf today!
Hook - US J/6mm, or size needed to meet gauge.
Yarn - 3 different colours of worsted (4) weight, approximately 280 yds each.
Notions - scissors, tape measure, yarn needle, 9” piece of cardboard or book to make the fringe.
Optional - blocking mats and pins.
Gauge - 7 sts x 7 rows = 2” in Tunisian Full Stitch.
Finished measurements - approximately 72” long x 9.5” wide (not including fringe).
This pattern uses standard US terms as detailed by the Craft Yarn Council:
Ch - chain
St(s) - stitch(es)
Sl st - slip stitch
Tfs - Tunisian Full Stitch (see tutorial video above)
Lts - last Tunisian stitch (insert hook under both loops of the edge stitch and pull up a loop)
RetP - Return Pass
This pattern is worked in 3 “strips.” The first strip is worked in regular tfs. The second and third strips are joined onto the side of the previous strip - no seaming in this pattern, my friends! For a great tutorial on the Join As You Go method, see the video above.
The first loop on the hook counts as the first stitch for each row.
For the first strip, the RetP is worked as follows: Ch 1, *yarn over and pull through 2 loops on hook. Repeat from * until 1 loop remains.
For the second and third strips, the RetP is worked as follows: Join with a sl st to the edge of the previous strip. *Yarn over, pull through 2 loops on hook. Repeat from * until 1 loop remains.

Row 1. Ch 12 and turn. Working into the back bumps of the ch sts, and starting in the second ch from hook, pull up a loop in each back bump (12 loops on hook). Work a RetP.
Row 2. Starting in the first space (between the first and second sts), tfs 10. Skip the last space, Lts and work a RetP.
Row 3. Skip the first space, tfs 10, Lts and work a Ret P.
Alternate Rows 2 and 3 until your work measures approximately 71” long (end on a repeat of Row 3).
Last row (bind off): Ch 1, starting in the first space, *insert hook as for tfs and pull up a loop. Yarn over, pull though both loops on the hook. Repeat from * in each space until one space remains. Skip the last space, insert hook into the last stitch as for Lts, yarn over and pull through both loops on the hook. Fasten off and weave in ends.
Row 1. Attach yarn at the bottom right corner of the previous strip, ch 12 and turn. Working into the back bumps of the ch sts, and starting in the second ch from hook, pull up a loop in each back bump (12 loops on hook). Join with a sl st to Row 1 of the previous strip and work a RetP.
Row 2. Starting in the first space (between the first and second sts), tfs 11. Join with a sl st in the side of the first st of the next row on the previous strip and work a RetP.
Row 3. Skip the first space, tfs 11. Join with a sl st in the side of the first st of the next row on the previous strip and work a RetP.
Alternate Rows 2 and 3 until you’ve joined to each row of the previous strip, minus the last (bind off) row.
Last row (bind off): Ch 1, starting in the first space, *insert hook as for tfs and pull up a loop. Yarn over, pull though both loops on the hook. Repeat from * in each space until one space remains. Skip the last space, join with a sl st to the ch st of the previous strip’s last row. Fasten off and we in ends.
Prior to adding the fringe, you may wish to block your work to straighten things out (sometimes Tunisian crochet tends to lean a little bit). Block your scarf according the fibre you’ve used - either wet block or steam block. Once your scarf is dry, you can move on to attaching the fringe.
To create the fringe, wrap yarn loosely but securely around your piece of cardboard or book. You don’t want any slack in your wraps but you also don’t want it to be stretched tight. Cut your wrapped yarn along one end only. You will need 216 pieces of yarn approximately 18” in length. I chose to do my fringe colour blocked and matching my strips, meaning I used 36 pieces of each colour per end. Feel free to mix up your colours!
Insert your hook into the first stitch on one of the short ends, and grab 3 strands of fringe with your hook. Pull a loop through, then pull the ends of the fringe through the loop. Cinch it down to tighten the fringe. Repeat in each stitch across both short ends of your scarf. Trim your fringe as needed, and you may wish to steam it to straighten out the strands.
Make an infinity scarf by omitting the fringe and seaming the short ends together to form a big loop.
Try different yarn weights and fibre content for a lighter or thicker scarf.
Adjust the length by working fewer or more rows of each strip. Adjust the width of your scarf by adjusting the number of strips, or the number of chain stitches in Row 1 of each strip. You can even make them uneven for an abstract effect.
Try variations on the fringe by making your pieces shorter or longer, or by placing fringe in every other or every third stitch. Leave the fringe off completely if it’s not your thing, or try tassels or poms!

Congratulations on finishing your fabulous new Stashdown Scarf! Share your pics on social media and tag me @capital.crochet and use the hashtag #StashdownScarf.
You may sell finished items made from this pattern, but please credit me as the designer by linking back to this blog post.
Thank you so much for your support!
Hey, Stashbuster! If you are looking for more patterns to help you work through your glorious yarn stash, check out these helpful patterns. Shown below are the Stashdown Blanket and Stashdown Pillow, available in my pattern shop, or on Etsy and Ravelry. Check out the Stashdown Blanket as a FREE pattern here on the blog, too!
Happy crocheting, friends!


This post may contain affiliate links, meaning that if you click through and make a purchase, I earn a small commission at no extra cost to you. This helps support my business and makes it possible for me to bring you free content.
We’re midway through this glorious month of Scarftober - yep, you heard that right! Scarftober, the perfect time to work up some warm and cozy scarves so you’re ready when those cold November days hit you out of the blue. I’m so pleased to bring you 3 free scarf patterns this month! In case you missed the first one, check out the Cozy Clusters Infinity pattern from a few weeks ago.
This next pattern is really special to me, because it was actually the VERY FIRST pattern I ever wrote and published for sale. That was over 3 years ago! It uses simple, beginner-friendly stitches, making it a great first scarf for someone new to crochet. I’ve given the original version a bit of a makeover, and I’m so happy to be sharing it here on the blog!

I first wrote the pattern for worsted weight (4) yarn - specifically Caron Cakes. They work really well for this pattern since you get effortless colour coordinated stripes without all the ends! But for this blog post, I wanted to up the cozy factor, so I used a wonderfully squishy super bulky (6) wool/acrylic blend. The result is next level warmth, and of course, the mustard yellow is so on trend (a rare thing for me!).
I do plan to offer an ad-free, printable pdf version of the pattern very soon with both the worsted and super bulky options, but for now, follow along below for the beginner-friendly directions, and get started on your very own Diamond Scarf today!
Hook - US 10mm, or size needed to meet gauge.
Yarn - 4 balls of Cozy Wool by Loops and Threads, available at Michael’s stores (or approx. 340 yds of super bulky (6) weight yarn).
Notions - scissors, tape measure, yarn needle, 9” piece of cardboard or book to make the fringe.
Gauge - 8 sts x 4 rows = 4” in dc.
Finished measurements - approximately 71” long x 9.5” wide (not including fringe).
This pattern uses standard US terms as detailed by the Craft Yarn Council:
Ch - chain
St(s) - stitch(es)
Sk - skip
Dc - double crochet
Fdc - foundation double crochet
Ch 3 to start each row counts as a dc.
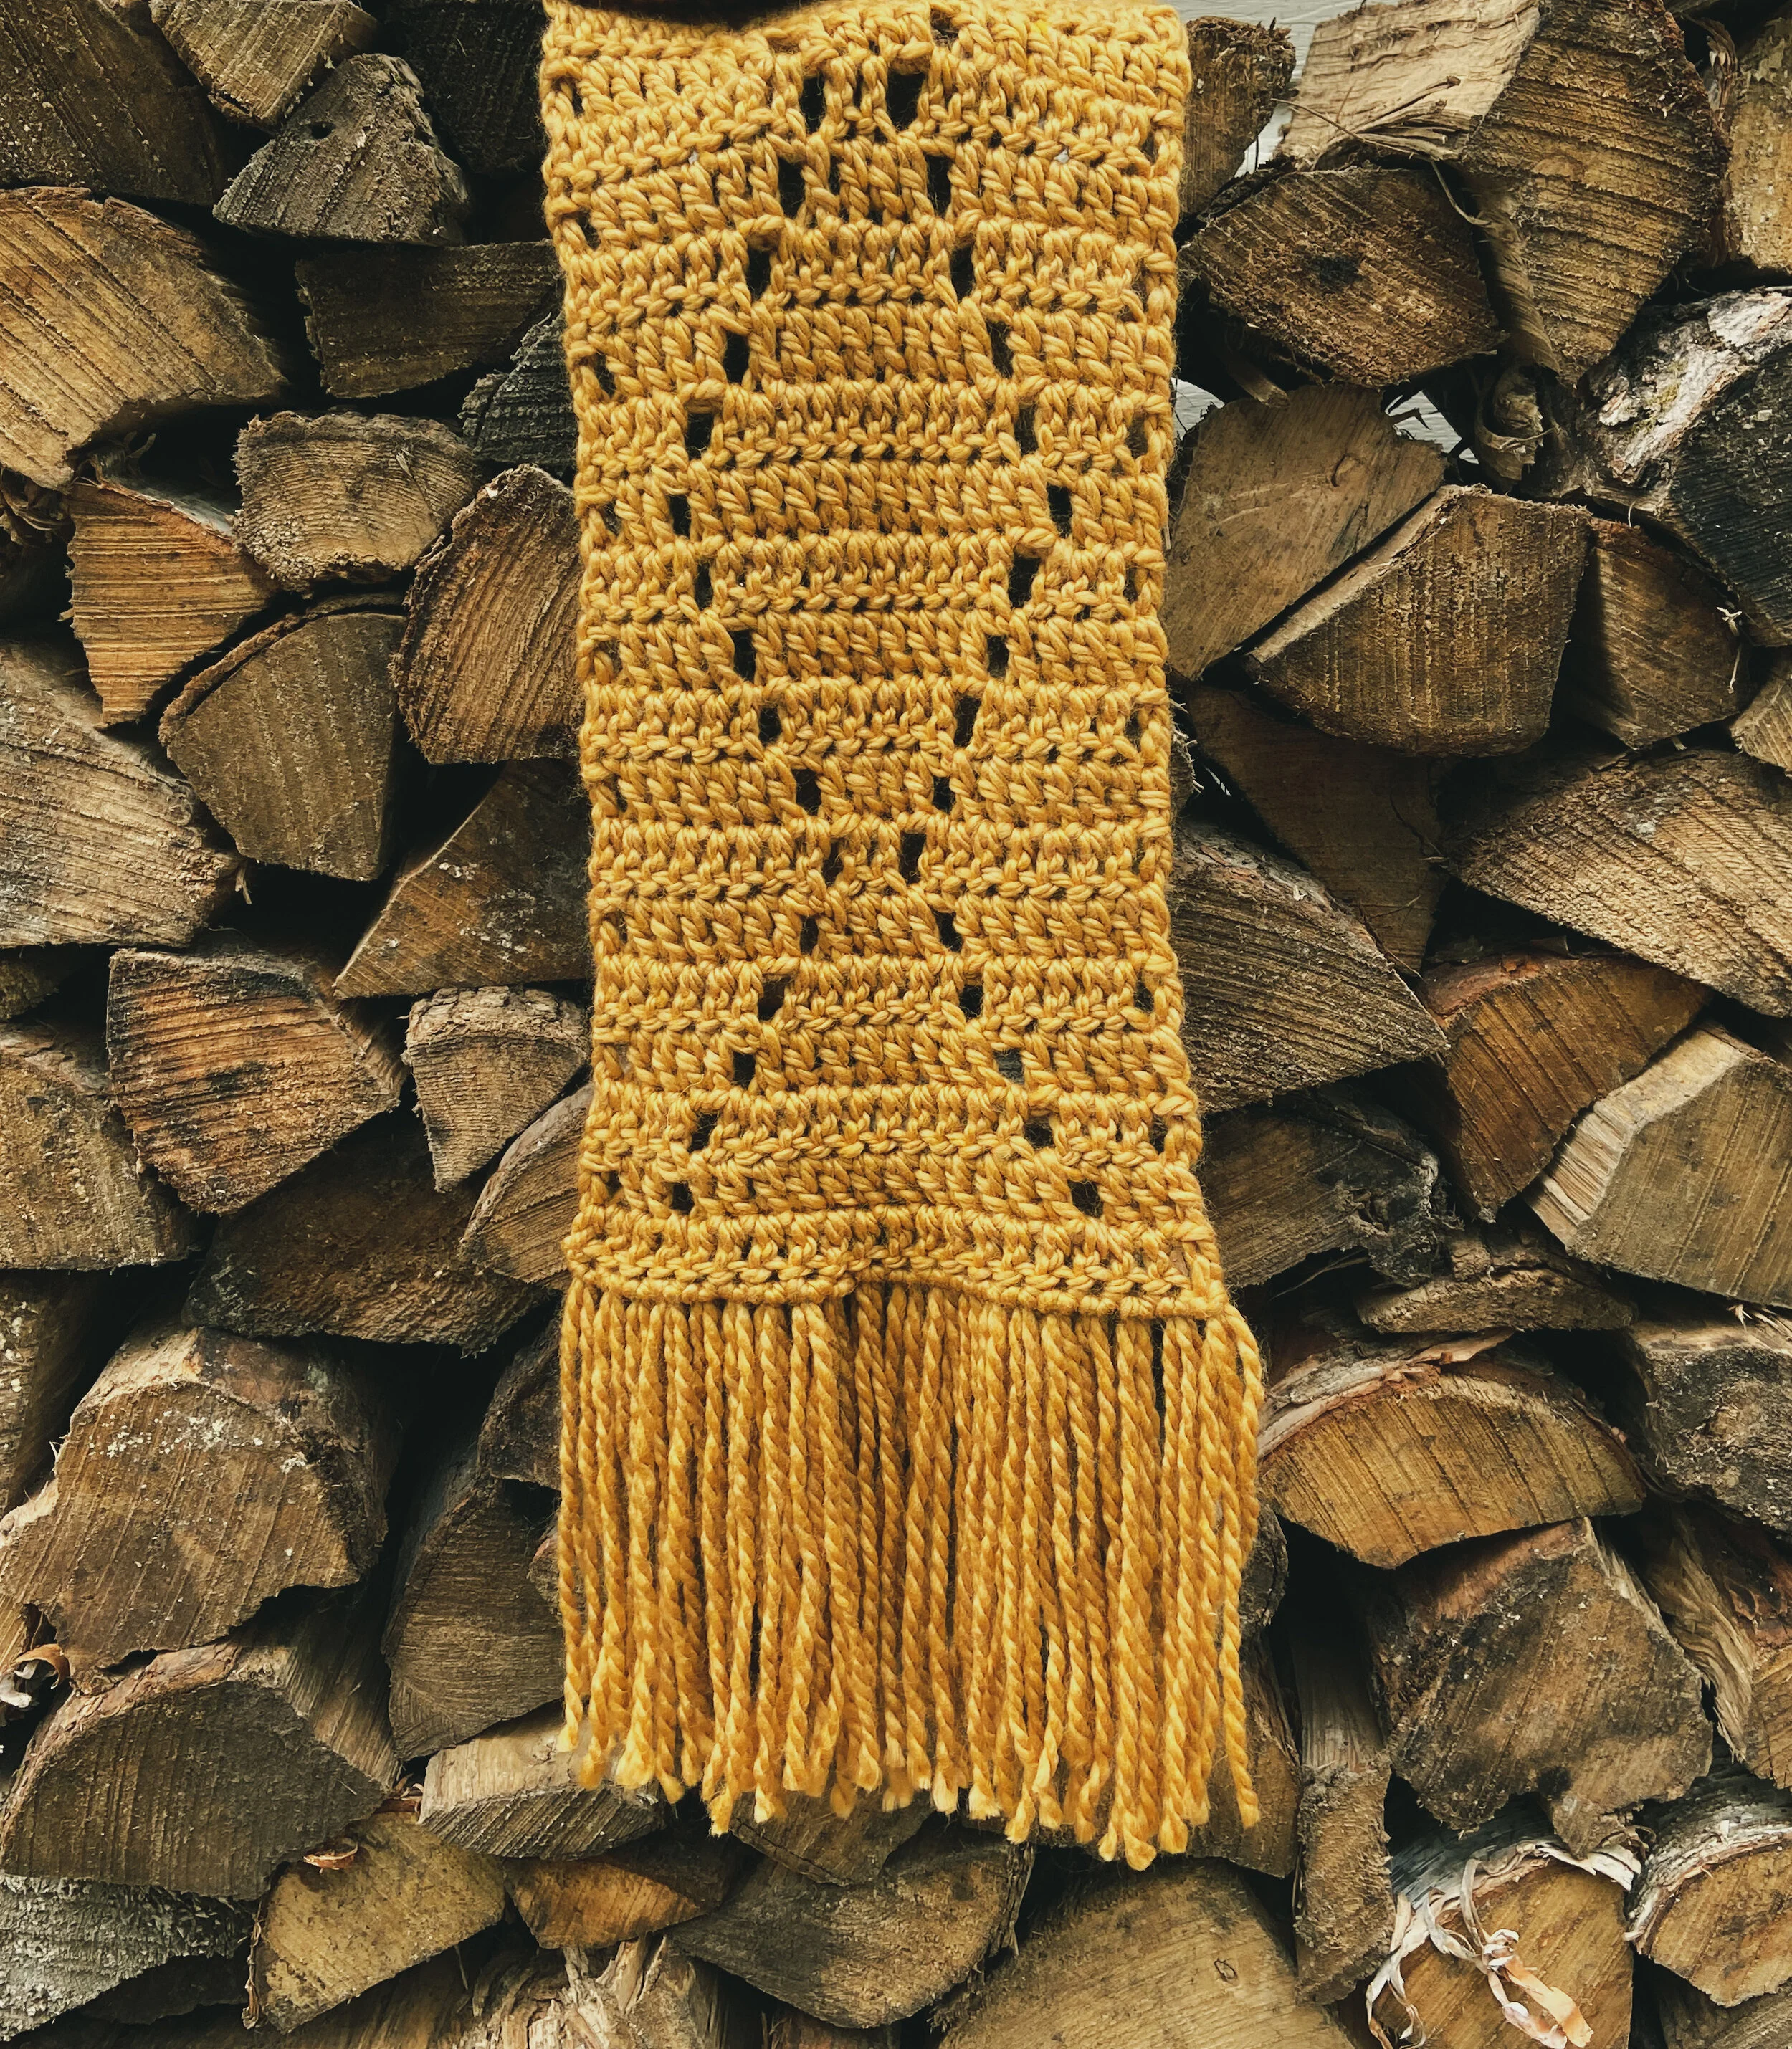
Row 1. Ch 22 and turn. In the fourth ch from the hook, dc (the first 3 chs count as 1 dc st). Dc in each ch across and turn. (20 sts)
TIP: you may also work row 1 with foundation sts: Fdc 20 and turn.
Row 2. Ch 3, dc 2, ch 1 sk 1, dc 12, ch 1 sk 1, dc 3 and turn.
Row 3. Ch 3, dc 3, ch 1 sk 1, dc 10, ch 1 sk 1, dc 4 and turn.
Row 4. Ch 3, dc 4, ch 1 sk 1, dc 8, ch 1 sk 1, dc 5 and turn.
Row 5. Ch 3, dc 5, ch 1 sk 1, dc 6, ch 1 sk 1, dc 6 and turn.
Row 6. Ch 3, dc 6, ch 1 sk 1, dc 4, ch 1 sk 1, dc 7 and turn.
Row 7. Ch 3, dc 7, ch 1 sk 1, dc 2, ch 1 sk 1, dc 8 and turn.
Row 8. Ch 3, dc 6, ch 1 sk 1, dc 4, ch 1 sk 1, dc 7 and turn.
Row 9. Ch 3, dc 5, ch 1 sk 1, dc 6, ch 1 sk 1, dc 6 and turn.
Row 10. Ch 3, dc 4, ch 1 sk 1, dc 8, ch 1 sk 1, dc 5 and turn.
Row 11. Ch 3, dc 3, ch 1 sk 1, dc 10, ch 1 sk 1, dc 4 and turn.
Repeat Rows 2-11 six more times. Your scarf should measure approximately 69” at this point.
Work one more repeat of Row 2.
Last row: Ch 3, dc in each st across. Fasten off and weave in all ends.
To create the fringe, wrap yarn loosely but securely around your piece of cardboard or book. You don’t want any slack in your wraps but you also don’t want it to be stretched tight. Cut your wrapped yarn along one end only. You will need 80 strands at approximately 18” each – I did two batches of wrapping it 40 times.
Insert your hook into the first stitch on one of the short ends, and grab 2 strands of fringe with your hook. Pull a loop through, then pull the ends of the fringe through the loop. Cinch it down to tighten the fringe. Repeat in each stitch across both short ends of your scarf. Trim your fringe so that it is fairly even, and you may wish to steam it to straighten out the strands.
This can also be made into an infinity scarf by seaming the short ends together to form a big loop.
Try variations on the fringe by making your pieces shorter or longer, or by placing fringe in every other or every third stitch. Leave the fringe off completely if it’s not your thing, or try tassels or poms!

Congratulations on finishing your fabulous new Diamond Scarf! Share your pics on social media and tag me @capital.crochet and use the hashtag #TheDiamondScarf.
You may sell finished items made from this pattern, but please credit me as the designer by linking back to this blog post.
Thank you so much for your support! Watch for the last pattern in the Scarftober series, dropping here on the blog on 30 October. See you then!
Hey fellow scarf lover, I thought you might enjoy these other patterns, too! Shown below are the Rachel Super Scarf and the Colour Block Triangle Scarf, both available in my pattern shop, or on Etsy and Ravelry.


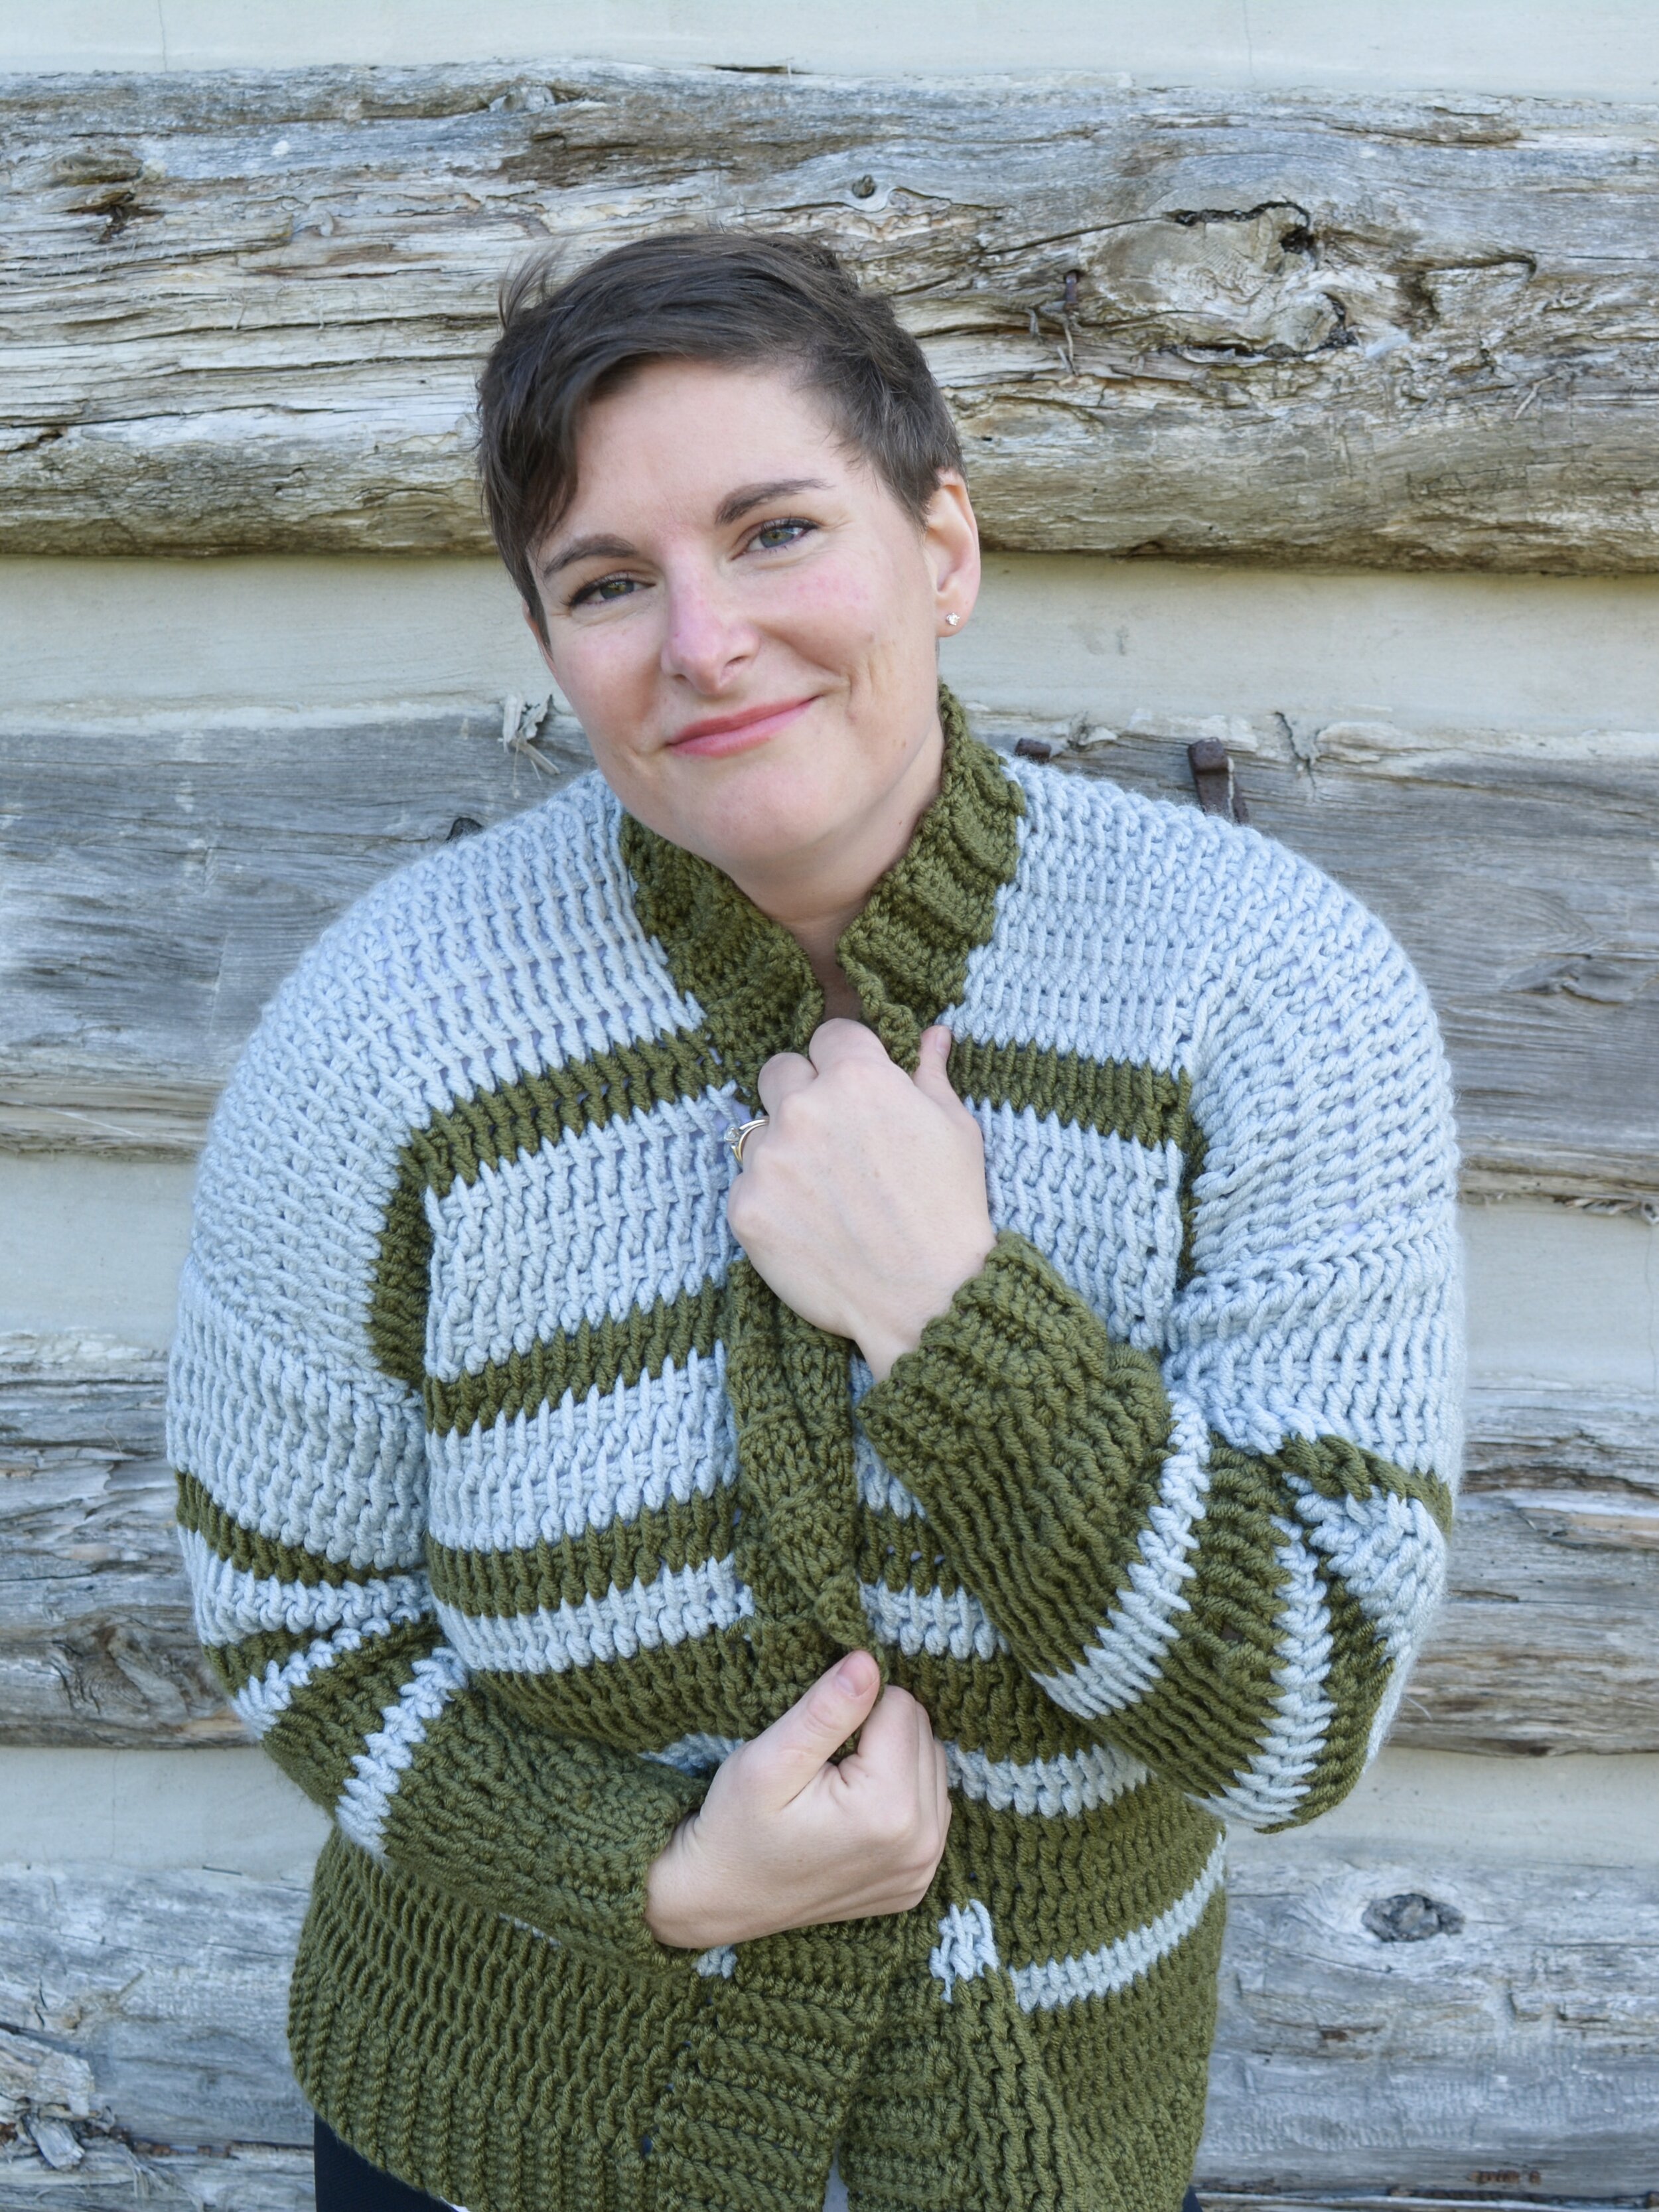
Hi friend! I’m Janine, the maker behind Capital Crochet. Thanks for stopping by my little corner of the fibre arts community!
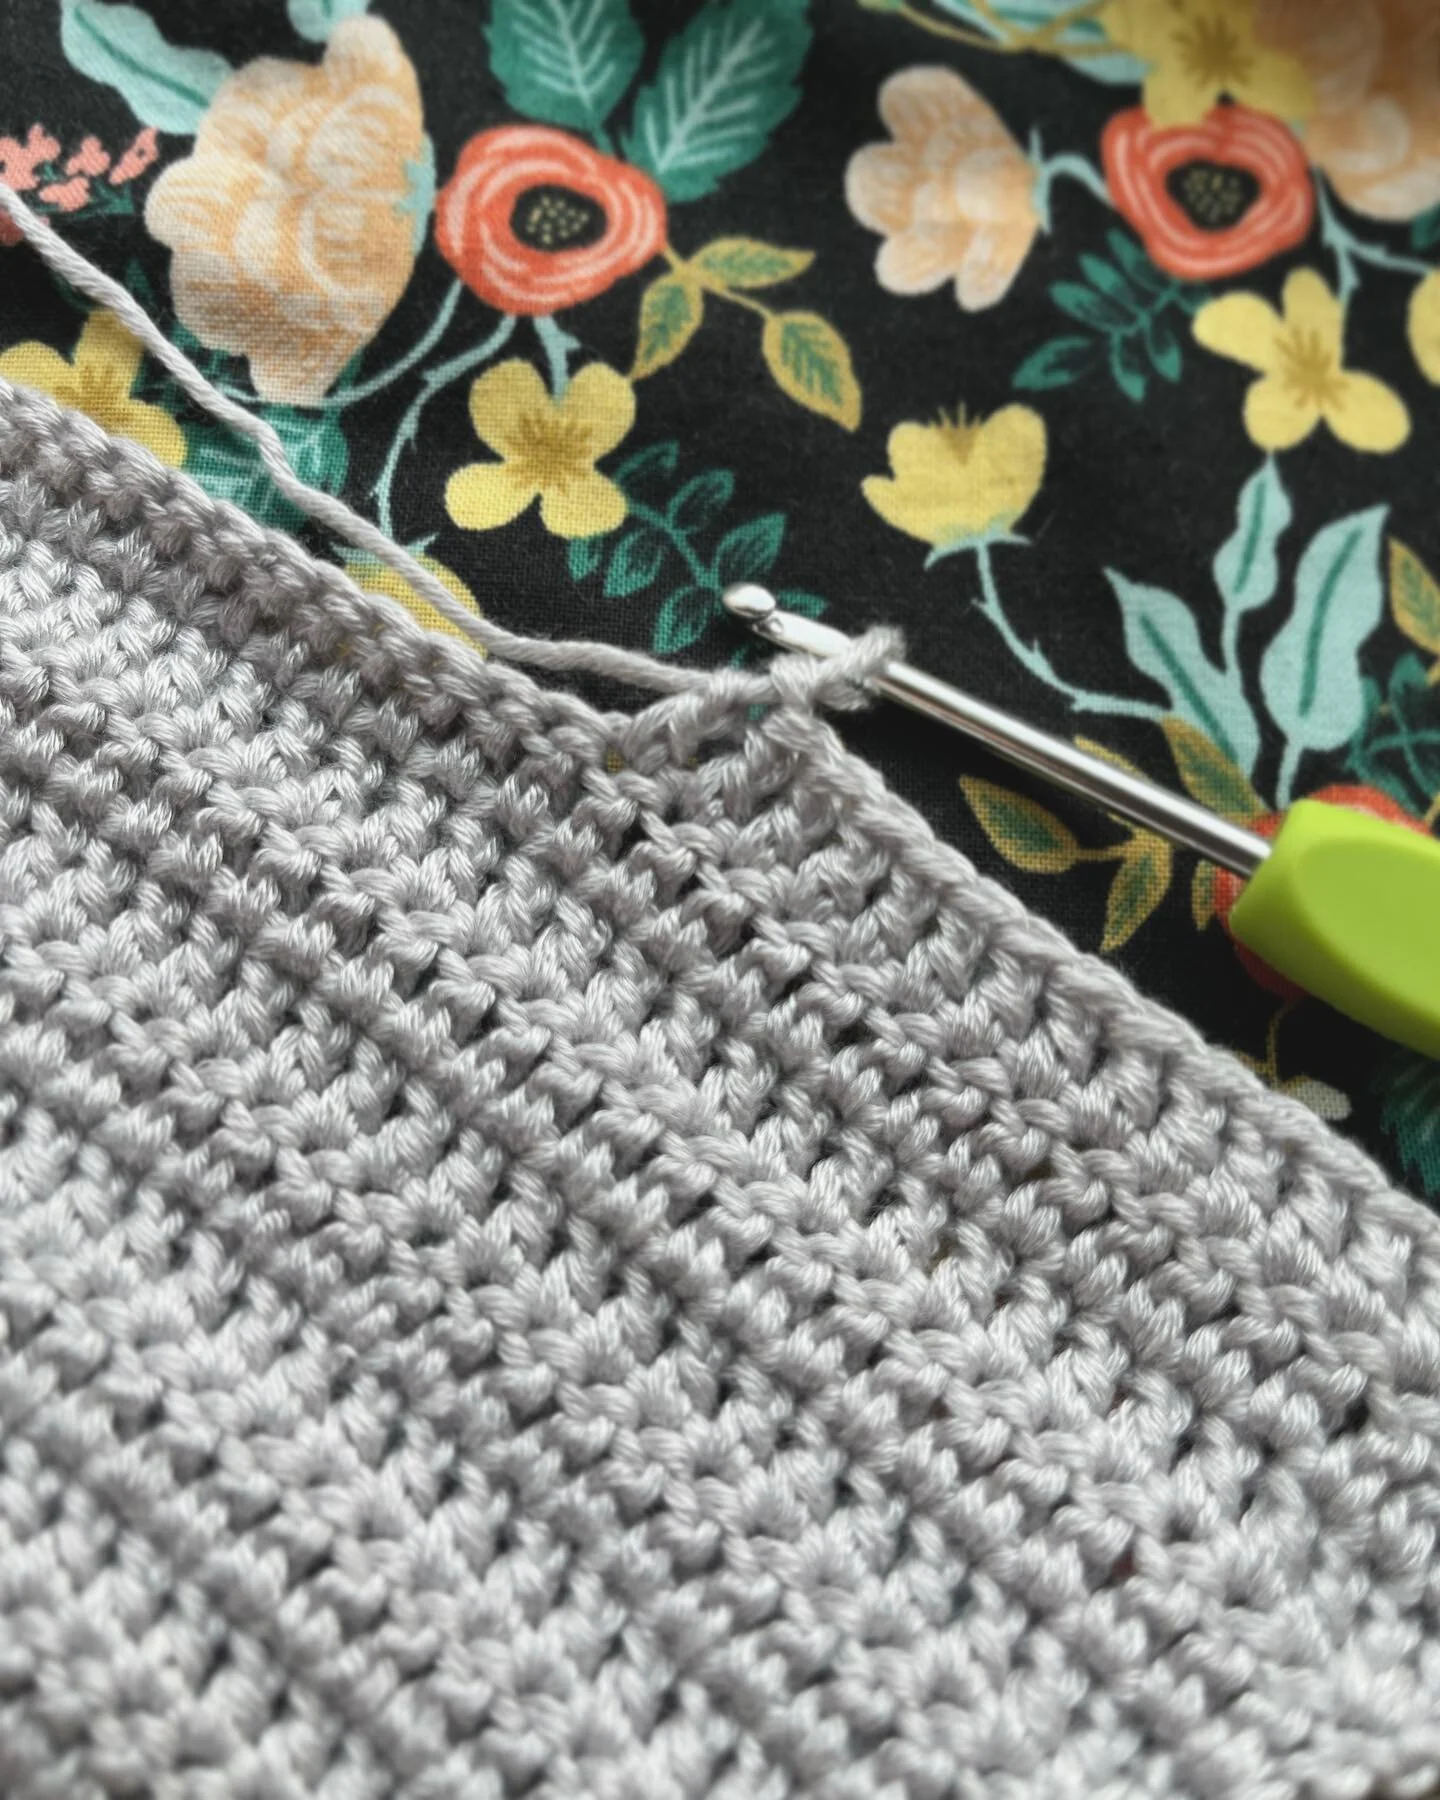
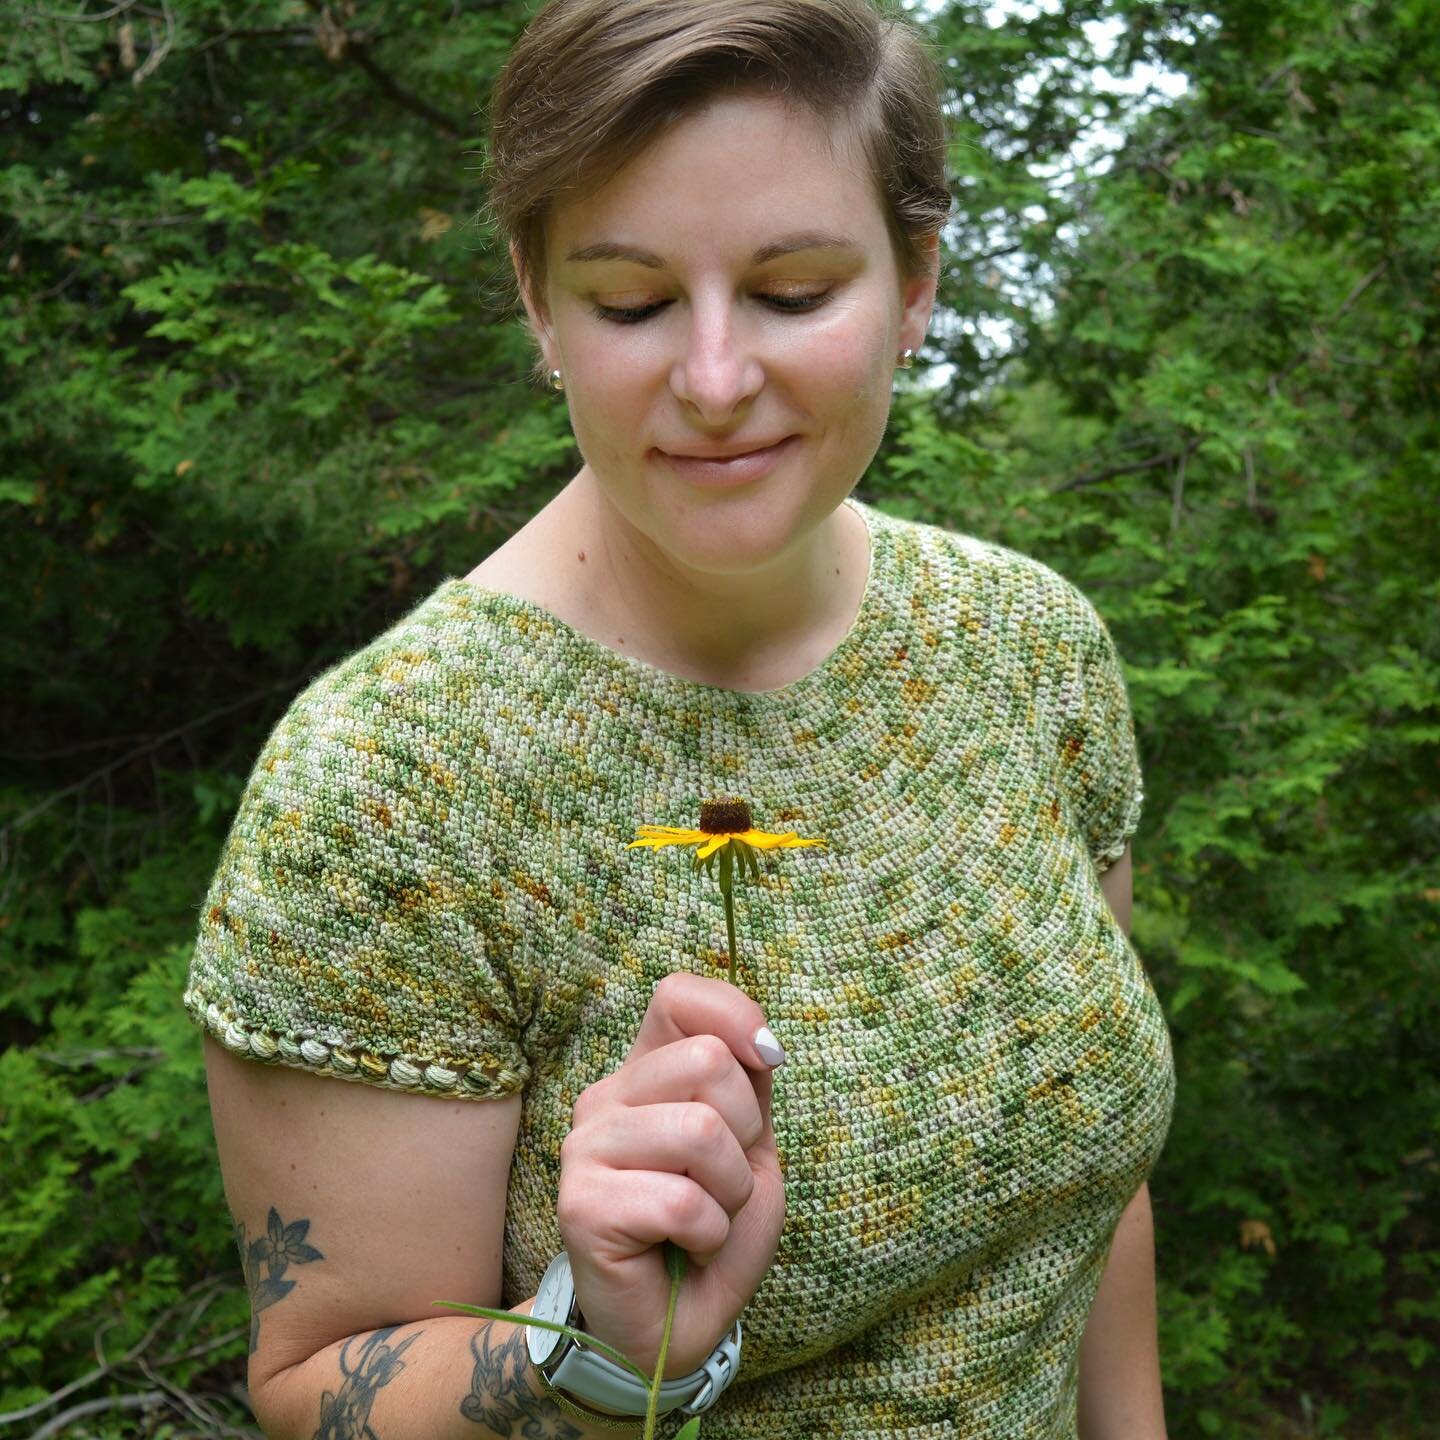

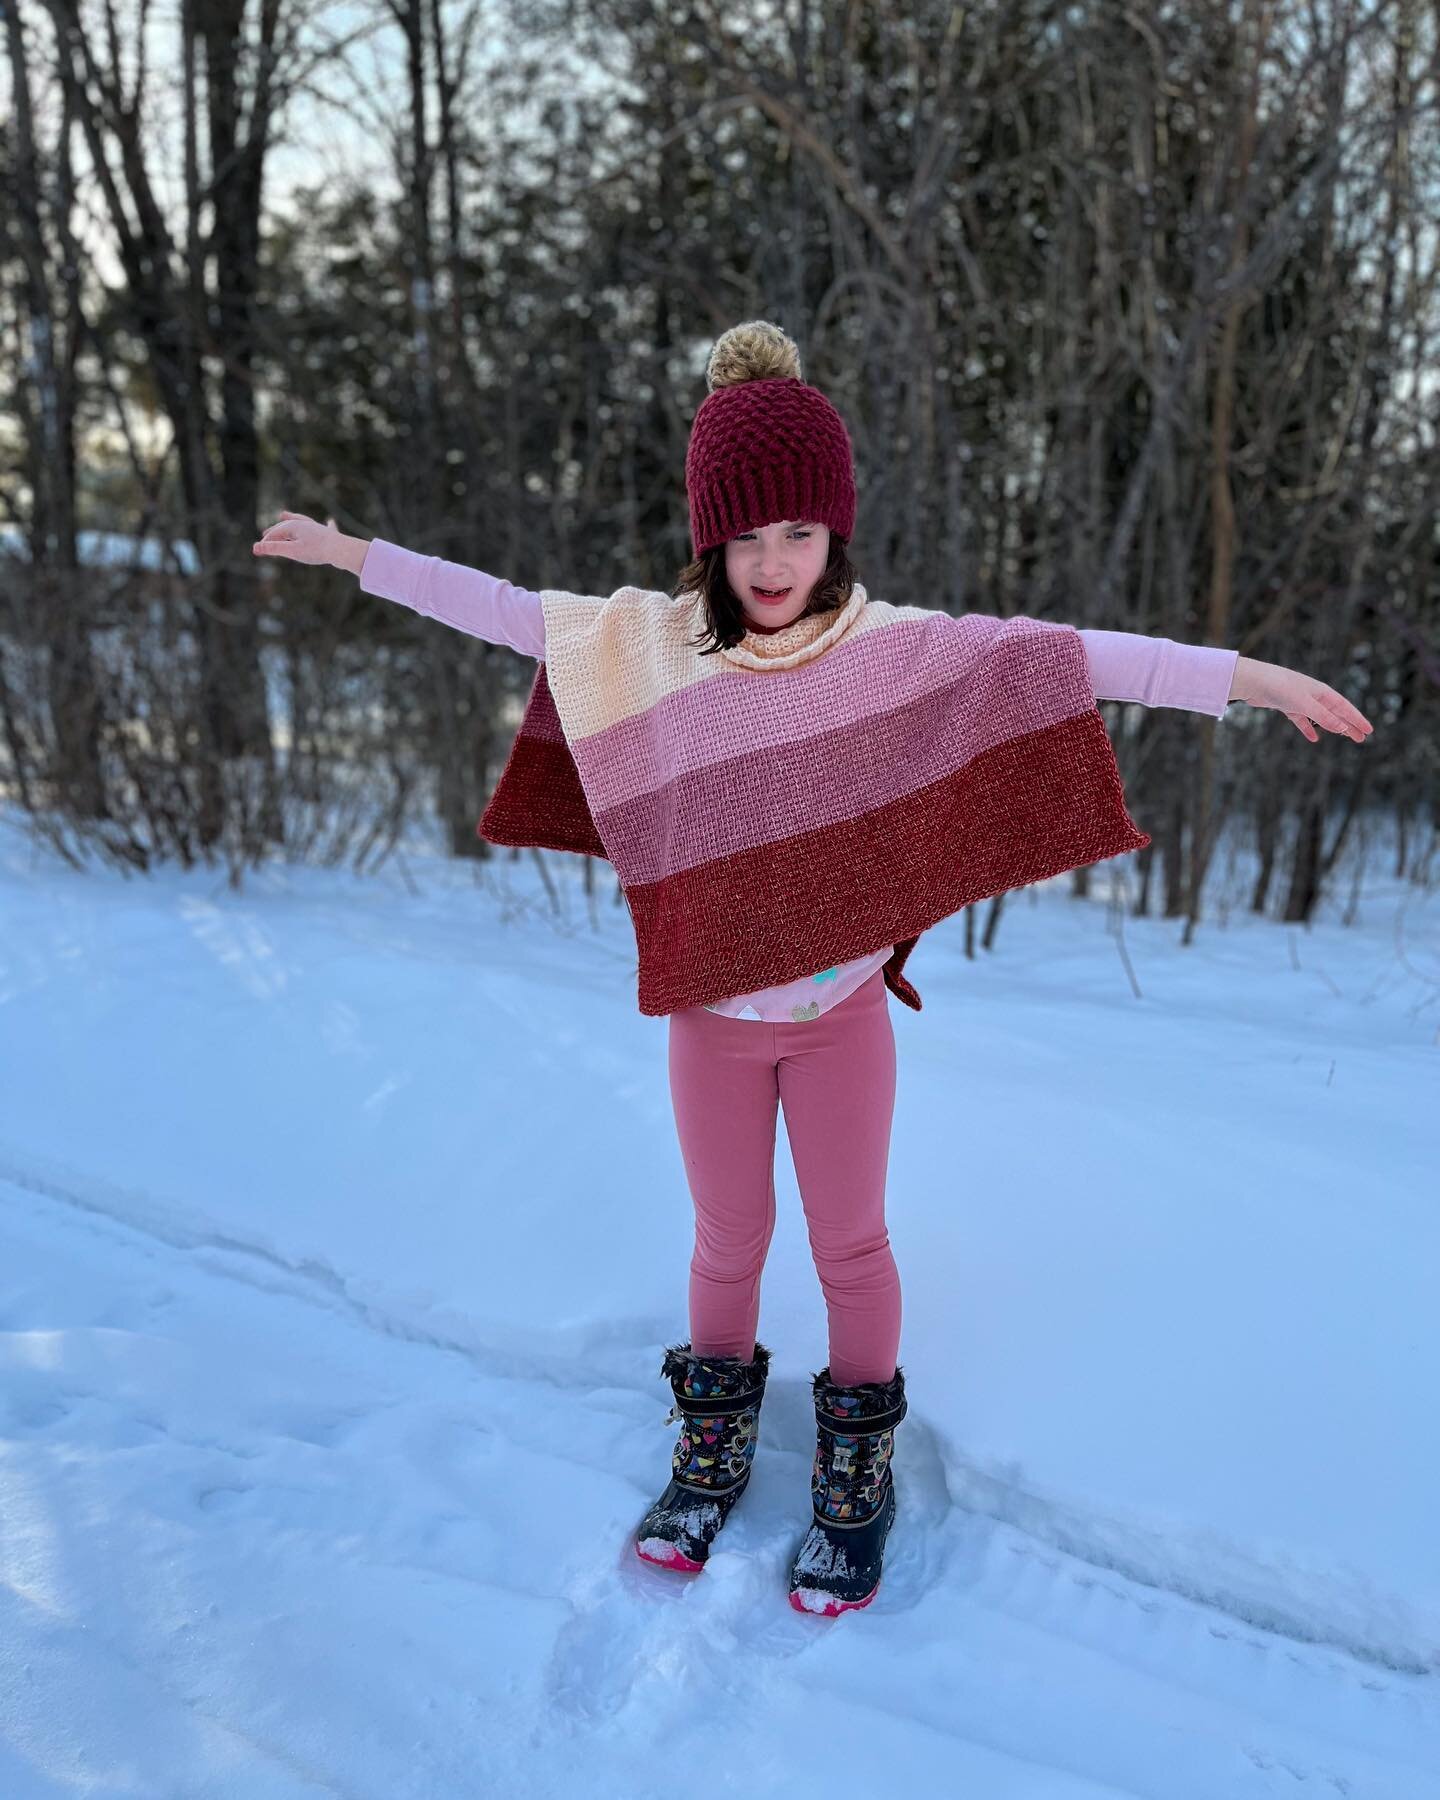
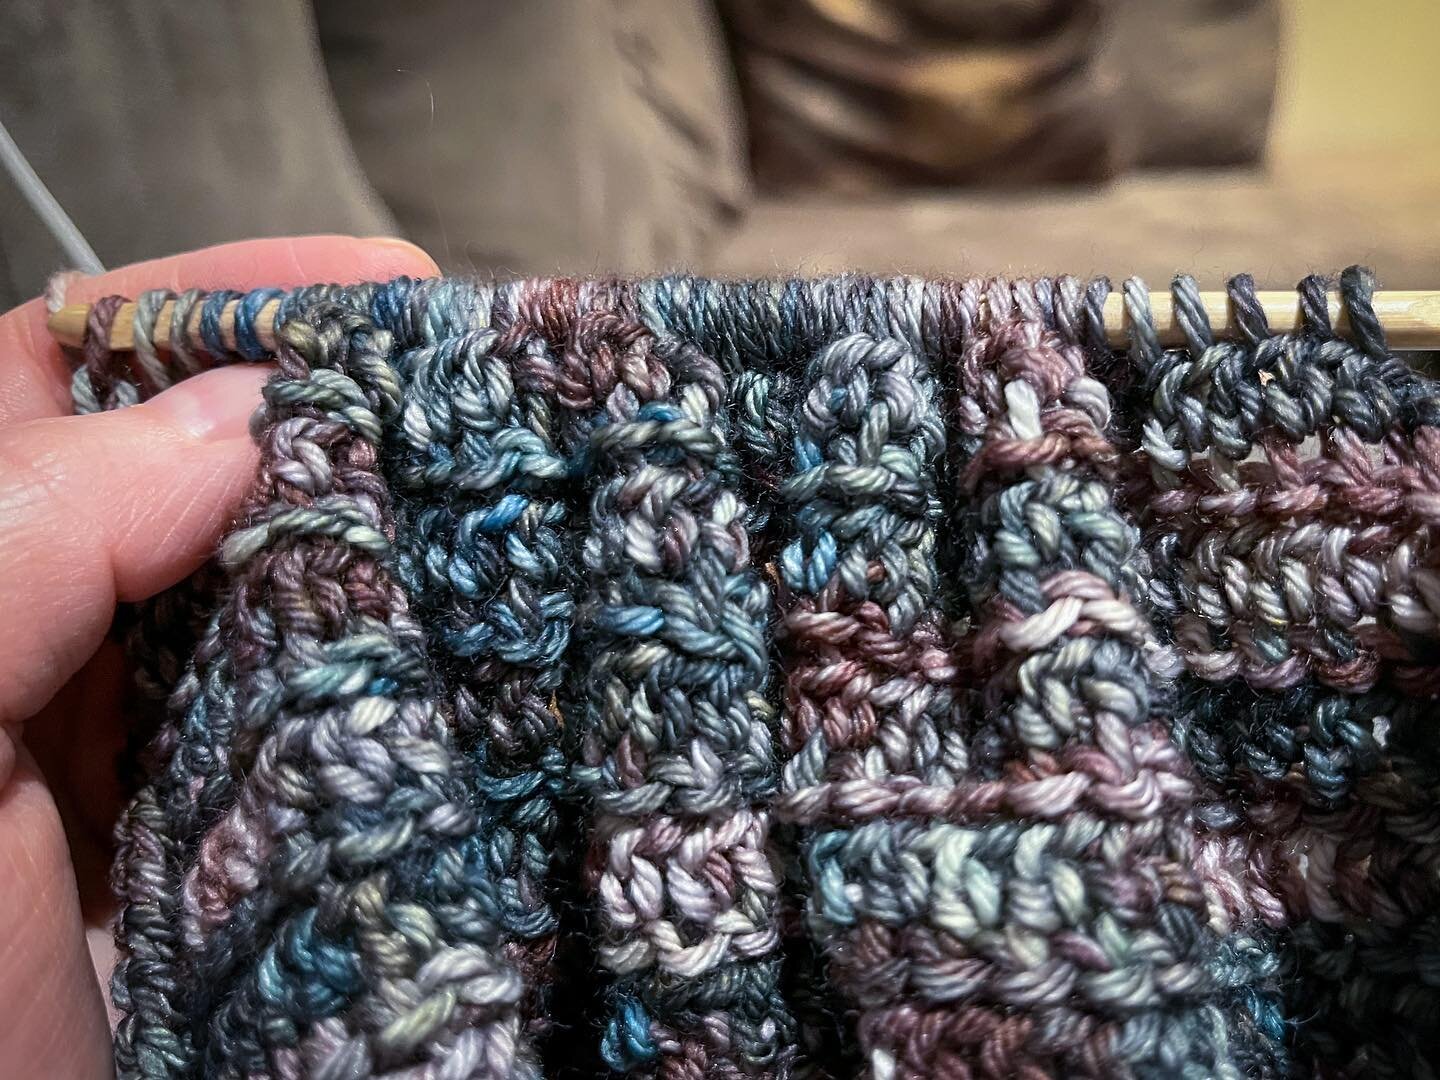
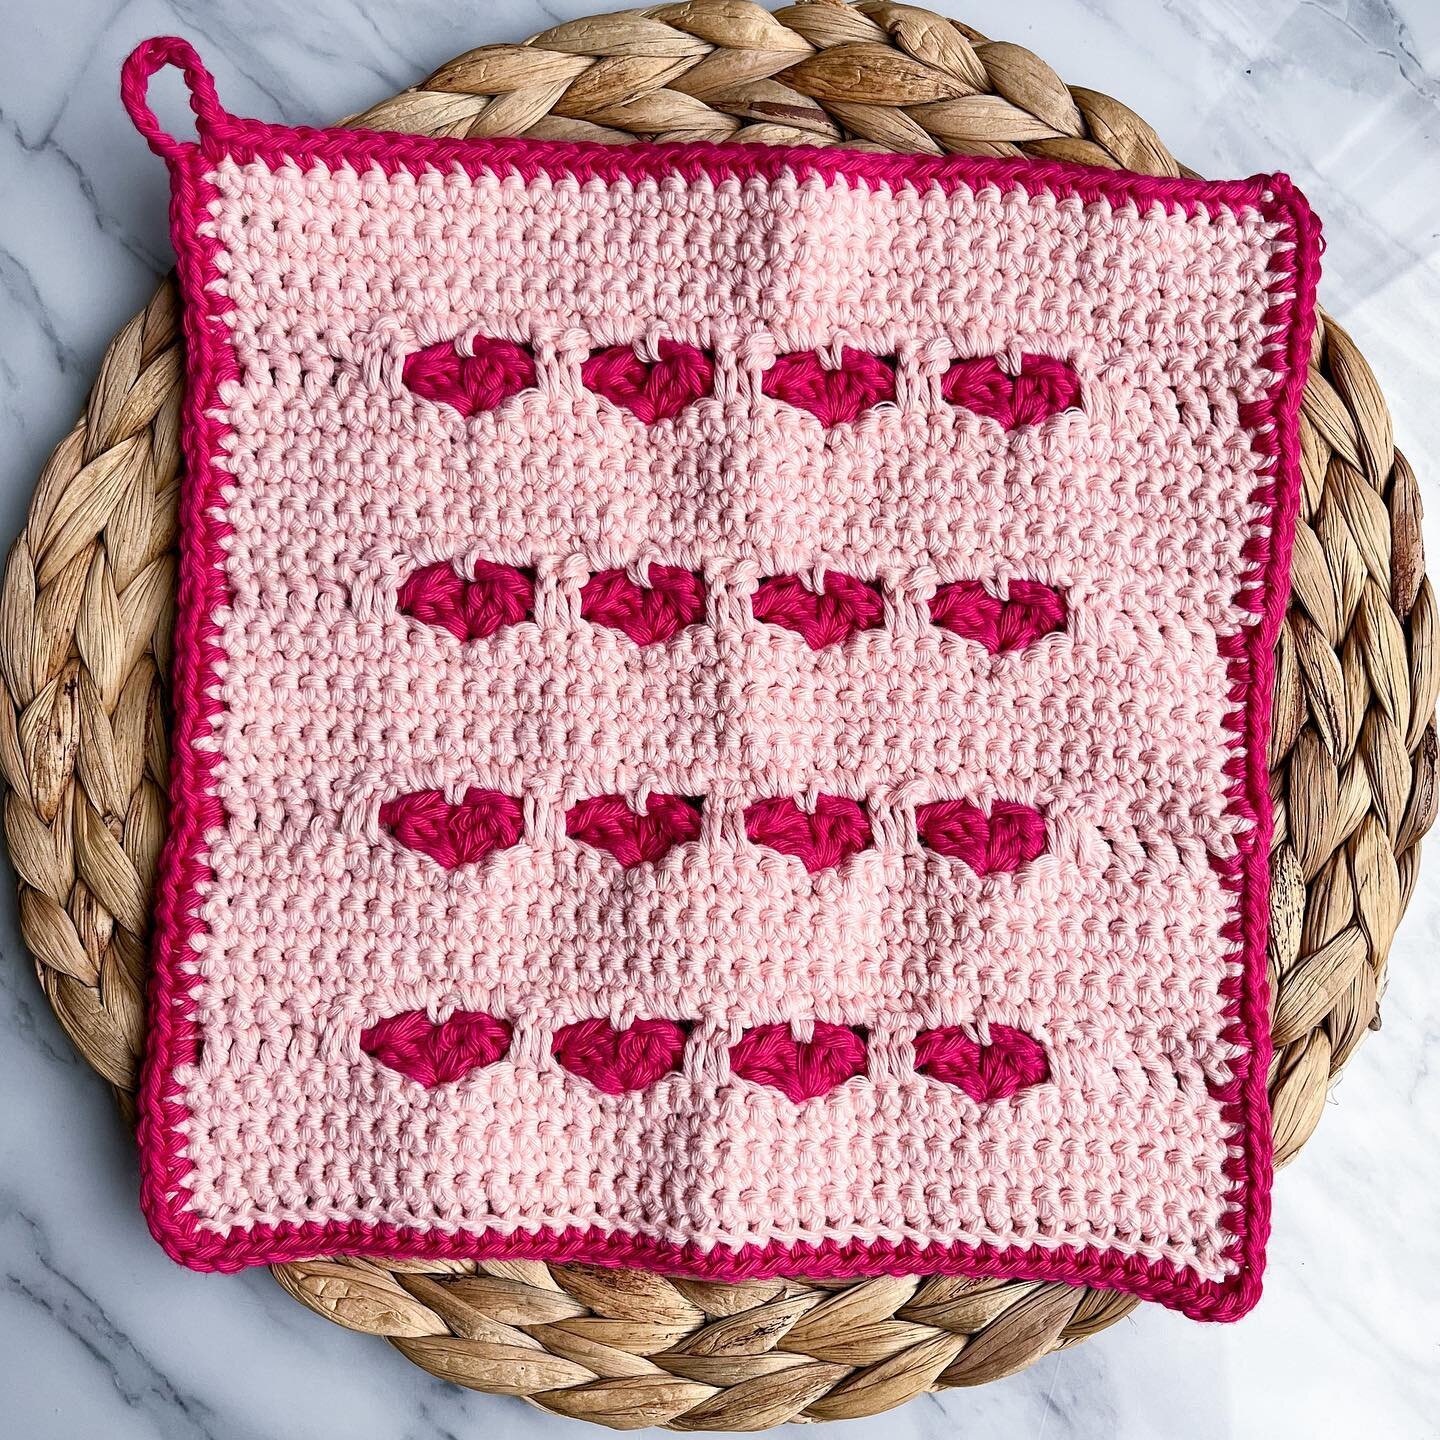
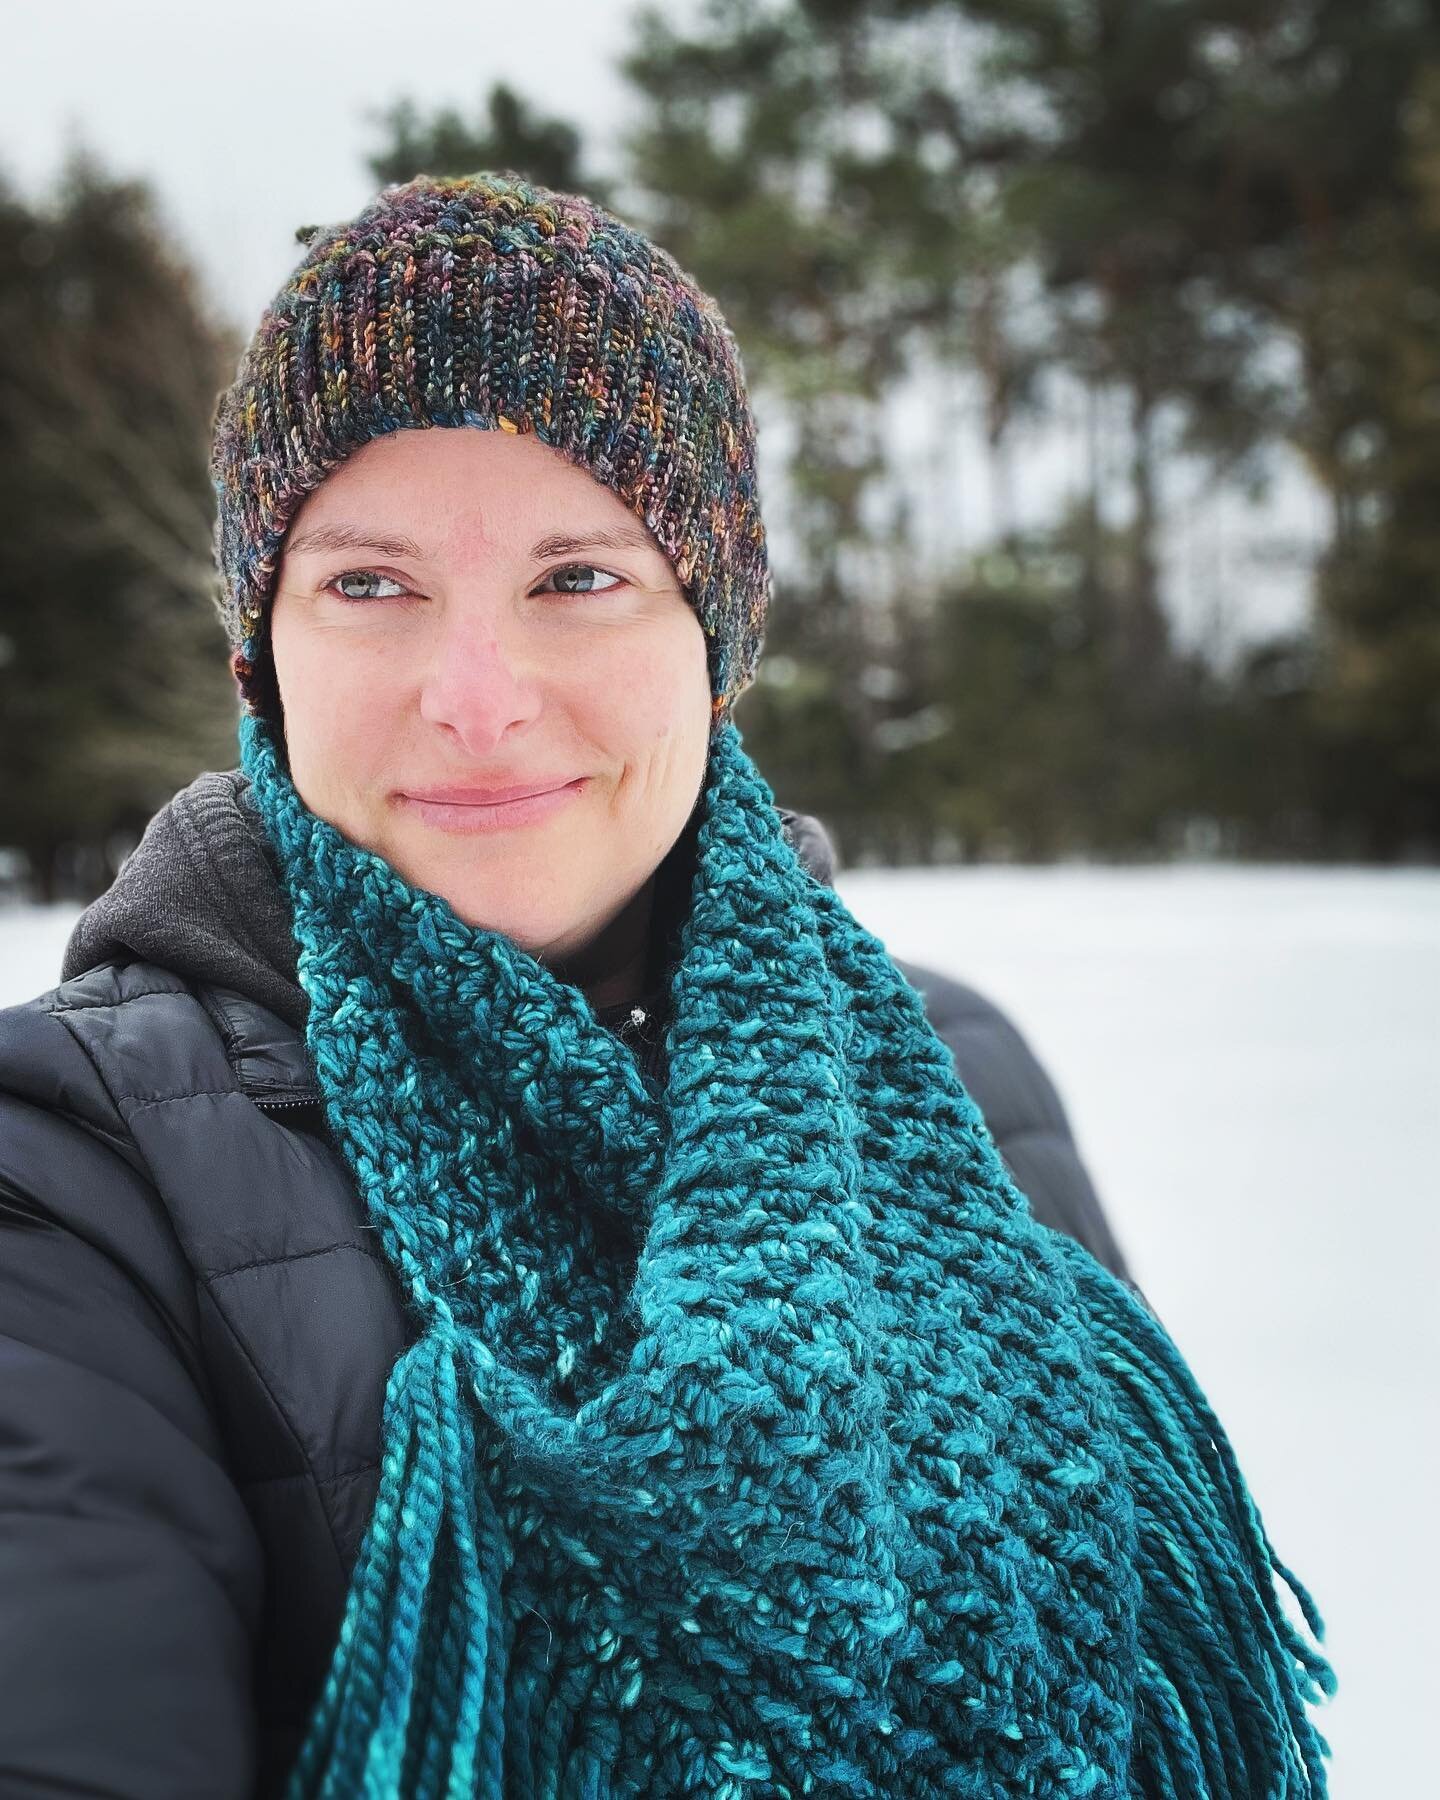
Powered by Squarespace. Copyright 2023 Capital Crochet. All rights reserved.
All photos and content are property of Capital Crochet unless otherwise stated and may not be copied, in part or in whole, without consent. This site uses third party advertising and affiliate links, meaning that a small commission may be earned at no additional cost to you. Janine Mudge of Capital Crochet is a participant in the Amazon Services LLC Associates Program, an affiliate advertising program designed to provide a means for sites to earn advertising fees by advertising and linking to amazon.com.